Dreamy Biscoff Cookie Butter Cheesecake Pops Recipe for Sweet Tooths
Creamy cheesecake meets irresistible Biscoff cookie butter in a delightful frozen treat that’ll make taste buds dance with joy.
These delectable pops blend smooth cream cheese with the caramelized warmth of cookie butter.
Each bite promises a rich, indulgent experience that melts perfectly on your tongue.
The combination of crisp cookie crumbs and velvety cheesecake creates a magical dessert that feels both nostalgic and innovative.
Chocolate drizzle adds a decadent finishing touch to these elegant frozen delights.
No baking required means maximum flavor with minimal effort.
Prepare to fall in love with the most addictive dessert you’ll make this season.
Why Everyone Talks About Biscoff Cookie Butter Cheesecake Pops

What Goes Into Biscoff Cookie Butter Cheesecake Pops
Base Ingredients:Cookie and Flavor Components:Finishing and Decoration Ingredients:Simple Guide to Biscoff Cookie Butter Cheesecake Pops
Step 1: Whip Creamy Base
Grab a medium mixing bowl and beat the cream cheese until it becomes silky smooth.
Add powdered sugar and vanilla extract, continuing to beat until the mixture looks luxuriously creamy with zero lumps.
Step 2: Fold In Delightful Additions
Using a soft spatula, gently incorporate whipped cream until just blended.
Next, fold in crushed Biscoff cookies, being delicate to maintain the mixture’s airy texture.
Step 3: Fill Freezing Vessels
Carefully spoon the cheesecake mixture into silicone molds or ice cube trays.
Make sure each cavity is completely filled, then smooth the tops using the back of a spoon or offset spatula.
Step 4: Insert Support Sticks
Slide a popsicle stick into the center of each filled mold.
Transfer the molds to the freezer and let them solidify for 2-3 hours until completely firm.
Step 5: Create Drizzle Magic
When pops are nearly frozen, prepare the cookie butter drizzle.
Place Biscoff cookie butter in a microwave-safe bowl and warm in 15-second bursts, stirring between each interval.
Continue until the mixture becomes smooth and pourable.
Add heavy cream if needed to achieve the perfect consistency.
Step 6: Release and Decorate
Carefully extract the cheesecake pops from their molds.
Work swiftly to drizzle melted cookie butter over each pop, allowing it to cascade down the sides.
Step 7: Add Crunchy Finish
While the drizzle remains wet, sprinkle crushed Biscoff cookies on top.
For extra flair, press a whole Biscoff cookie onto each pop’s surface.
Step 8: Chill and Serve
Arrange the decorated pops on a parchment-lined baking sheet.
Refrigerate for 10-15 minutes to set the drizzle.
Serve chilled and savor every bite!
Store any remaining pops in a sealed container in the freezer.
Pro Insights on Biscoff Cookie Butter Cheesecake Pops
Biscoff Cookie Butter Cheesecake Pops New Ways to Enjoy
Creative Serving for Biscoff Cookie Butter Cheesecake Pops
Storing Biscoff Cookie Butter Cheesecake Pops for Best Results
FAQs
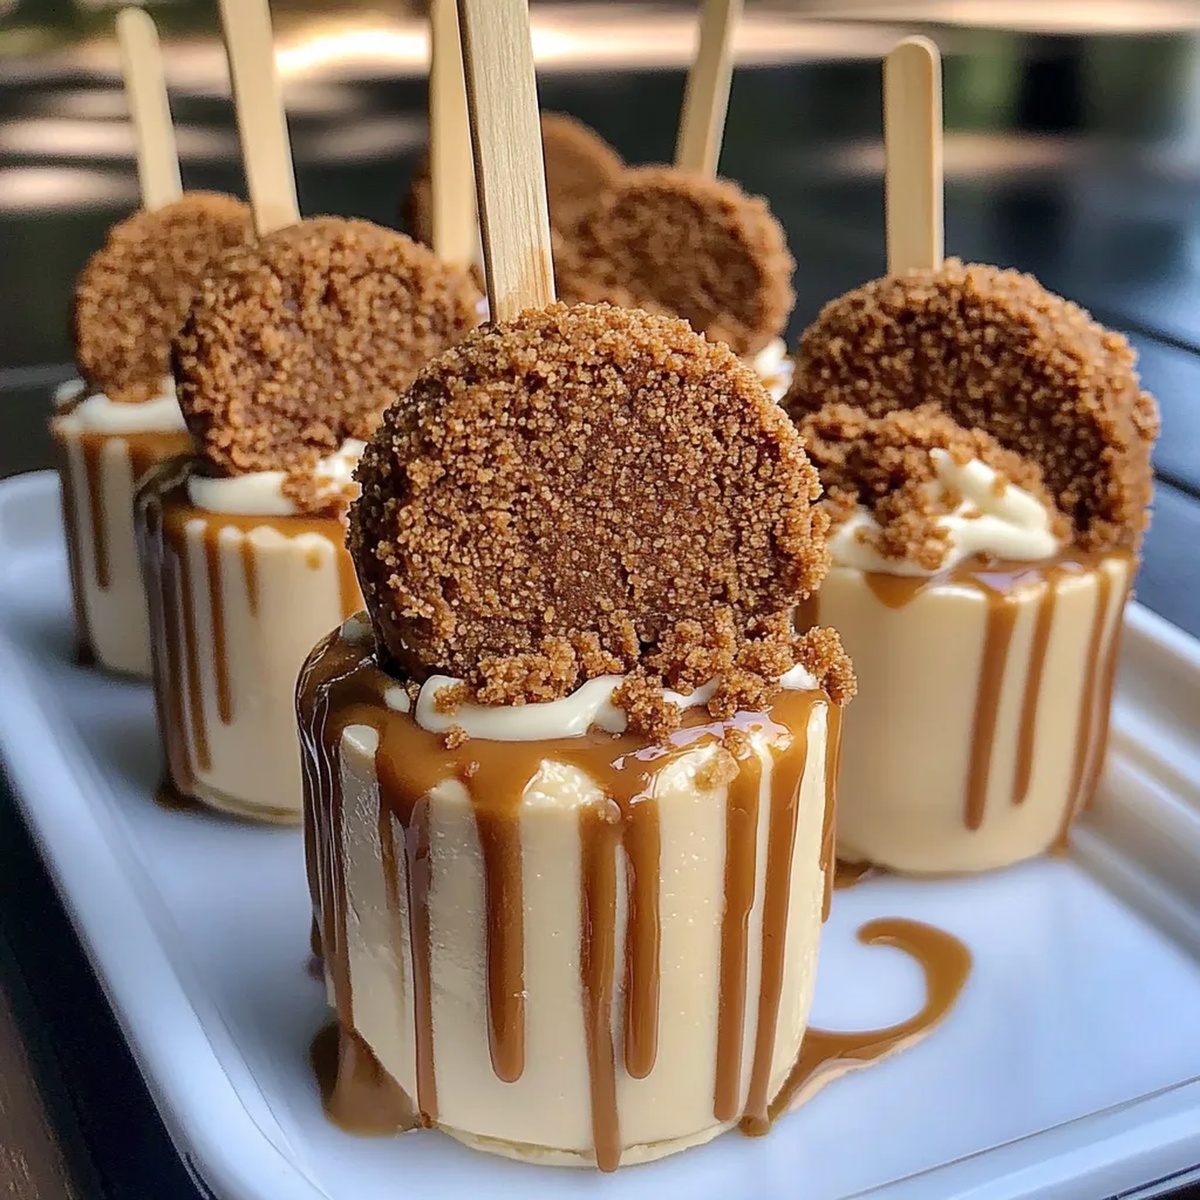
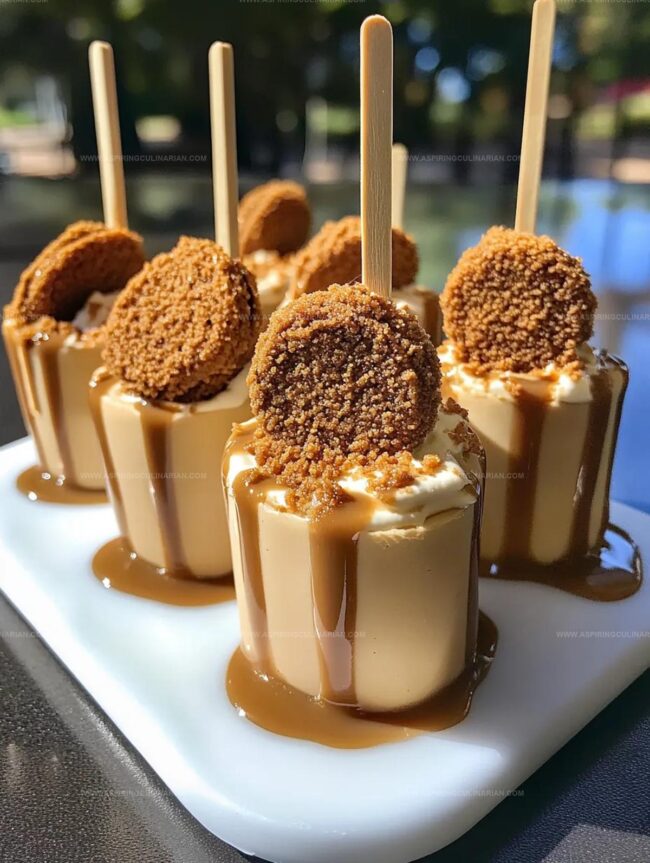
A delightful frozen treat combining creamy cheesecake, crushed Biscoff cookies, and a cookie butter drizzle, served on a stick for easy enjoyment.
You’ll need silicone molds or ice cube trays, popsicle sticks, and a microwave-safe bowl for melting cookie butter.
Yes! You can prepare these pops in advance and store them in the freezer for up to 2 weeks, making them perfect for party prep or quick desserts.
Not at all! This recipe is straightforward and requires basic mixing skills. Even novice bakers can create these delicious cheesecake pops with simple steps.
Print
Biscoff Cookie Butter Cheesecake Pops Recipe
- Total Time: 20 minutes
- Yield: 12 1x
Description
Sweet dreams come true with Biscoff Cookie Butter Cheesecake Pops, a playful dessert that marries creamy cheesecake and caramelized cookie spread. Chilled and dipped in chocolate, these bite-sized treats deliver pure indulgence you won’t want to miss.
Ingredients
Main Ingredients:
- 8 ounces (226 grams) cream cheese, softened
- 1/2 cup powdered sugar
- 1/2 cup whipped cream (or Cool Whip)
- 1/2 cup crushed Biscoff cookies
Flavoring & Extras:
- 1 teaspoon vanilla extract
Cookie Butter & Toppings:
- 1/2 cup Biscoff cookie butter
- 2 tablespoons heavy cream (optional, for thinning)
- Whole Biscoff cookies
- Extra crushed Biscoff cookies for garnish
- Popsicle sticks
Instructions
- Blend cream cheese in a medium bowl until velvety smooth, incorporating powdered sugar and vanilla extract. Ensure the mixture develops a creamy, lump-free consistency.
- Delicately fold whipped cream into the mixture using a spatula, maintaining a light texture. Gently integrate crushed Biscoff cookies, preserving the mixture’s airy structure.
- Transfer the cheesecake blend into silicone molds or ice cube trays, filling each cavity completely. Smooth the surface evenly using a spoon or offset spatula.
- Carefully insert popsicle sticks into the center of each filled mold. Freeze for 2-3 hours at 0°F until the pops become completely solid.
- Prepare the cookie butter drizzle by microwaving Biscoff cookie butter in 15-second intervals. Stir between heating cycles until the mixture reaches a smooth, pourable consistency. Add heavy cream if additional thinning is required.
- Extract the frozen cheesecake pops from their molds with precision. Quickly drizzle melted cookie butter over each pop, allowing it to cascade down the sides.
- While the cookie butter remains wet, sprinkle additional crushed Biscoff cookies on top. Optionally, garnish with a whole Biscoff cookie for enhanced presentation.
- Arrange the decorated pops on a parchment-lined baking sheet. Refrigerate for 10-15 minutes to set the cookie butter drizzle. Serve chilled and store remaining pops in a sealed freezer container.
Notes
- Choose full-fat cream cheese to ensure a rich, velvety texture that won’t become icy when frozen.
- Whip the cream carefully to maintain soft peaks, preventing the cheesecake mixture from becoming too dense or heavy.
- Consider using a piping bag for neater, more precise filling of molds and a professional-looking finish.
- For dairy-free adaptation, swap cream cheese with coconut cream and use vegan whipped topping to create an inclusive dessert option.
- Prevent sticks from falling out by allowing initial partial freeze before fully inserting them into the mixture.
- Keep cookie butter at room temperature for easier drizzling and smoother coating on frozen pops.
- Use parchment paper when storing to prevent sticking and preserve the beautiful decorative details.
- Prep Time: 20 minutes
- Cook Time: 0 minutes
- Category: Desserts, Snacks
- Method: Freezing
- Cuisine: American
Nutrition
- Serving Size: 12
- Calories: 180
- Sugar: 14 g
- Sodium: 150 mg
- Fat: 12 g
- Saturated Fat: 7 g
- Unsaturated Fat: 3 g
- Trans Fat: 0 g
- Carbohydrates: 19 g
- Fiber: 1 g
- Protein: 2 g
- Cholesterol: 30 mg
Lena Martinez
Contributing Writer & Culinary Educator
Expertise
Southwestern and Latin American cuisines, Vegetarian and plant-based recipe development, Culinary education and community outreach
Education
Santa Fe Community College, Santa Fe, NM
Certificate in Culinary Arts
Emphasized Southwestern cuisine and sustainable cooking practices
Lena grew up surrounded by the colors, spices, and traditions of the Southwest – flavors that sparked her love for bold, honest cooking. After earning her Culinary Arts certificate at Santa Fe Community College, she made it her mission to teach home cooks how to create flavorful, plant-powered meals without the fuss.
Her recipes are packed with vibrant ingredients, simple steps, and the kind of heart that turns a regular meal into something you’ll want to share. Outside the kitchen, Lena spends her time wandering farmers’ markets, trading family recipes, and helping young chefs find their voice through food.