
Dreamy Biscoff Mini Cheesecakes Recipe: Bite-Sized Bliss
Sweet dreams come alive with these irresistible biscoff mini cheesecakes that blend creamy indulgence and caramelized cookie magic.
Crumbly cookie bases create a rich foundation for silky smooth filling.
Each delicate bite promises pure comfort and nostalgic warmth.
Layers of delectable textures melt together in perfect harmony.
Minimal ingredients deliver maximum satisfaction without complicated techniques.
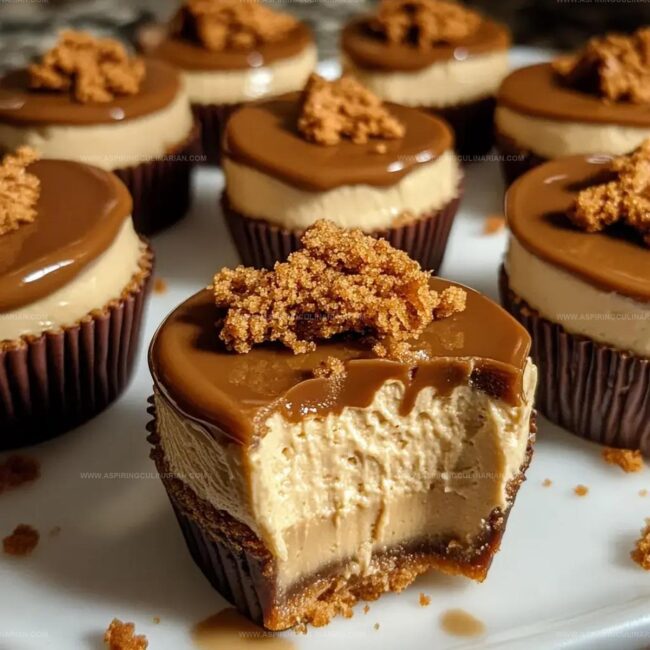
Compact and adorable, these miniature desserts work beautifully for intimate gatherings or solo treat moments.
You’ll fall in love with how simple yet spectacular these little delights can be.
Discover pure bliss in every tiny, decadent spoonful.
Cookie Butter Treats: Pure Bliss, Here’s Why
Cookie Butter Treats: All the Sweet Essentials
Crust Ingredients:Filling Ingredients:Topping Ingredient:Making Cookie Butter Treats, Simplified
Step 1: Prepare Baking Setup
Grab a muffin tin and line it with paper liners.
Ensure your oven rack is in the middle position for even baking.
Step 2: Create Cookie Crust
In a food processor, combine:Pulse until the mixture resembles wet sand and can hold its shape when pressed.
Step 3: Form Crust Bases
Press the cookie mixture firmly into each muffin liner, creating an even layer.
Bake the crust at 375°F for 5 minutes to set the base.
Step 4: Lower Oven Temperature
Reduce the oven heat to 325°F, preparing for the cheesecake filling.
Step 5: Blend Creamy Filling
In a large mixing bowl, whisk together:Mix until the filling is silky smooth with no lumps.
Step 6: Fill Cheesecake Bases
Carefully pour the filling over the pre-baked cookie crusts, filling each liner about 3/4 full.
Step 7: Gentle Baking
Bake the cheesecakes for 15 minutes until the edges are set but the center still has a slight jiggle.
Step 8: Controlled Cooling
Let the cheesecakes cool in stages:Step 9: Refrigerate
Transfer the cheesecakes to the refrigerator and chill for 2 hours to firm up completely.
Step 10: Finish With Drizzle
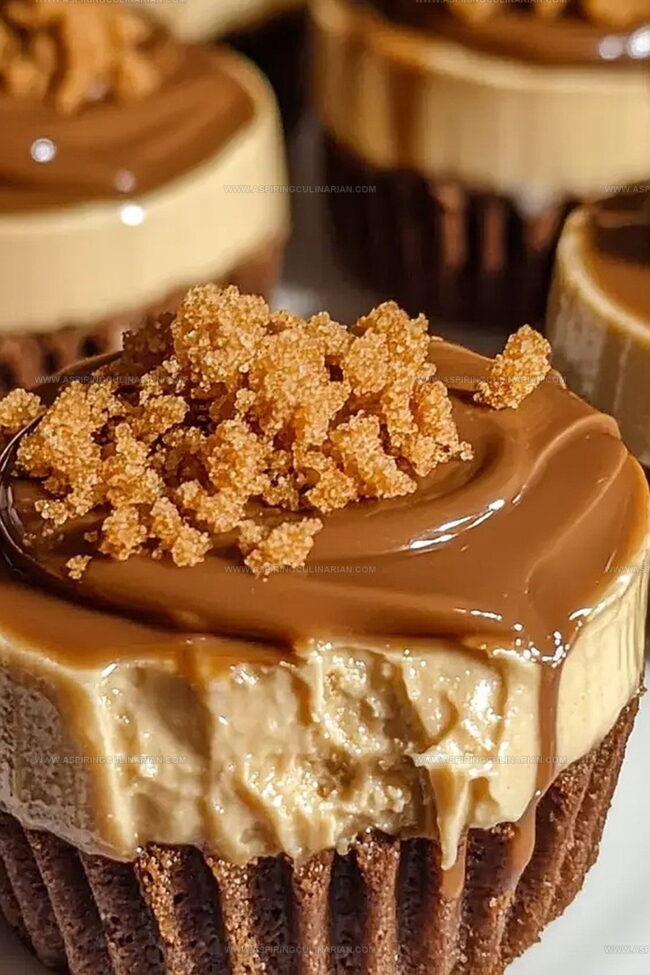
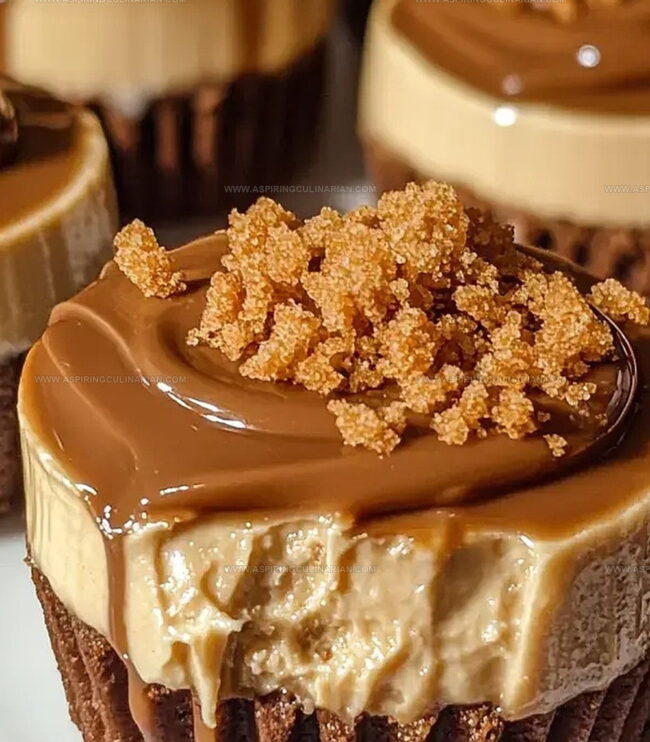
Before serving, warm some cookie butter and drizzle over each mini cheesecake for an extra decadent touch.
Cookie Butter Treats: Tips from the Pros
Cookie Butter Treats: Swap and Experiment
How to Share Cookie Butter Treats
Stash Cookie Butter Treats for Sweet Moments
FAQs
The crust uses crushed cookies, sugar, and melted butter blended together, creating a rich and flavorful base that complements the cheesecake filling.
Yes, you can experiment with different cookie types like graham crackers or chocolate cookies to create your own variation of the crust.
Mix the filling ingredients at room temperature and blend until completely smooth, avoiding overmixing to prevent air bubbles and cracking.
Gradual cooling helps prevent cracking and ensures a creamy, even texture by allowing the cheesecake to settle slowly and reduce temperature stress.
Print
Biscoff Mini Cheesecakes Recipe
- Total Time: 40 minutes
- Yield: 12 1x
Description
Creamy Biscoff mini cheesecakes blend irresistible European cookie flavors into a delightful dessert. Smooth cream cheese and caramelized cookie crumbs create luxurious bite-sized treats you’ll crave with every delectable spoonful.
Ingredients
Main Ingredients:
- 12 ounces (340 grams) cream cheese
- 4 ounces (113 grams) Biscoff cookies
- 1 egg plus 1 egg yolk
- 12 cup (120 milliliters) cookie butter
Sweeteners and Flavoring:
- 38 cup (75 grams) sugar
- 1 teaspoon brown sugar
- 2 teaspoons vanilla
- 14 cup (60 milliliters) sour cream
Additional Ingredients:
- 3 tablespoons (45 grams) butter, melted
- 2 tablespoons (30 milliliters) heavy cream
- 18 teaspoon salt
- 14 cup (60 milliliters) cookie butter for topping
Instructions
- Preheat the oven to 375F and line a muffin pan with cupcake liners for optimal preparation.
- Pulverize cookies, sugar, and melted butter in a food processor until the mixture becomes a uniform crumbly texture.
- Gently press the cookie mixture into each liner, creating an even base, then bake for 5 minutes to set the crust.
- Lower the oven temperature to 325F, preparing for the filling stage.
- Whisk cream cheese, cookie butter, sugar, sour cream, heavy cream, vanilla, salt, egg, and egg yolk in a large bowl until the mixture reaches a silky, lump-free consistency.
- Carefully distribute the filling evenly across the pre-baked crusts, ensuring no spillage.
- Slide the muffin pan into the oven and bake for 15 minutes, watching for subtle golden edges.
- Remove from oven and allow gradual cooling: first 10 minutes with the door closed, then 10 minutes with the door slightly ajar to prevent cracking.
- Transfer the cheesecakes to the refrigerator and chill for 2 hours to set completely.
- Before serving, drizzle warm cookie butter over each cheesecake for a decadent finishing touch.
Notes
- Choose a non-stick muffin pan to prevent treats from sticking and ensure easy removal.
- Crush cookies finely for a smoother, more consistent crust that binds perfectly with melted butter.
- Avoid overmixing the filling to prevent air bubbles and maintain a creamy, silky texture.
- Customize the recipe by using gluten-free cookies for a celiac-friendly version or swapping cookie butter with alternative spreads for different flavor profiles.
- Prep Time: 20 minutes
- Cook Time: 20 minutes
- Category: Desserts, Snacks
- Method: Baking
- Cuisine: American
Nutrition
- Serving Size: 12
- Calories: 263
- Sugar: 16 g
- Sodium: 125 mg
- Fat: 18 g
- Saturated Fat: 9 g
- Unsaturated Fat: 7 g
- Trans Fat: 0.3 g
- Carbohydrates: 19 g
- Fiber: 1 g
- Protein: 4 g
- Cholesterol: 65 mg
Nathaniel Brooks
Founder & Recipe Developer
Expertise
Farm-to-table cuisine, Seasonal recipe development, Culinary storytelling
Education
Ivy Tech Community College – Indianapolis, IN
Culinary Arts / Hospitality Administration & Events
Focused on hands-on training in classical and modern culinary techniques.
Nathaniel’s story starts in the foothills of the Appalachian Mountains, where farm stands, backyard gardens, and old family recipes shaped his love for real food. After graduating from Ivy Tech Community College in Indianapolis, he spent years working in farm-to-table kitchens, learning how to turn local, seasonal ingredients into something memorable.
Today, Nathaniel pours that same spirit into every single recipe on Aspiring Culinarian – recipes that feel real, comforting, and connected to the land. When he’s not in the kitchen, you’ll find him foraging wild herbs, chasing sunsets with his camera, or writing about the flavors that shaped his roots.