Dreamy Boston Cream Pie Cheesecake Recipe: Sweet Layers of Joy
Crafting a decadent Boston cream pie cheesecake feels like unleashing pure culinary magic in my kitchen.
Sweet dreams start dancing when layers of creamy goodness blend classic dessert traditions.
Soft vanilla custard nestles between rich cream cheese and delicate cake layers.
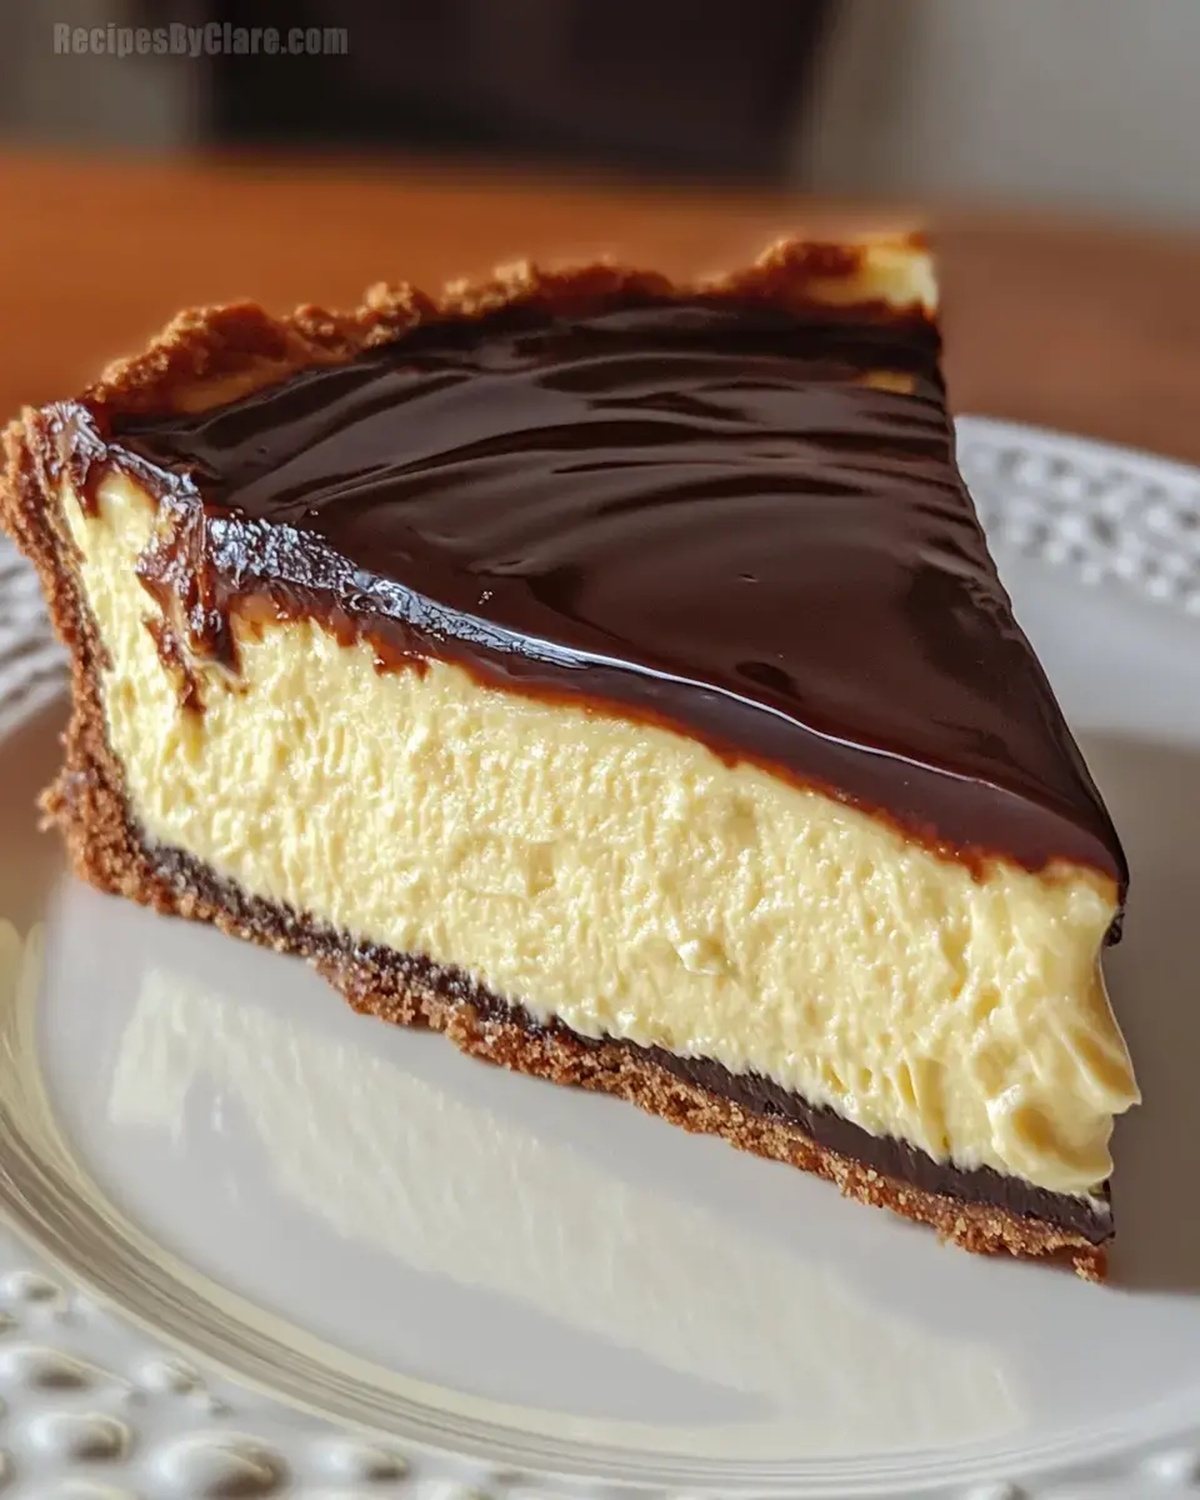
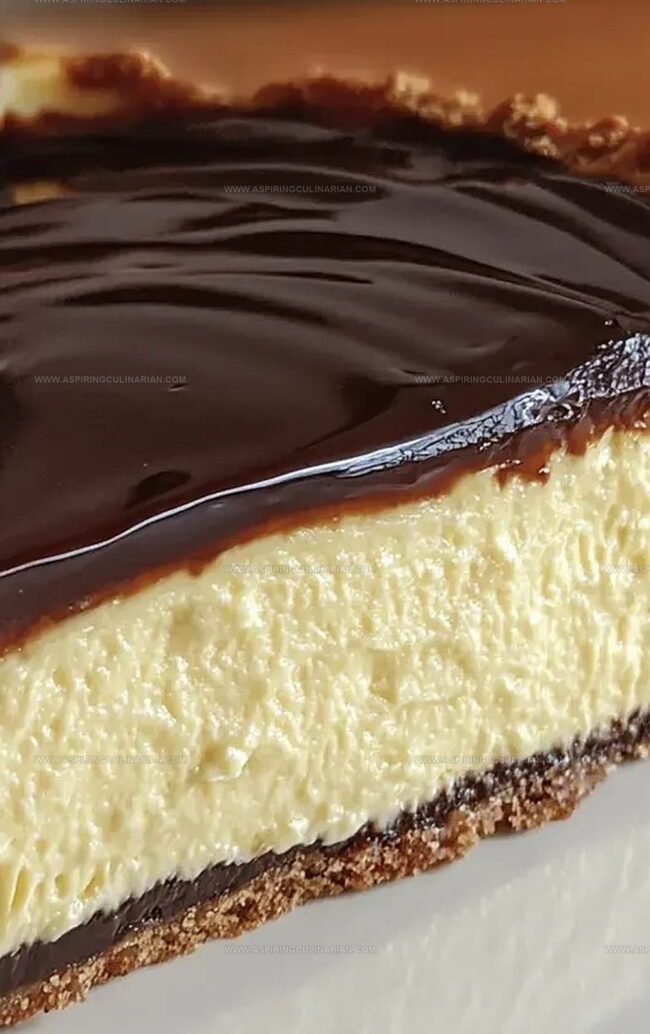
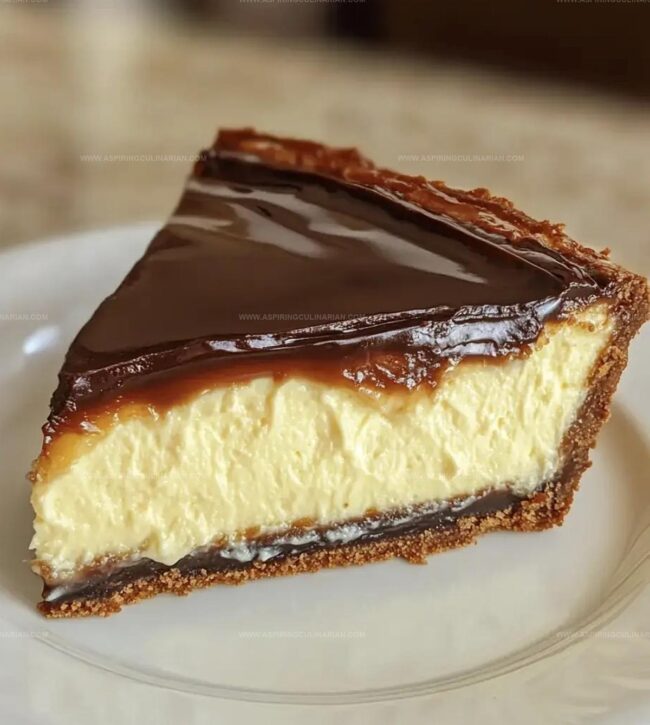
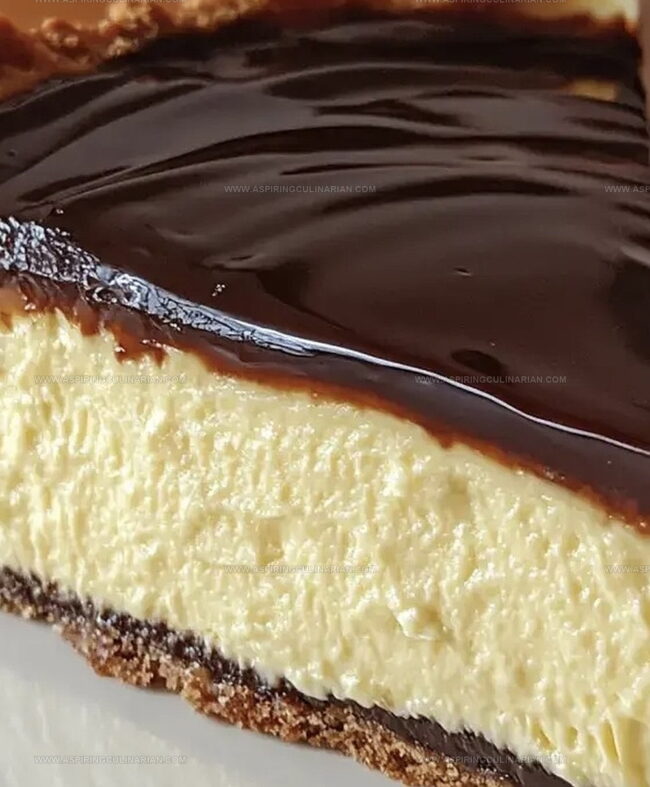
chocolate ganache drizzles create irresistible depth and shine across each stunning slice.
Kitchen adventures become memorable when unexpected flavor combinations surprise our taste buds.
Mixing classic techniques with innovative approaches makes this dessert a true showstopper.
One bite promises to transport you straight into dessert paradise.
You’ll want to savor every single delightful crumb of this extraordinary treat.
Boston Cream Pie Cheesecake: Dessert Royalty
Gather for Boston Cream Pie Cheesecake
Crust Ingredients:Cheesecake Filling Ingredients:Chocolate and Ganache Ingredients:Cheesecake, Boston Style: How-To
Step 1: Warm Up the Oven
Fire up your oven to a cozy 325F (165C).
Grab a 9-inch springform pan and give it a quick spray or butter rub to prevent sticking.
Step 2: Create a Crumbly Foundation
Dive into making the crust by mixing graham cracker crumbs with melted butter.
Press this mixture down firmly into the bottom of the pan, creating a solid base that’ll make your cheesecake sing.
Step 3: Lay Down a Chocolate Barrier
Melt some dark chocolate and spread a luxurious layer over the crust.
Pop it in the refrigerator for 10 minutes to create a delightful chocolate shield.
Step 4: Whip Up the Creamy Filling
Grab your mixing bowl and beat cream cheese with sugar until it’s silky smooth.
Add eggs one by one, mixing thoroughly after each.
Stir in:Blend until everything is perfectly combined and dreamy.
Step 5: Bake to Perfection
Pour the luscious cheesecake batter over the chocolate crust.
Slide it into the oven and bake for 55-65 minutes.
You’re looking for a center that’s just barely set – no jiggling allowed!
Step 6: Gentle Cooling Technique
Turn off the oven and crack the door open.
Let your cheesecake hang out inside for an hour.
This prevents those pesky cracks and helps it cool gracefully.
Step 7: Craft the Glossy Ganache
In a small saucepan, heat heavy cream until it’s just simmering.
Pour the hot cream over dark chocolate chips in a bowl.
Let it sit for two minutes, then stir until you’ve got a smooth, shiny ganache that looks like liquid gold.
Step 8: Final Chocolate Flourish
Once the cheesecake has cooled completely, drench the top with ganache.
Use a spatula to spread it evenly, creating a chocolate waterfall.
Refrigerate for at least 4 hours or overnight to let everything set beautifully.
Step 9: Slice and Celebrate
Cut into this magnificent creation and savor every single bite of your Boston Cream Pie Cheesecake.
Prepare for pure dessert bliss!
Baker’s Best Boston Cream Tips
Mix Up Boston Cream Cheesecake Flavors
Ways to Serve This Fancy Cheesecake
Storing Creamy Boston Delights
FAQs
The crust uses graham cracker crumbs mixed with melted butter, creating a classic, buttery base that’s pressed firmly into the springform pan and topped with a layer of melted dark chocolate for extra richness.
Bake the cheesecake at a lower temperature (325F), cool it inside the oven with the door slightly open for an hour after turning off the heat, which helps prevent sudden temperature changes that cause cracking.
Sour cream adds tanginess and helps create a smooth, creamy texture, while heavy cream contributes to a richer, more luxurious consistency in the cheesecake filling.
Print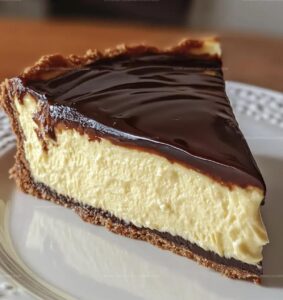
Boston Cream Pie Cheesecake Recipe
- Total Time: 2 hours 40 minutes
- Yield: 12 1x
Description
Creamy Boston cream pie cheesecake blends classic dessert magic with rich cheesecake indulgence. Silky vanilla custard and chocolate ganache crown a dreamy graham cracker base, creating a delectable masterpiece you’ll crave again and again.
Ingredients
Crust:
- 2 cups graham cracker crumbs
- 1/2 cup (113 grams) unsalted butter, melted
- 1/2 cup (85 grams) dark chocolate, melted
Cheesecake Filling:
- 3 cups (680 grams) cream cheese, softened
- 1 cup (200 grams) granulated sugar
- 3 large eggs
- 2 teaspoons vanilla extract
- 1/2 cup (120 milliliters) sour cream
- 1/2 cup (120 milliliters) heavy cream
Ganache Topping:
- 1 1/2 cups (255 grams) dark chocolate chips
- 1/2 cup (120 milliliters) heavy cream
Instructions
- Prepare the kitchen workspace by setting the oven to 325F (165C) and readying a 9-inch springform pan with a light grease coating.
- Create the crust by blending graham cracker crumbs with melted butter until thoroughly incorporated, then press the mixture compactly into the pan’s base.
- Craft a chocolate foundation by spreading a smooth layer of melted dark chocolate across the crust, then chill for 10 minutes to solidify.
- Develop the creamy cheesecake mixture by whipping cream cheese and sugar until silky, gradually incorporating eggs, then blending in vanilla, sour cream, and heavy cream until the texture is uniform and luscious.
- Transfer the cheesecake batter over the chocolate-lined crust, ensuring an even distribution, and bake for 55-65 minutes until the center displays a gentle, subtle firmness.
- Allow the cheesecake to rest inside the oven after turning off heat, leaving the door slightly ajar for one hour to prevent surface cracking.
- Construct the ganache by heating heavy cream until it reaches a gentle simmer, then cascading the hot cream over chocolate chips, letting it rest momentarily before stirring into a glossy, smooth consistency.
- Once the cheesecake has completely cooled, elegantly drape the ganache across the top, spreading it evenly with a spatula, then refrigerate for a minimum of 4 hours to achieve perfect setting.
- Slice and serve this decadent dessert, savoring the harmonious blend of chocolate, cream, and rich cheesecake textures.
Notes
- Chill the cream cheese and eggs at room temperature before mixing to ensure a smooth, lump-free cheesecake filling that blends perfectly.
- Use a water bath technique by placing the springform pan in a larger pan filled with hot water to create even, gentle heat and prevent cracking.
- Customize the chocolate layer by experimenting with milk or white chocolate for a different flavor profile, making the dessert adaptable to various taste preferences.
- For a gluten-free version, replace graham cracker crumbs with almond flour or gluten-free cookie crumbs to accommodate dietary restrictions without compromising texture.
- Prep Time: 45 minutes
- Cook Time: 1 hour 55 minutes
- Category: Desserts, Snacks
- Method: Baking
- Cuisine: American
Nutrition
- Serving Size: 12
- Calories: 422 kcal
- Sugar: 20 g
- Sodium: 150 mg
- Fat: 32 g
- Saturated Fat: 18 g
- Unsaturated Fat: 12 g
- Trans Fat: 0.5 g
- Carbohydrates: 25 g
- Fiber: 2 g
- Protein: 7 g
- Cholesterol: 120 mg
Nathaniel Brooks
Founder & Recipe Developer
Expertise
Farm-to-table cuisine, Seasonal recipe development, Culinary storytelling
Education
Ivy Tech Community College – Indianapolis, IN
Culinary Arts / Hospitality Administration & Events
Focused on hands-on training in classical and modern culinary techniques.
Nathaniel’s story starts in the foothills of the Appalachian Mountains, where farm stands, backyard gardens, and old family recipes shaped his love for real food. After graduating from Ivy Tech Community College in Indianapolis, he spent years working in farm-to-table kitchens, learning how to turn local, seasonal ingredients into something memorable.
Today, Nathaniel pours that same spirit into every single recipe on Aspiring Culinarian – recipes that feel real, comforting, and connected to the land. When he’s not in the kitchen, you’ll find him foraging wild herbs, chasing sunsets with his camera, or writing about the flavors that shaped his roots.