The Best Boston Cream Pie Fudge Recipe: Sweet Nostalgic Bliss
Creamy, decadent Boston cream pie fudge brings the classic dessert’s magic right to your kitchen counter.
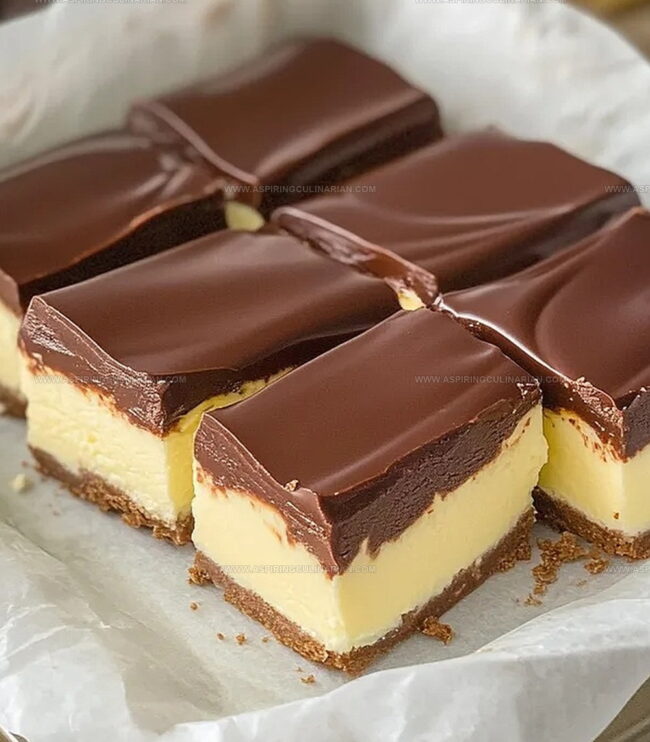
Sweet layers of custard-like flavor dance between delicate cake and smooth chocolate.
This no-bake treat captures the essence of the beloved traditional dessert in bite-sized squares.
Each piece delivers a rich, indulgent experience that melts in your mouth.
The combination of vanilla, chocolate, and creamy filling creates a dessert that feels both nostalgic and innovative.
Chocolate lovers and dessert enthusiasts will fall head over heels for this simple yet stunning confection.
Prepare to delight your taste buds with a recipe that promises pure culinary bliss.
Why You’ll Crave Boston Cream Pie Fudge
Boston Cream Pie Fudge Must-Have Ingredients
Base Ingredients:Chocolate and Flavor Ingredients:Topping and Finishing Ingredients:Making Boston Cream Pie Fudge Step by Step
Step 1: Prepare Baking Dish
Line an 8×8 inch baking dish with parchment paper, ensuring the edges hang over the sides for easy removal of the fudge.
Step 2: Create Fudge Base
Combine sugar, butter, and heavy cream in a large saucepan.
Heat the mixture to a boil over medium heat.
Step 3: Cook Fudge Mixture
Lower the heat to medium-low and cook for 7 minutes, stirring continuously.
Test the mixture’s readiness by dropping a small amount into ice water – it should form a fudge-like ball.
Step 4: Incorporate Chocolate and Marshmallow
Quickly remove the pan from heat and add:Stir until completely melted and well combined.
Step 5: Add Flavoring
Mix in vanilla pudding and vanilla extract until smooth.
Pour approximately two-thirds of the fudge into the prepared pan.
Step 6: Develop Chocolate Layer
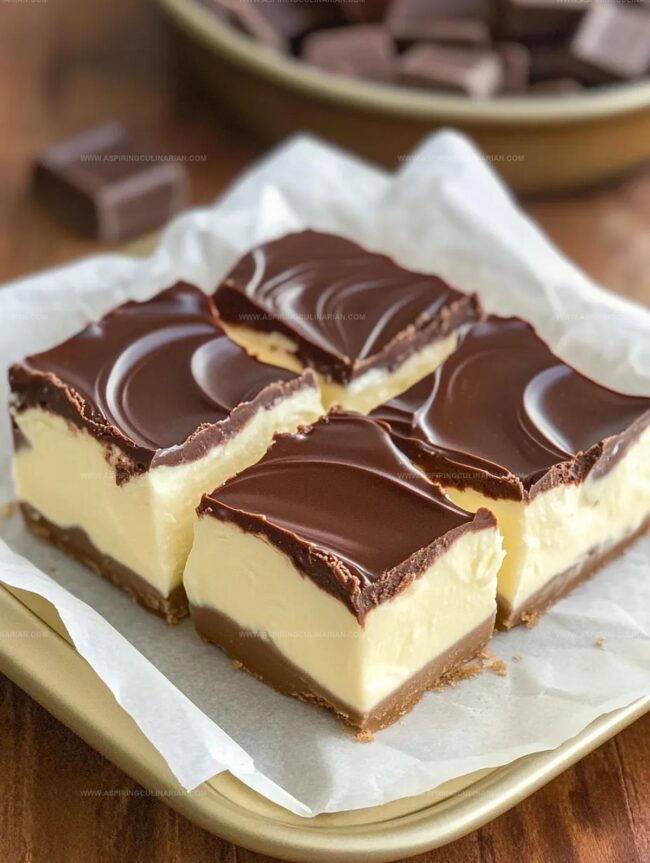
Whisk cocoa powder into the remaining fudge mixture until fully incorporated.
Pour this chocolate layer on top of the vanilla layer.
Step 7: Create Swirl Pattern
Use a knife to create swirls through both fudge layers, generating a marbled effect.
Step 8: Cool and Slice
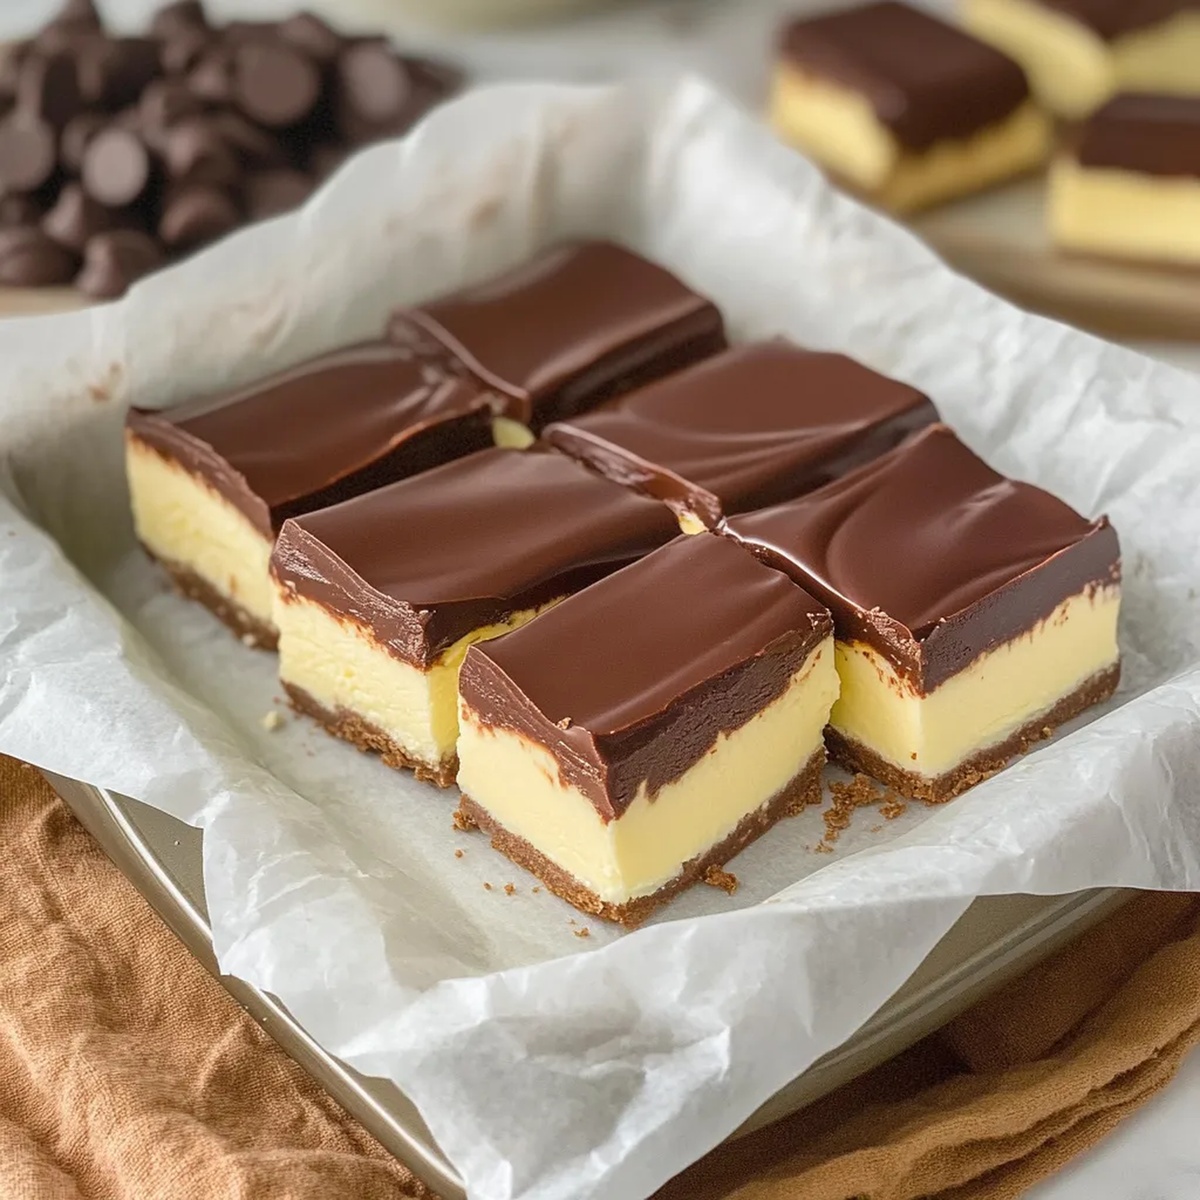
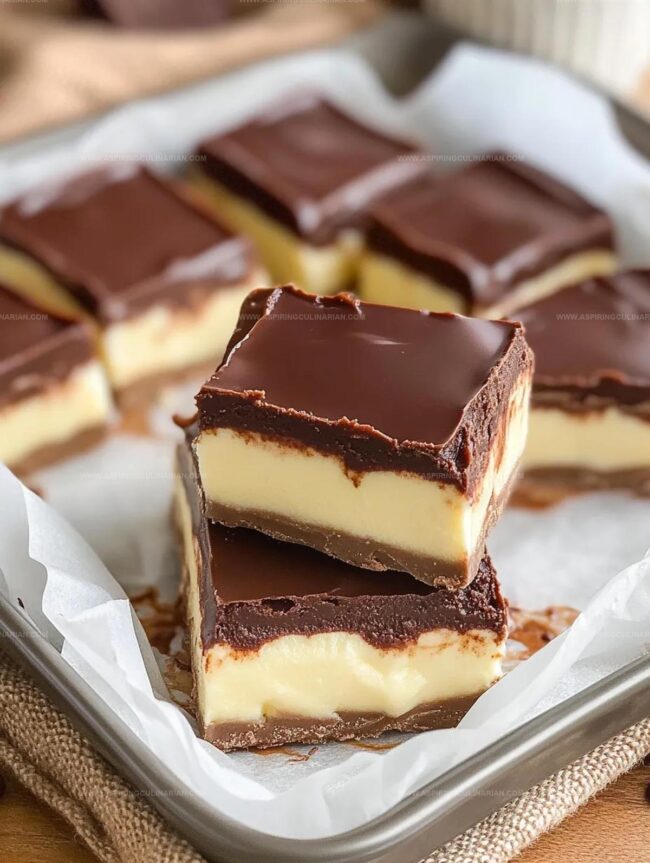
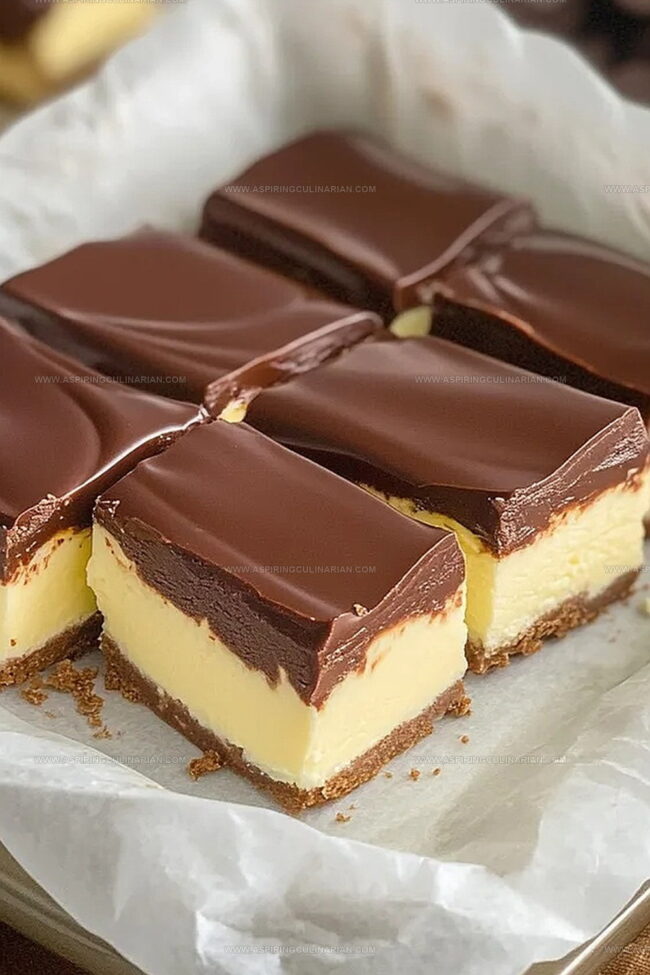
Allow the fudge to cool to room temperature, then cut into 16 equal squares.
Step 9: Prepare Chocolate Topping
In a microwave-safe bowl, combine:Microwave in 30-second intervals, stirring between each, until smooth and melted.
Step 10: Apply Chocolate Topping
Let the melted chocolate cool for 15 minutes.
Dip the top of each fudge piece into the chocolate and place on parchment paper.
Step 11: Set and Serve
Wait for the chocolate topping to completely set and harden, which takes about an hour.
Serve and enjoy your delicious Boston Cream Pie Fudge!
Secrets for Perfect Boston Cream Pie Fudge
Boston Cream Pie Fudge Custom Options
How to Share Boston Cream Pie Fudge Deliciously
Storing Boston Cream Pie Fudge for Later
FAQs
The vanilla pudding mix adds depth of flavor and helps create a creamy, smooth texture that mimics the classic Boston cream pie taste.
Precise measurements are crucial in fudge-making, so try to follow the recipe closely to ensure the right consistency and flavor.
Drop a small amount into ice water – if you can form a ball with a fudge-like consistency, it’s perfectly cooked and ready to remove from heat.
The swirl adds visual appeal and creates a beautiful marbled effect that makes the fudge look more appetizing and professional.
Print
Boston Cream Pie Fudge Recipe
- Total Time: 1 hour 35 minutes
- Yield: 16 1x
Description
Silky smooth Boston cream pie fudge blends classic dessert nostalgia with creamy confectionery magic. Sweet layers of vanilla custard and chocolate ganache create an irresistible treat you won’t be able to resist.
Ingredients
Main Ingredients:
- 2 cups (470 ml) sugar
- 4 ounces (113 grams) unsalted butter
- 2 cups (340 grams) white chocolate chips
- 7 ounces (198 grams) marshmallow creme
Liquid and Cream Ingredients:
- 1/2 cup (120 ml) heavy cream
- 3 tablespoons vanilla pudding
- 1/2 teaspoon vanilla extract
- 1 tablespoon vegetable oil
Powder Ingredients:
- 3 tablespoons unsweetened cocoa powder
- 6 ounces (170 grams) semisweet chocolate chips
Instructions
- Prepare the baking dish by lining an 8×8 pan with parchment paper, ensuring edges overhang for easy removal.
- Combine sugar, butter, and heavy cream in a large saucepan, heating to a boil over medium temperature.
- Reduce heat to medium-low and simmer for 7 minutes, continuously stirring. Test readiness by dropping a small amount into ice water – it should form a fudge-like ball.
- Immediately remove from heat and incorporate white chocolate chips, stirring until completely melted and integrated.
- Quickly fold in marshmallow creme, mixing thoroughly until smooth and consistent.
- Blend vanilla pudding and vanilla extract into the mixture, ensuring complete incorporation.
- Pour approximately two-thirds of the fudge into the prepared parchment-lined pan.
- Whisk cocoa powder into the remaining fudge, creating a rich chocolate layer.
- Carefully pour the chocolate layer over the vanilla base, using a knife to create elegant marbled swirls.
- Allow fudge to cool to room temperature, then slice into 16 uniform squares.
- Melt semisweet chocolate chips with vegetable oil in the microwave, stirring every 30 seconds until smooth.
- Let chocolate topping cool for 15 minutes, then dip each fudge square’s top into the melted chocolate.
- Place dipped pieces on fresh parchment paper and allow chocolate to set completely for approximately one hour before serving.
Notes
- Use a candy thermometer for accurate sugar syrup temperature, ensuring perfect fudge texture without crystallization.
- Create elegant marbling by gently dragging a knife through layers, avoiding overmixing which can muddy the pattern.
- Pat marshmallow creme and pudding mix dry to prevent excess liquid from disrupting fudge consistency.
- Refrigerate fudge in an airtight container for up to two weeks, separating layers with parchment paper to maintain texture and prevent sticking.
- Prep Time: 20 minutes
- Cook Time: 1 hour 15 minutes
- Category: Desserts, Snacks
- Method: Boiling
- Cuisine: American
Nutrition
- Serving Size: 16
- Calories: 223
- Sugar: 17 g
- Sodium: 25 mg
- Fat: 12 g
- Saturated Fat: 7 g
- Unsaturated Fat: 4 g
- Trans Fat: 0 g
- Carbohydrates: 27 g
- Fiber: 0.5 g
- Protein: 2 g
- Cholesterol: 15 mg
Lena Martinez
Contributing Writer & Culinary Educator
Expertise
Southwestern and Latin American cuisines, Vegetarian and plant-based recipe development, Culinary education and community outreach
Education
Santa Fe Community College, Santa Fe, NM
Certificate in Culinary Arts
Emphasized Southwestern cuisine and sustainable cooking practices
Lena grew up surrounded by the colors, spices, and traditions of the Southwest – flavors that sparked her love for bold, honest cooking. After earning her Culinary Arts certificate at Santa Fe Community College, she made it her mission to teach home cooks how to create flavorful, plant-powered meals without the fuss.
Her recipes are packed with vibrant ingredients, simple steps, and the kind of heart that turns a regular meal into something you’ll want to share. Outside the kitchen, Lena spends her time wandering farmers’ markets, trading family recipes, and helping young chefs find their voice through food.