Fluffy Pink Bubblegum Ice Cream Recipe: A Sweet Summer Treat
Sweet summer memories swirl together with this nostalgic bubblegum ice cream recipe that captures childhood delight in every creamy bite.
Bursting with playful pink colors and whimsical flavor, this dessert transports you back to carefree days.
The homemade treat brings pure joy to your taste buds with its vibrant charm.
Soft, smooth, and utterly delightful, this ice cream delights both kids and adults alike.
Nobody can resist the magical blend of sugary sweetness and silky texture.
Each spoonful promises a delectable journey into pure happiness.
Prepare to indulge in a dessert that turns ordinary moments into extraordinary memories.
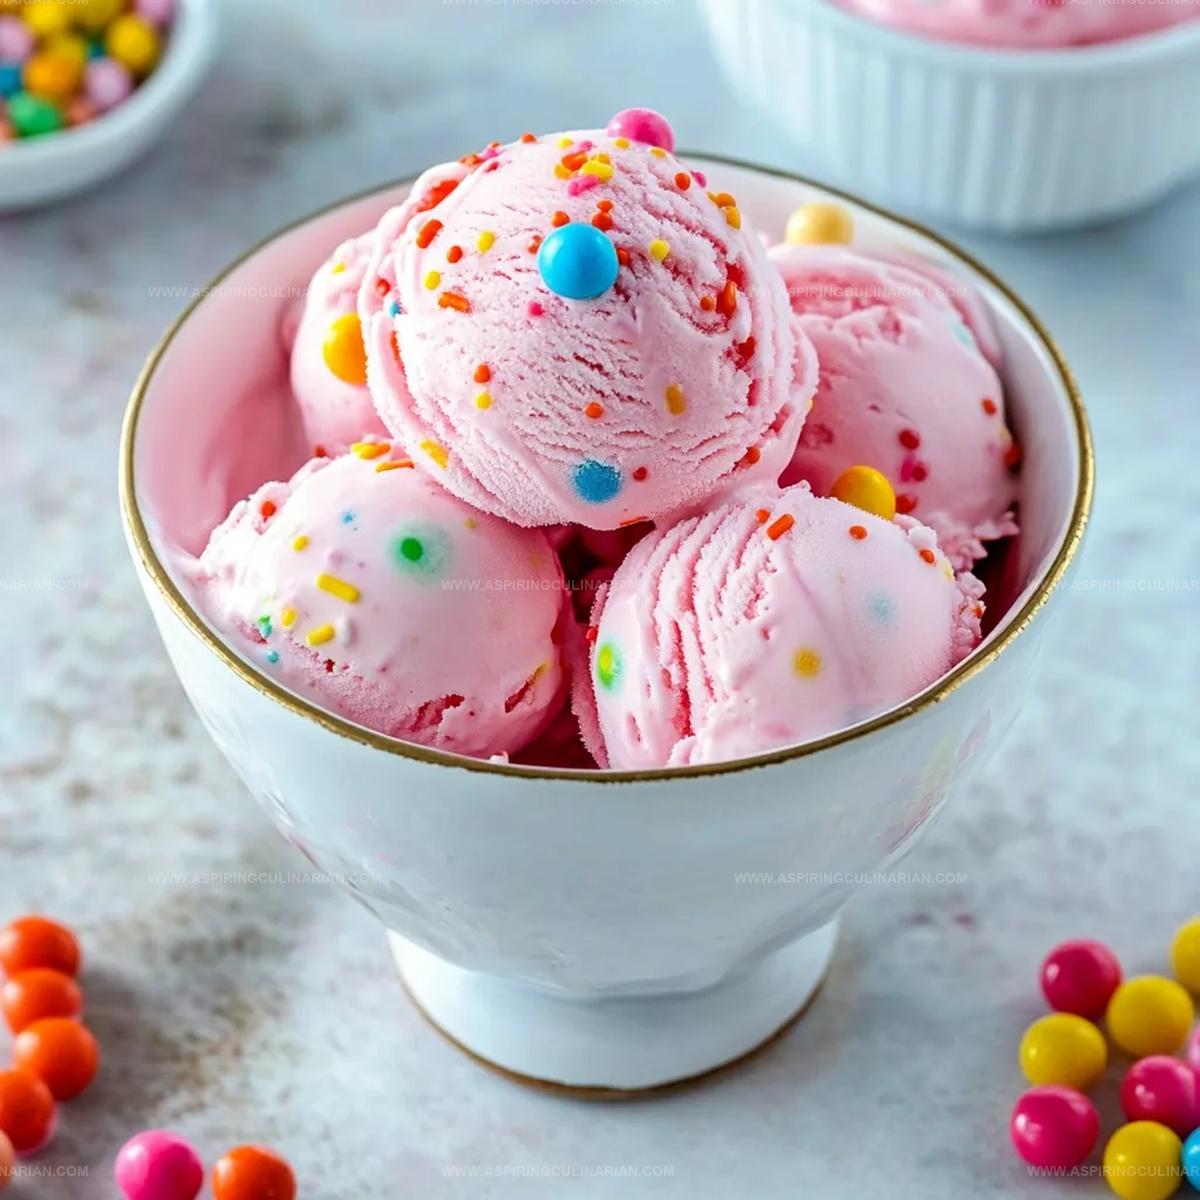
Bubblegum Ice Cream Adds Whimsy To Every Scoop

Ingredients For Bubblegum Ice Cream Ready To Go
Base Ingredients:Flavoring Ingredients:Color and Decoration Ingredients:Step By Step Guide For Bubblegum Ice Cream

Step 1: Prep the Freezer Magic
Get your ice cream maker bowl super chilled by tucking it into the freezer for a full day.
This frozen superhero will help create the smoothest, dreamiest bubblegum treat.
Step 2: Whip Up the Dreamy Base
Grab a big mixing bowl and toss in:Whirl everything together with a whisk until the sugar disappears completely, creating a silky smooth mixture.
Step 3: Color Your Flavor Adventure
Splash in pink or red food coloring drop by drop.
Stir after each addition until you nail that perfect bubblegum pink shade.
Pro tip: The color will soften when frozen, so go a touch bolder than you want.
Step 4: Chill and Let Flavor Develop
Cover your mixture and slide it into the refrigerator.
Let it hang out for an hour or overnight if you can.
This secret step lets all those yummy flavors mingle and get to know each other.
Step 5: Churn into Creamy Wonderland
Pour the chilled mixture into your frozen ice cream maker.
Let it spin and dance for about 20-25 minutes until it looks like dreamy soft-serve magic.
Step 6: Sprinkle Some Joy
Toss most of your confetti sprinkles into the churning mix during the final two minutes.
Watch them swirl and create colorful bursts throughout your ice cream.
Step 7: Pack and Smooth
Scoop the churned goodness into a container.
Smooth the top with a spatula and shower the remaining sprinkles on top for extra pizzazz.
Step 8: Freeze into Perfection
Cover the container with plastic wrap, pressing it directly onto the surface.
Freeze for at least four hours until it’s firm and scoopable.
Step 9: Serve with Playful Flair
Let the ice cream relax at room temperature for five minutes.
Scoop into bowls and crown with colorful gumballs for a totally Instagram-worthy dessert.
Enjoy your bubblegum bliss!
Tricks For Creamy Bubblegum Ice Cream Every Time

Tasty Variations Of Bubblegum Ice Cream To Enjoy
Serve Bubblegum Ice Cream For Parties Or Kids
Bubblegum Ice Cream Storage Ensures Next-Day Freshness
FAQs
Yes, you can use the no-churn method by whipping heavy cream until stiff peaks form, then folding in sweetened condensed milk and bubblegum flavoring. Freeze in a container, stirring every 2 hours to break up ice crystals.
Bubblegum flavoring is food-grade and safe when used in moderation. It’s typically made from natural and artificial ingredients designed specifically for culinary use.
The ice cream will stay fresh in an airtight container in the freezer for up to 2 weeks. After that, ice crystals may start to form and affect the texture.
Print
Bubblegum Ice Cream Recipe
- Total Time: 1 hour 30 minutes
- Yield: 6 1x
Description
Sweet summer memories melt into this playful Bubblegum Ice Cream, blending nostalgic childhood flavors with creamy indulgence. Cool pink scoops promise refreshing delight you won’t want to miss.
Ingredients
Main Ingredients:
- 2 cups (473 ml) heavy cream
- 1 cup (237 ml) whole milk
- 3/4 cup (150 g) granulated sugar
Flavoring Ingredients:
- 2 teaspoons bubblegum flavoring
- 1 teaspoon vanilla extract
- 1/4 teaspoon kosher salt
- Pink or red food coloring (to taste)
Decorative Ingredients:
- 1/2 cup confetti sprinkles, divided
- 1 cup gumballs (for decoration)
Instructions
- Prepare the ice cream maker by placing the freezer bowl in the freezer for a full 24 hours to guarantee optimal chilling for the churning process.
- Create the base mixture by whisking heavy cream, whole milk, granulated sugar, bubblegum flavoring, vanilla extract, and kosher salt together for 2-3 minutes until sugar completely dissolves.
- Gradually introduce pink or red food coloring, adding drops incrementally and stirring between each addition to achieve the desired pastel pink hue, remembering the color will slightly soften when frozen.
- Refrigerate the mixture for a minimum of 1 hour or up to overnight to enhance flavor development and improve overall texture consistency.
- Pour the chilled mixture into the pre-frozen ice cream maker and churn for approximately 20-25 minutes, monitoring until the mixture reaches a soft-serve consistency.
- During the final 2 minutes of churning, incorporate most of the confetti sprinkles, allowing them to distribute evenly throughout the ice cream.
- Carefully transfer the churned ice cream into a shallow container, smoothing the surface with a spatula and sprinkling the reserved confetti sprinkles on top for additional visual appeal.
- Cover the container with plastic wrap, pressing directly onto the ice cream surface to prevent crystallization, then freeze for a minimum of 4 hours or until completely firm.
- Before serving, allow the ice cream to rest at room temperature for 5 minutes to soften slightly, then scoop and garnish with colorful gumballs for a playful presentation.
Notes
- Freeze Ice Cream Maker Bowl Completely solid freezing of the bowl is crucial for achieving the perfect ice cream texture, so ensure it’s in the freezer for the full 24 hours before churning.
- Customize Color Gradually add food coloring to control the exact shade of pink, understanding that the color will soften when frozen, allowing for a personalized aesthetic.
- Control Sweetness Adjust bubblegum flavoring and sugar levels to suit individual taste preferences, recognizing that homemade ice cream provides flexibility in flavor intensity.
- Prevent Ice Crystals Press plastic wrap directly onto the ice cream’s surface before freezing to block moisture formation, guaranteeing a smooth and creamy final texture.
- Prep Time: 1 hour 5 minutes
- Cook Time: 25 minutes
- Category: Desserts, Snacks
- Method: Churning
- Cuisine: American
Nutrition
- Serving Size: 6
- Calories: 400
- Sugar: 26 g
- Sodium: 50 mg
- Fat: 30 g
- Saturated Fat: 18 g
- Unsaturated Fat: 10 g
- Trans Fat: 0 g
- Carbohydrates: 36 g
- Fiber: 0 g
- Protein: 4 g
- Cholesterol: 90 mg
Lena Martinez
Contributing Writer & Culinary Educator
Expertise
Southwestern and Latin American cuisines, Vegetarian and plant-based recipe development, Culinary education and community outreach
Education
Santa Fe Community College, Santa Fe, NM
Certificate in Culinary Arts
Emphasized Southwestern cuisine and sustainable cooking practices
Lena grew up surrounded by the colors, spices, and traditions of the Southwest – flavors that sparked her love for bold, honest cooking. After earning her Culinary Arts certificate at Santa Fe Community College, she made it her mission to teach home cooks how to create flavorful, plant-powered meals without the fuss.
Her recipes are packed with vibrant ingredients, simple steps, and the kind of heart that turns a regular meal into something you’ll want to share. Outside the kitchen, Lena spends her time wandering farmers’ markets, trading family recipes, and helping young chefs find their voice through food.