
Indulgent Butterfinger Candy Balls Recipe: Crispy Sweet Joy
Chocolate and peanut butter lovers unite over these decadent butterfinger candy balls that melt in your mouth with every bite.
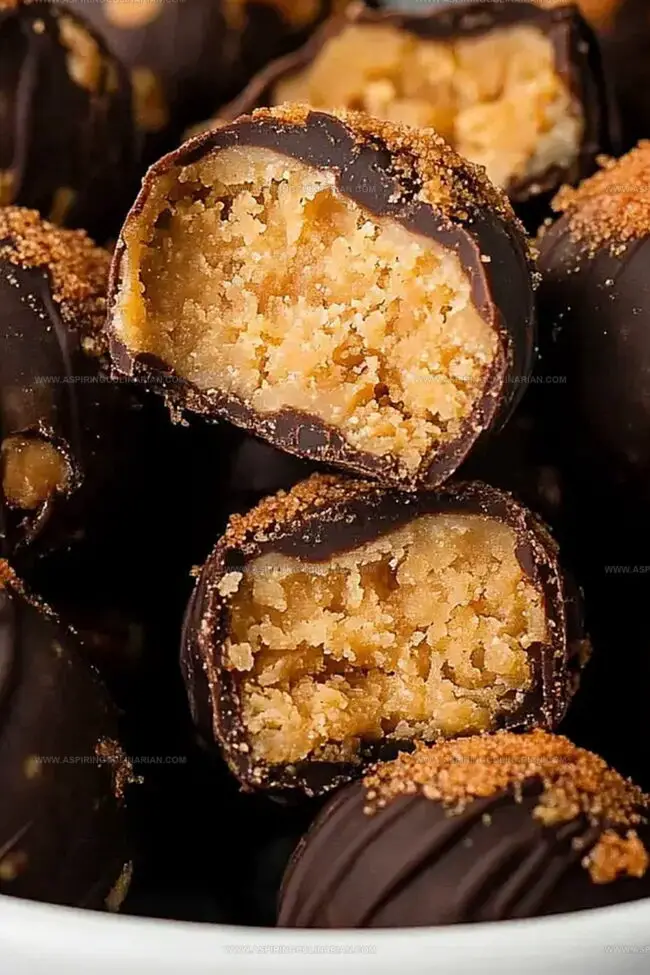
The homemade butterfinger candy balls recipe delivers an irresistible blend of sweet and crunchy textures.
Crushed graham crackers and creamy peanut butter form the perfect base for these delightful treats.
Each ball gets coated in smooth melted chocolate, creating a luxurious exterior that complements the rich inner core.
No baking is required, making these candies a quick and easy dessert option for any occasion.
The combination of crispy butterfinger pieces and silky chocolate makes these treats impossible to resist.
Prepare to indulge in a dessert that will have everyone asking for seconds.
Sweet Peanut Butter Treats Flavor Highlights
Peanut Butter Treats Ingredient Guide
Base Ingredients:Flavoring and Dry Ingredients:Coating and Topping Ingredients:How to Make Sweet Peanut Butter Treats

Step 1: Whip Creamy Base
Grab your electric mixer and combine peanut butter with softened butter.
Blend these ingredients until they form a smooth, silky mixture with no lumps.
Step 2: Infuse Aromatic Flavor
Pour in vanilla extract and mix thoroughly, creating a rich and fragrant base that will enhance the overall taste of your treats.
Step 3: Incorporate Dry Ingredients
Gradually add powdered sugar using your mixer, blending in small batches to prevent clumping.
Then gently fold in:Ensure all ingredients are evenly distributed throughout the mixture.
Step 4: Shape Delectable Spheres
Use a small scoop or spoon to portion out the mixture.
Roll each portion between your palms to create perfectly round balls.
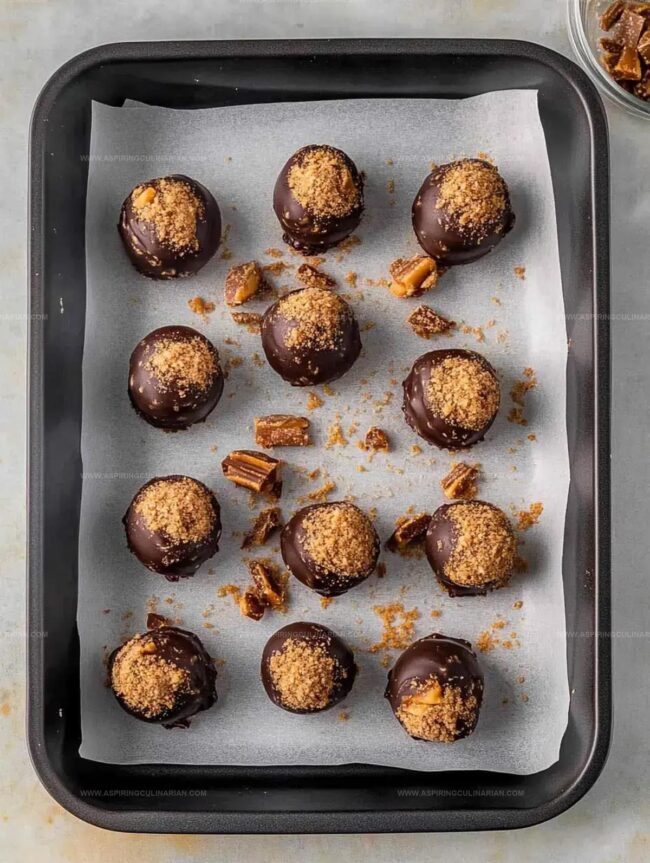
Place these treats on a parchment-lined baking sheet.
Step 5: Prepare Cooling Zone
Transfer the baking sheet to the freezer.
Allow the balls to chill for approximately 30 minutes until they become firm and solid.
Step 6: Chocolate Immersion
Melt chocolate in the microwave, using 30-second intervals at 50% power.
Stir between each interval to ensure smooth melting.
Carefully dip each chilled ball into the melted chocolate, coating completely.
Step 7: Final Decorative Touch
Sprinkle your chocolate-covered treats with:Let the chocolate set completely at room temperature or in the refrigerator.
Tips for Peanut Butter Treats Success

Peanut Butter Treats Twist Ideas
Serving Peanut Butter Treats Creatively

Storing Sweet Peanut Butter Treats

FAQs
Yes, these sweet peanut butter treats are completely no-bake and require only mixing, chilling, and dipping.
You’ll just need a mixer, baking sheet, parchment paper, and microwave for melting chocolate. Basic kitchen tools work perfectly.
Absolutely! These treats can be prepared a few days in advance and stored in the refrigerator. They’re great for making ahead of parties or events.
Yes, these treats are super easy and fun to make. Kids can help roll balls and sprinkle toppings, making it a great family cooking activity.
Print
Butterfinger Candy Balls Recipe
- Total Time: 1 hour 10 minutes
- Yield: 12 1x
Description
Indulgent Butterfinger Candy Balls bring creamy peanut butter and crispy candy bar goodness into delightful bite-sized treats. Chocolate-coated spheres of sweet pleasure promise a nostalgic crunch that chocolate enthusiasts will crave with pure delight.
Ingredients
Main Ingredients:
- 1 cup (240 ml) creamy peanut butter (not natural style)
- 3/4 cup (90 g) graham cracker crumbs
- 1/2 cup (60 g) crushed butterfinger bars
- 8 ounces (226 g) chocolate bark or chocolate chips
Binding and Flavoring Ingredients:
- 4 tablespoons (56 g) butter, softened
- 1 cup (120 g) powdered sugar
- 1 teaspoon (5 ml) vanilla extract
Garnish Ingredients:
- Extra crushed butterfingers
- Sprinkles
- Coarse salt
Instructions
- Cream peanut butter and softened butter using an electric mixer until smooth and homogeneous.
- Incorporate vanilla extract, blending thoroughly.
- Gradually introduce powdered sugar, mixing in batches until well integrated.
- Fold in graham cracker crumbs and crushed butterfingers, ensuring even distribution.
- Using a small scoop, portion mixture and roll into uniform spherical shapes.
- Arrange balls on parchment-lined baking sheet, ensuring minimal contact between pieces.
- Refrigerate for 30 minutes to solidify and enhance structural integrity.
- Melt chocolate in microwave, using 30-second intervals at 50% power, stirring between cycles to prevent burning.
- Submerge chilled balls completely in melted chocolate, allowing excess to drip off.
- Immediately garnish with additional crushed butterfingers, decorative sprinkles, or a delicate salt crystal finish.
- Allow chocolate coating to set completely at room temperature, approximately 15-20 minutes.
Notes
- Soften butter and peanut butter at room temperature for easier mixing and smoother texture.
- Use creamy peanut butter for a more uniform consistency in the treats.
- Crush butterfingers and graham crackers finely to ensure even distribution throughout the mixture.
- Chill the mixture before rolling into balls to prevent sticking and make shaping easier.
- Use a cookie scoop for uniform-sized treats that cook and set evenly.
- Melt chocolate slowly and carefully to prevent burning or seizing.
- Customize by using different chocolate types like dark, milk, or white chocolate.
- Sprinkle sea salt for a gourmet touch that enhances the sweet and salty flavor profile.
- Store in an airtight container in the refrigerator for up to a week.
- Prep Time: 20 minutes
- Cook Time: 50 minutes
- Category: Snacks, Desserts
- Method: Rolling
- Cuisine: American
Nutrition
- Serving Size: 12
- Calories: 211
- Sugar: 16 g
- Sodium: 70 mg
- Fat: 14 g
- Saturated Fat: 5 g
- Unsaturated Fat: 9 g
- Trans Fat: 0 g
- Carbohydrates: 20 g
- Fiber: 1 g
- Protein: 4 g
- Cholesterol: 15 mg
Nathaniel Brooks
Founder & Recipe Developer
Expertise
Farm-to-table cuisine, Seasonal recipe development, Culinary storytelling
Education
Ivy Tech Community College – Indianapolis, IN
Culinary Arts / Hospitality Administration & Events
Focused on hands-on training in classical and modern culinary techniques.
Nathaniel’s story starts in the foothills of the Appalachian Mountains, where farm stands, backyard gardens, and old family recipes shaped his love for real food. After graduating from Ivy Tech Community College in Indianapolis, he spent years working in farm-to-table kitchens, learning how to turn local, seasonal ingredients into something memorable.
Today, Nathaniel pours that same spirit into every single recipe on Aspiring Culinarian – recipes that feel real, comforting, and connected to the land. When he’s not in the kitchen, you’ll find him foraging wild herbs, chasing sunsets with his camera, or writing about the flavors that shaped his roots.