The Best Homemade Caramel Apples Fall Fun Recipe
Sweet autumn memories dance around these delectable caramel apples, a fall fun recipe that captures childhood wonder.
Crisp orchard varieties create the perfect canvas for rich, golden caramel coating.
Seasonal treats like these spark joy and connect us to cherished traditions.
Chilled nights call for something special that warms the heart and delights the senses.
Crafting these sticky-sweet delicacies requires minimal ingredients but delivers maximum happiness.
Warm kitchens become magical spaces where simple ingredients transform into nostalgic masterpieces.
Gather your favorite apples and let the caramel adventure begin!
Caramel Apples for Fall: Sticky, Fun, Iconic!
What You’ll Need for Caramel Apple Fun
Main Ingredients:Optional Toppings:Preparation Tools:Easy Steps for Caramel Apple Making
Step 1: Prepare Apple Bases
Firmly push wooden skewers or popsicle sticks into the center of each apple, ensuring they’re securely anchored.
Place the stick-inserted apples in the freezer for about 15 minutes to help the caramel adhere better.
Step 2: Create Creamy Caramel Coating
In a heavy-bottomed saucepan, combine:Melt the ingredients over medium-low heat, stirring continuously with a silicone spatula until the mixture transforms into a smooth, glossy liquid.
Remove from heat once completely melted and combined.
Step 3: Dunk Apples in Caramel
Hold each apple by the stick and carefully swirl it into the warm caramel, rotating to ensure complete and even coverage.
Gently twirl the apple to let excess caramel drip off, creating an even layer.
Step 4: Set Caramel Coating
Transfer the caramel-covered apples to a baking sheet lined with parchment paper or a silicone mat.
Allow them to rest at room temperature for a few minutes to start setting.
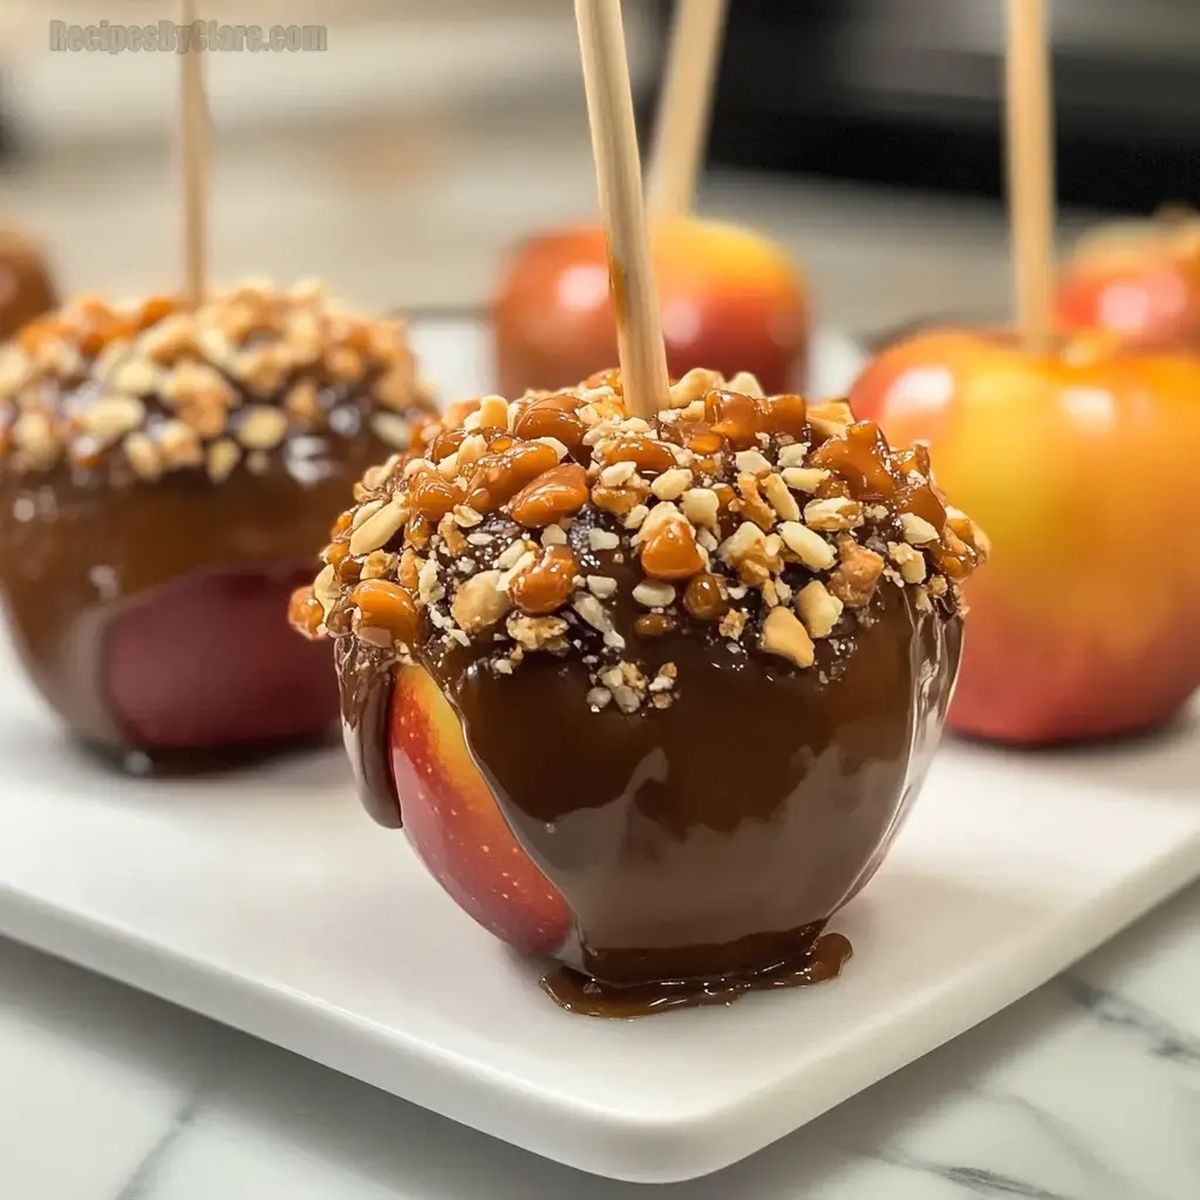
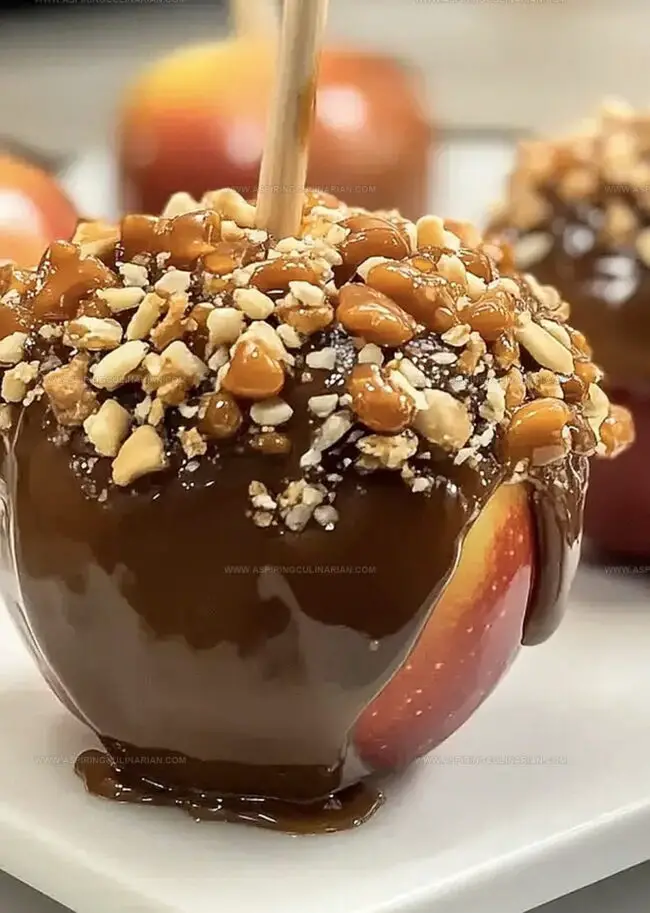
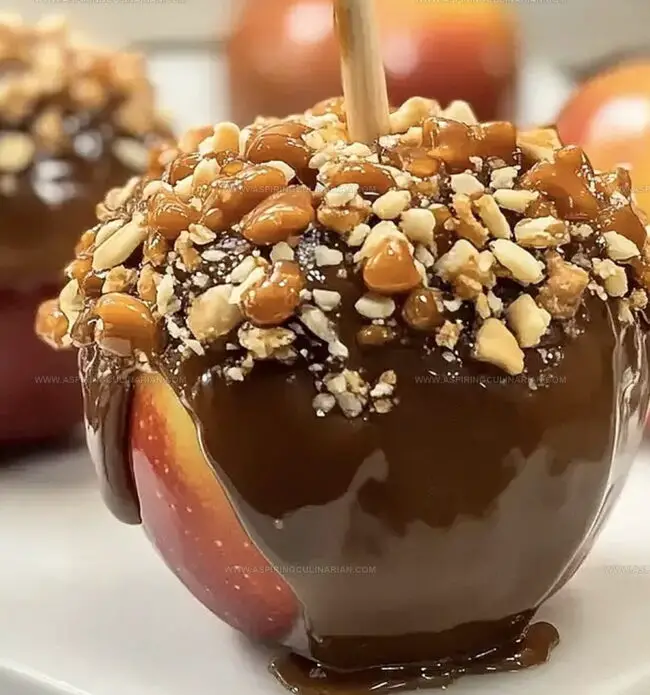
Step 5: Add Decorative Touches
Embellish your caramel apples with optional toppings like:Press toppings gently into the caramel to ensure they stick.
Step 6: Chill and Firm
Place the decorated apples in the refrigerator for 15-20 minutes to completely set the caramel and help toppings adhere firmly.
Step 7: Serve and Enjoy
Remove apples from the refrigerator about 5-10 minutes before serving to allow the caramel to soften slightly for easier eating.
Enjoy your festive fall treat!
Pro Secrets for Perfect Caramel Apples
Twist Up Your Caramel Apples
Serving Caramel Apples for Smiles
Storing Caramel Apples the Right Way
FAQs
Freezing helps the apples stay firm and allows the caramel to stick better, preventing it from sliding off and creating a cleaner, more even coating.
Yes, crisp and tart apples like Granny Smith, Honeycrisp, or Fuji work best because they provide a nice contrast to the sweet caramel and hold their shape well.
When stored properly in the refrigerator, caramel apples can remain fresh for about 3-4 days, but they are best enjoyed within the first two days for optimal taste and texture.
Print
Caramel Apples Fall Fun Recipe
- Total Time: 20 minutes
- Yield: 10 1x
Description
Caramel Apple Magic whisks autumn’s sweetest charm into a delightful dessert that captures seasonal nostalgia. Crisp orchard apples draped in rich, golden caramel create an irresistible treat you’ll savor with pure delight.
Ingredients
Main Ingredients:
- 8–10 medium apples (washed and dried)
- 22 ounces (624 grams) (2 bags) individually wrapped caramel candies
Liquid Ingredient:
- 4 tablespoons milk, half-and-half, or heavy cream
Toppings:
- Assorted toppings (chocolates, sprinkles, nuts, etc.)
Instructions
- Prepare wooden skewers and firmly insert them into the apple centers, positioning the apples vertically in the freezer for 15 minutes to help caramel adhere better.
- Create a double boiler by placing a heat-safe glass bowl over a pot of simmering water, melting caramels and milk together while continuously stirring until achieving a silky, uniform texture around 5-7 minutes.
- Remove apples from freezer and carefully tilt the caramel bowl, rotating each apple to ensure complete and even coating, allowing excess caramel to gently drip off.
- Transfer caramel-dipped apples onto a parchment-lined baking sheet, maintaining space between each apple to prevent sticking.
- Quickly chill the coated apples in the refrigerator for approximately 20 minutes until caramel sets and becomes firm.
- Optional decoration: Melt chocolate in a separate bowl and use a spoon or piping bag to create artistic drizzles, then sprinkle chopped nuts or colorful toppings while chocolate remains slightly wet.
- Return decorated apples to refrigerator for an additional 10 minutes to solidify toppings completely.
- Store finished caramel apples in the refrigerator, consuming within 2-3 days for optimal freshness and flavor.
Notes
- Freezing apples for 15 minutes before dipping helps caramel adhere better and prevents sliding.
- Select premium soft caramels that melt smoothly and provide rich, consistent coating.
- Monitor caramel heat carefully to prevent burning or becoming too thick, which makes dipping challenging.
- Try crushed graham crackers, toasted coconut, or mini chocolate chips for unique flavor combinations and textures.
- Prep Time: 15 minutes
- Cook Time: 5 minutes
- Category: Snacks, Desserts
- Method: Baking
- Cuisine: American
Nutrition
- Serving Size: 10
- Calories: 17 kcal
- Sugar: 3 g
- Sodium: 5 mg
- Fat: 0.4 g
- Saturated Fat: 0.2 g
- Unsaturated Fat: 0.1 g
- Trans Fat: 0 g
- Carbohydrates: 4 g
- Fiber: 0.3 g
- Protein: 0.1 g
- Cholesterol: 1 mg
Nathaniel Brooks
Founder & Recipe Developer
Expertise
Farm-to-table cuisine, Seasonal recipe development, Culinary storytelling
Education
Ivy Tech Community College – Indianapolis, IN
Culinary Arts / Hospitality Administration & Events
Focused on hands-on training in classical and modern culinary techniques.
Nathaniel’s story starts in the foothills of the Appalachian Mountains, where farm stands, backyard gardens, and old family recipes shaped his love for real food. After graduating from Ivy Tech Community College in Indianapolis, he spent years working in farm-to-table kitchens, learning how to turn local, seasonal ingredients into something memorable.
Today, Nathaniel pours that same spirit into every single recipe on Aspiring Culinarian – recipes that feel real, comforting, and connected to the land. When he’s not in the kitchen, you’ll find him foraging wild herbs, chasing sunsets with his camera, or writing about the flavors that shaped his roots.