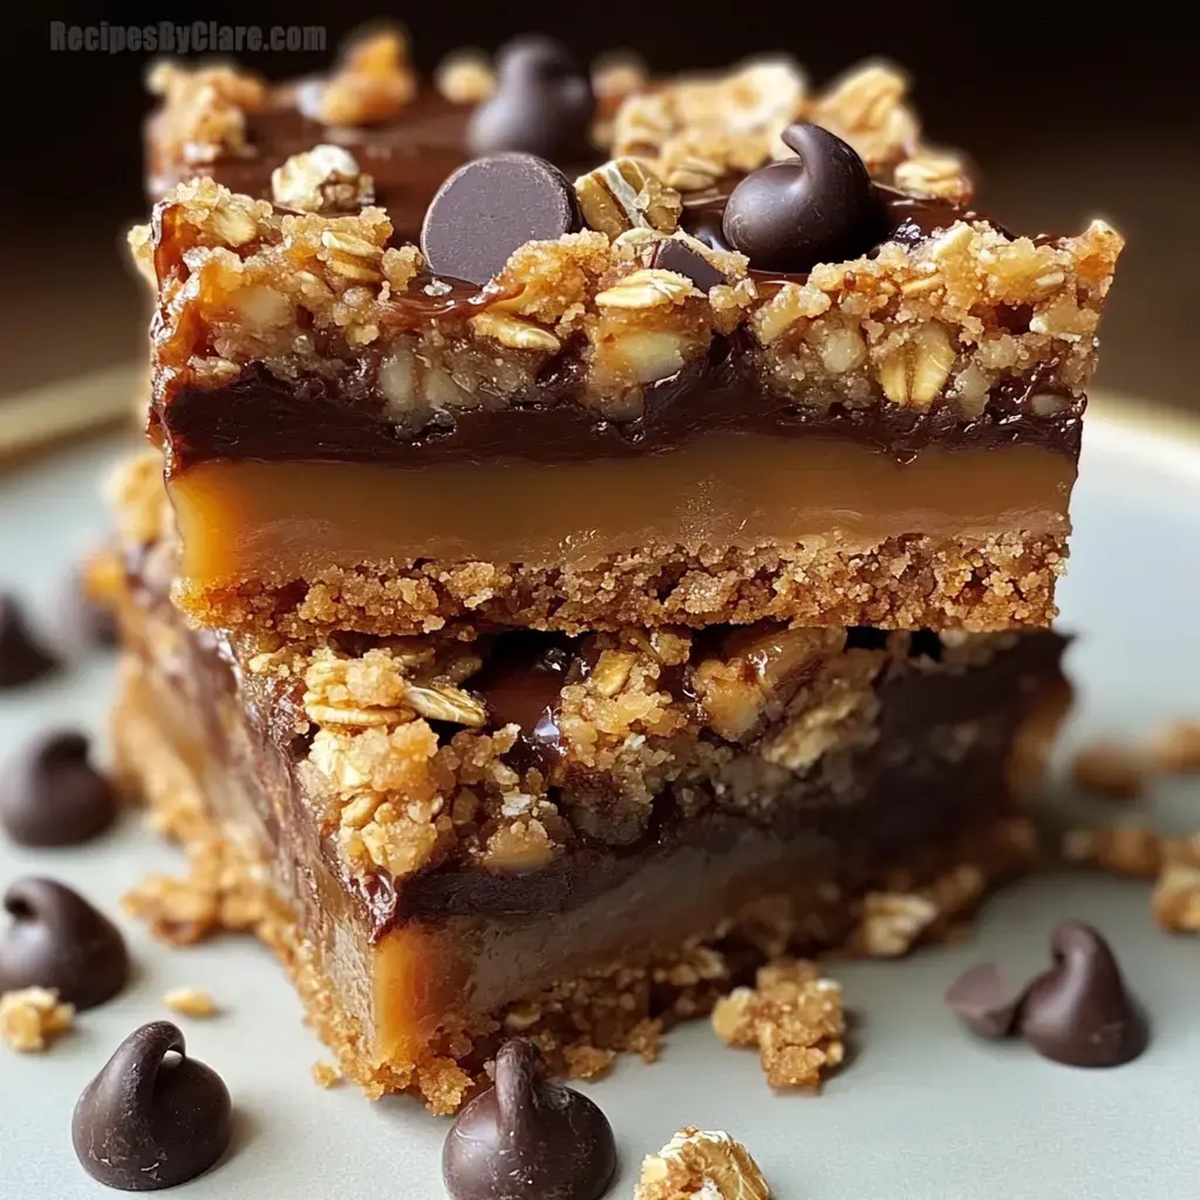
The Golden Caramelitas Recipe: Sweet Bliss in Every Bite
Chocolate and caramel lovers will adore these decadent caramelitas that melt hearts with every single bite.
Sweet layers of gooey goodness create a dessert experience beyond ordinary expectations.
Buttery oatmeal cookie crumbles provide a perfect crisp foundation for rich caramel swirls.
Minimal ingredients combine into maximum flavor, making this treat surprisingly simple to assemble.
Warm cookies fresh from the oven promise pure indulgence that lingers deliciously on your palate.
Craving something impossibly delectable?
You should definitely dive right into making these irresistible bars.
Prepare to be amazed by how quickly these caramelitas disappear from your serving plate.
Caramelitas: Ooey-Gooey Caramel Squares
Gather Caramelita Must-Haves
Base Ingredients:Binding Ingredient:Flavor Enhancers:Bake Caramelitas at Home
Step 1: Warm Up the Oven
Fire up your oven to a toasty 350°F (175°C).
Grab a 9×13-inch baking pan and give it a light grease.
Lay down a sheet of parchment paper to make cleanup and removal a breeze.
Step 2: Create the Crumbly Base
In a spacious mixing bowl, combine:Step 3: Bring in the Butter
Pour in melted butter and mix until the ingredients transform into a delightful, crumbly texture.
Step 4: Build the Foundation
Press half of the oat mixture firmly into the prepared pan, creating a solid base.
Slide the pan into the oven and bake for 10 minutes until it turns a beautiful light golden color.
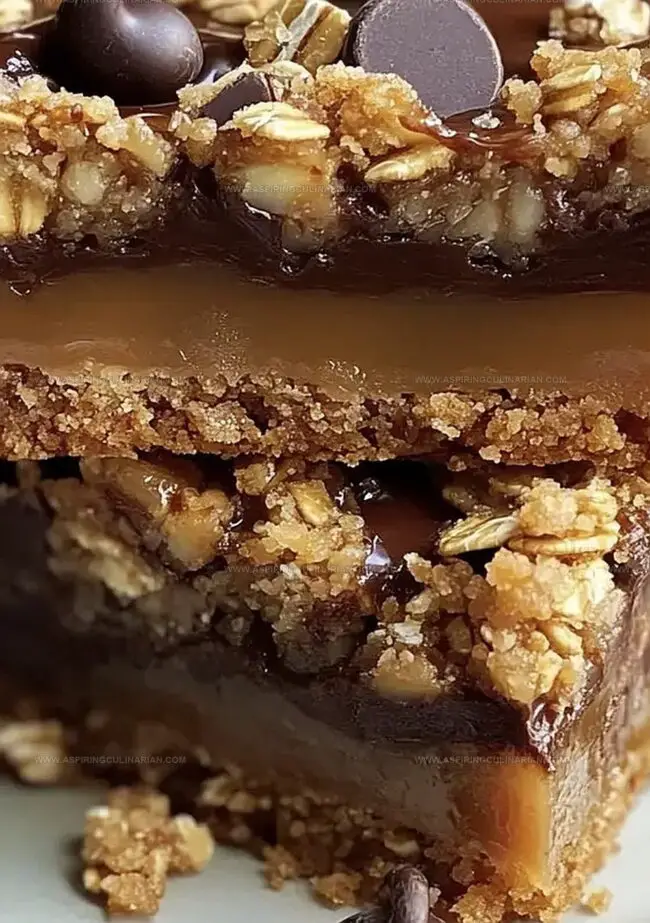
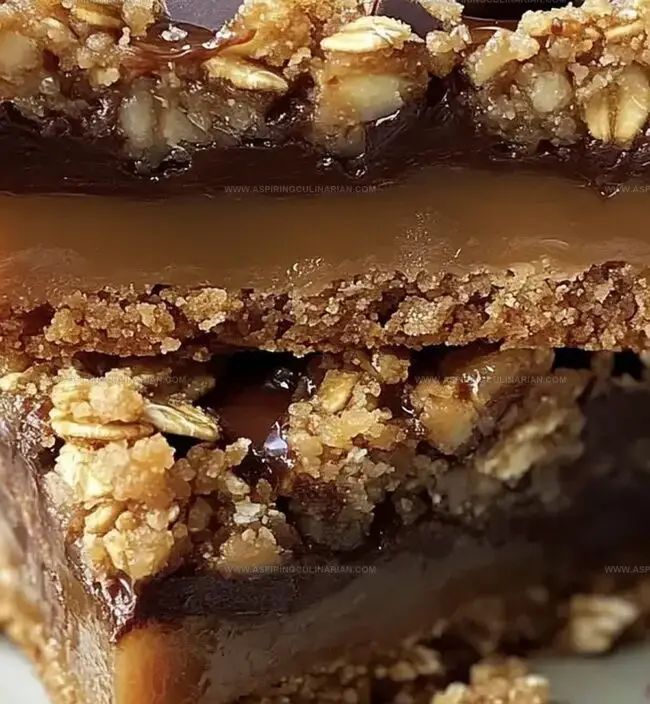
Step 5: Layer on the Deliciousness
Once the crust emerges from the oven, sprinkle a generous layer of:Drizzle caramel sauce evenly across the surface, ensuring every inch gets some sweet love.
Step 6: Crown with Crumble
Scatter the remaining oat mixture over the caramel layer.
Gently press down to create a unified topping.
Step 7: Final Bake
Return the pan to the oven and bake for 15-20 minutes.
Watch for a golden-brown top and bubbling caramel edges.
Step 8: Cool and Devour
Allow the caramelitas to cool completely.
Slice into squares and prepare for a mouthwatering experience.
Caramelita Tips for Success
Caramelita Recipe Flavor Swaps
Serve Caramelitas for Dessert
Caramelita Storage Tips
FAQs
No, they’re surprisingly easy! The recipe involves simple steps like mixing dry ingredients, pressing a crust, adding layers, and baking. Even beginner bakers can successfully create these delicious bars.
Absolutely! Pecans are optional. If you don’t like nuts or have allergies, simply omit them without changing the other ingredients. The chocolate and caramel will still taste amazing.
Homemade or store-bought caramel sauce both work great. Just ensure it’s a thick, smooth sauce that will hold up during baking. Avoid thin or runny caramel sauces.
Look for a golden-brown top and bubbling caramel around the edges.
Print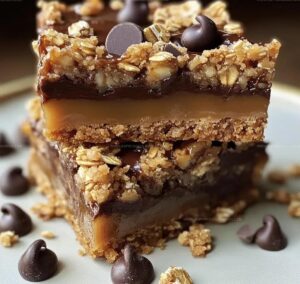
Caramelitas Recipe
- Total Time: 45 minutes
- Yield: 16 1x
Description
Chocolate and caramel lovers will adore these irresistible Caramelitas, a rich dessert blending buttery oats, gooey caramel, and silky chocolate chips. Crisp edges and melting center make these bars a perfect indulgence for sweet-craving souls.
Ingredients
Main Ingredients:
- 2 cups all-purpose flour
- 2 cups old-fashioned rolled oats
- 1 1/2 cups brown sugar, packed
- 1 1/2 cups unsalted butter, melted
Chocolate and Nut Addition:
- 1 cup semi-sweet chocolate chips
- 1/2 cup chopped pecans (optional)
Seasoning and Leavening:
- 1 teaspoon baking soda
- 1/2 teaspoon salt
- 1 1/2 cups caramel sauce
Instructions
- Prepare the oven to 350°F (175°C) and prepare a 9×13-inch baking dish with grease and parchment paper for effortless removal.
- Combine flour, rolled oats, brown sugar, baking soda, and salt in a spacious mixing bowl, creating a dry foundation for the dessert.
- Incorporate melted butter into the dry ingredients, stirring until the mixture transforms into a crumbly, cohesive texture.
- Firmly compress half of the oat mixture into the prepared baking dish, forming a solid base. Bake for 10 minutes until achieving a light golden hue.
- After removing the crust from the oven, strategically distribute chocolate chips and pecans across the surface, then generously drizzle caramel sauce, ensuring an even coverage.
- Delicately scatter the remaining oat mixture over the caramel layer, gently pressing to create a unified topping.
- Return the dish to the oven, baking for 15-20 minutes until the surface turns a rich golden brown and caramel bubbles emerge around the edges.
- Allow the caramelitas to cool completely, ensuring structural integrity before slicing into delectable squares for serving.
Notes
- Customize the texture by adjusting the oat mixture’s consistency, ensuring a crisp yet chewy base that complements the gooey caramel layer.
- Swap regular flour with gluten-free alternatives like almond or oat flour to make the recipe celiac-friendly without compromising taste.
- Try different chocolate varieties such as dark, milk, or white chocolate to create unique flavor profiles that suit individual preferences.
- Enhance nutritional value by incorporating chopped nuts like almonds or walnuts, adding extra crunch and healthy fats to the caramelitas.
- Prep Time: 15 minutes
- Cook Time: 30 minutes
- Category: Desserts, Snacks
- Method: Baking
- Cuisine: American
Nutrition
- Serving Size: 16
- Calories: 221
- Sugar: 14 g
- Sodium: 97 mg
- Fat: 11 g
- Saturated Fat: 6 g
- Unsaturated Fat: 4 g
- Trans Fat: 0.2 g
- Carbohydrates: 29 g
- Fiber: 2 g
- Protein: 3 g
- Cholesterol: 17 mg
Nathaniel Brooks
Founder & Recipe Developer
Expertise
Farm-to-table cuisine, Seasonal recipe development, Culinary storytelling
Education
Ivy Tech Community College – Indianapolis, IN
Culinary Arts / Hospitality Administration & Events
Focused on hands-on training in classical and modern culinary techniques.
Nathaniel’s story starts in the foothills of the Appalachian Mountains, where farm stands, backyard gardens, and old family recipes shaped his love for real food. After graduating from Ivy Tech Community College in Indianapolis, he spent years working in farm-to-table kitchens, learning how to turn local, seasonal ingredients into something memorable.
Today, Nathaniel pours that same spirit into every single recipe on Aspiring Culinarian – recipes that feel real, comforting, and connected to the land. When he’s not in the kitchen, you’ll find him foraging wild herbs, chasing sunsets with his camera, or writing about the flavors that shaped his roots.