
Easy Homemade Cereal Bars Recipe: Crispy, Sweet Breakfast Joy
Homemade cereal bars bring nostalgic comfort to snack time with their perfect crunch and sweet flavors.
This simple recipe combines wholesome grains with a touch of sweetness for an ideal breakfast or midday treat.
No special equipment or complicated steps are needed, making it quick and easy to whip up a batch.
Each bite offers satisfying texture and flavor that delights kids and adults alike.
Prepare these bars in minutes and watch them disappear faster than you can say “snack time.” They’re perfect for busy mornings or after-school snacks.
Enjoy a wholesome treat everyone will love.
Cereal Bars Reasons These Bars Are So Handy
What Goes Into Cereal Bars for the Best Flavor
Base Ingredients:Optional Protein Boosters:Seasoning and Optional Add-ins:Directions for Cereal Bars Start to Finish
Step 1: Prepare the Baking Canvas
Line an 8-inch square baking pan with parchment paper, allowing extra paper to hang over the sides for easy removal.
For a larger batch, use a 9×13-inch pan and adjust ingredients accordingly.
Step 2: Soften the Nut Butter
Warm the nut butter gently until it becomes smooth and easily mixable.
This helps create a more uniform texture throughout the bars.
Step 3: Create the Magical Mixture
In a spacious mixing bowl, combine the following ingredients:Stir everything together until the ingredients are thoroughly blended and evenly distributed.
Step 4: Shape the Bars
Transfer the cereal mixture into the prepared pan.
Place a second sheet of parchment paper on top and press down firmly with your hands or a flat utensil.
Apply consistent pressure to ensure the bars hold together perfectly when cut.
Step 5: Chill and Set
Place the pan in the freezer for approximately 30 minutes.
The mixture should become firm enough to slice cleanly without crumbling.
Step 6: Slice and Store
Remove the bars from the pan using the overhanging parchment paper.
Cut into 9 equal-sized bars using a sharp knife.
Store the bars in an airtight container in the refrigerator, freezer, or a cool, dry location at room temperature.
Cereal Bars Must-Know Tips for Success
Different Styles of Cereal Bars to Try
Serving Ideas for Cereal Bars You’ll Love
Cereal Bars Storage for Grab-and-Go Snacks
FAQs
These bars offer a nutritious snack option packed with protein, healthy fats from nut butter, and whole grain carbohydrates from cereal. They provide quick energy and can be customized with additional nutrients like protein powder.
Absolutely! The protein powder is optional. Your cereal bars will still hold together and taste great without it. Just ensure you use enough nut butter and sweetener to bind the ingredients.
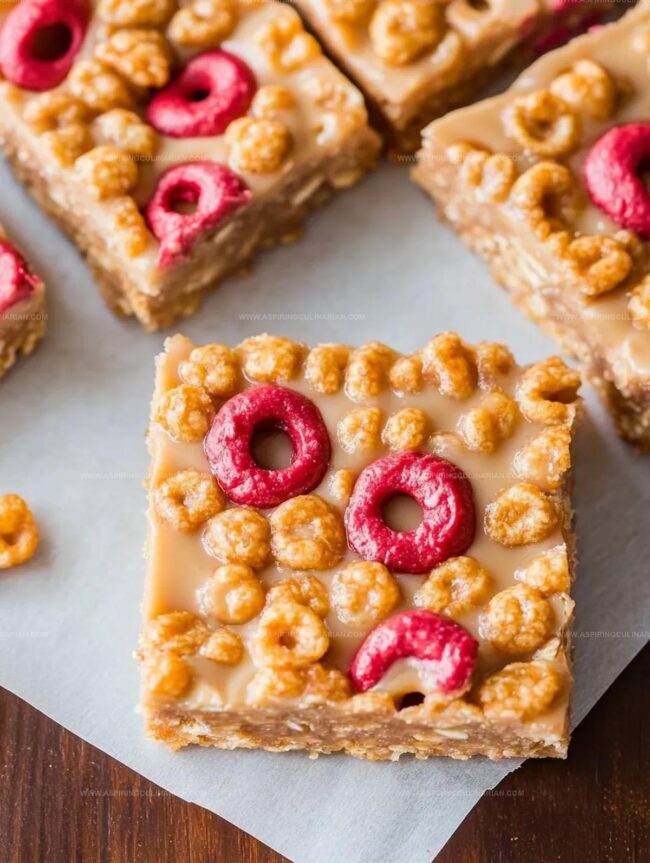
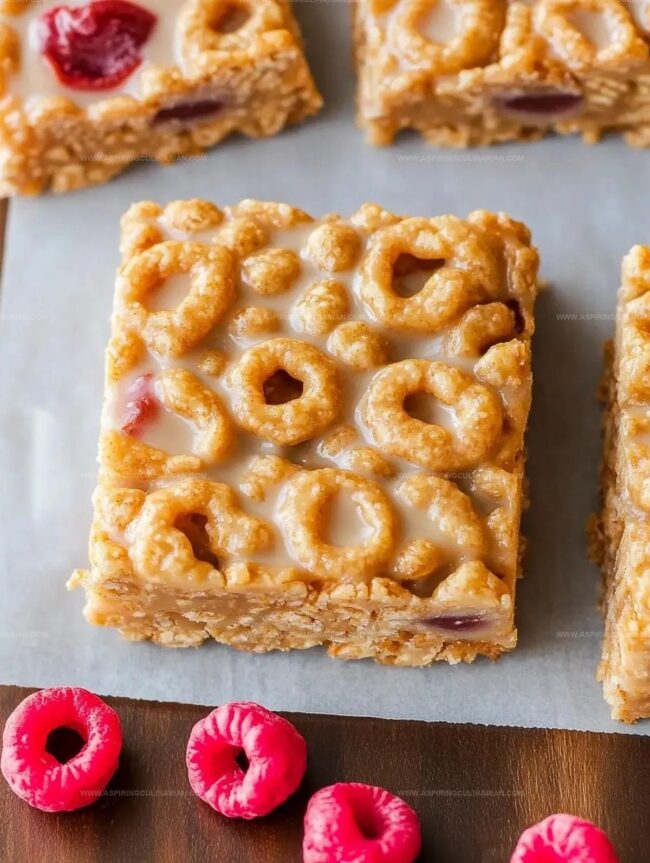
Look for cereal with larger, sturdier pieces like rice crispy cereal, corn flakes, or granola. Avoid very fine or powdery cereals that might make the bars crumbly. Choose cereals with minimal added sugar for a healthier result.
Print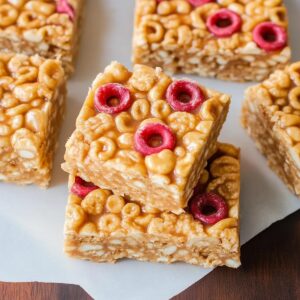
Cereal Bars Recipe
- Total Time: 45 minutes
- Yield: 12 1x
Description
Homemade cereal bars blend crunchy oats, sweet honey, and nutty almonds into a delightful snack perfect for quick breakfasts or energizing treats. Each bite promises wholesome goodness and satisfying flavor you’ll crave again and again.
Ingredients
Main Ingredients:
- 3 cups cereal of choice
- 2/3 cup (160 ml) peanut butter or nut butter of choice
- 1/2 cup (120 ml) agave, honey, or brown rice syrup
Supplementary Ingredients:
- 1/2 teaspoon salt (optional)
- 3 tablespoons (45 ml) protein powder (optional)
Instructions
- Prepare a square baking vessel by lining with parchment paper, ensuring excess paper hangs over the edges for easy removal. Select an 8-inch pan or a 9×13-inch pan for larger quantities.
- Gently warm nut butter to achieve a smooth, pourable consistency, facilitating better ingredient integration.
- Combine cereal, nut butter, sweetener, salt, and protein powder in a spacious mixing bowl. Stir thoroughly until all components are evenly distributed and fully incorporated.
- Transfer the mixture into the prepared pan, spreading it uniformly. Place an additional parchment sheet on top and apply firm, consistent pressure to compact the ingredients, promoting bar stability.
- Refrigerate or freeze for approximately 30 minutes, allowing the mixture to solidify and maintain structural integrity.
- Extract the consolidated mixture from the pan using parchment paper overhang. Slice into 9 uniform bars using a sharp knife.
- Preserve bars in an airtight container. Optimal storage includes refrigeration, freezing, or placement in a cool, dry environment to maintain texture and prevent crumbling.
Notes
- Swap nut butters easily to match dietary needs or flavor preferences, trying almond, cashew, or sunflower seed butter for variety.
- Choose gluten-free cereal options like rice crisp or corn flakes to make the recipe celiac-friendly and accommodating for different nutritional requirements.
- Press mixture extremely firmly to guarantee bar stability, using flat-bottomed glass or measuring cup to create compact, dense texture that prevents crumbling.
- Try mix-ins like chia seeds, dried fruit, or dark chocolate chips to elevate nutritional profile and add exciting flavor dimensions without compromising structural integrity.
- Prep Time: 15 minutes
- Cook Time: 30 minutes
- Category: Breakfast, Snacks, Desserts
- Method: None
- Cuisine: American
Nutrition
- Serving Size: 12
- Calories: 210
- Sugar: 8 g
- Sodium: 50 mg
- Fat: 10 g
- Saturated Fat: 2 g
- Unsaturated Fat: 7 g
- Trans Fat: 0 g
- Carbohydrates: 27 g
- Fiber: 2 g
- Protein: 5 g
- Cholesterol: 0 mg
Lena Martinez
Contributing Writer & Culinary Educator
Expertise
Southwestern and Latin American cuisines, Vegetarian and plant-based recipe development, Culinary education and community outreach
Education
Santa Fe Community College, Santa Fe, NM
Certificate in Culinary Arts
Emphasized Southwestern cuisine and sustainable cooking practices
Lena grew up surrounded by the colors, spices, and traditions of the Southwest – flavors that sparked her love for bold, honest cooking. After earning her Culinary Arts certificate at Santa Fe Community College, she made it her mission to teach home cooks how to create flavorful, plant-powered meals without the fuss.
Her recipes are packed with vibrant ingredients, simple steps, and the kind of heart that turns a regular meal into something you’ll want to share. Outside the kitchen, Lena spends her time wandering farmers’ markets, trading family recipes, and helping young chefs find their voice through food.