Heavenly Cheese Danishes Recipe: Fluffy Pastry Perfection
Soft, buttery pastries dance with creamy cheese in this irresistible cheese danishes recipe that promises pure breakfast bliss.
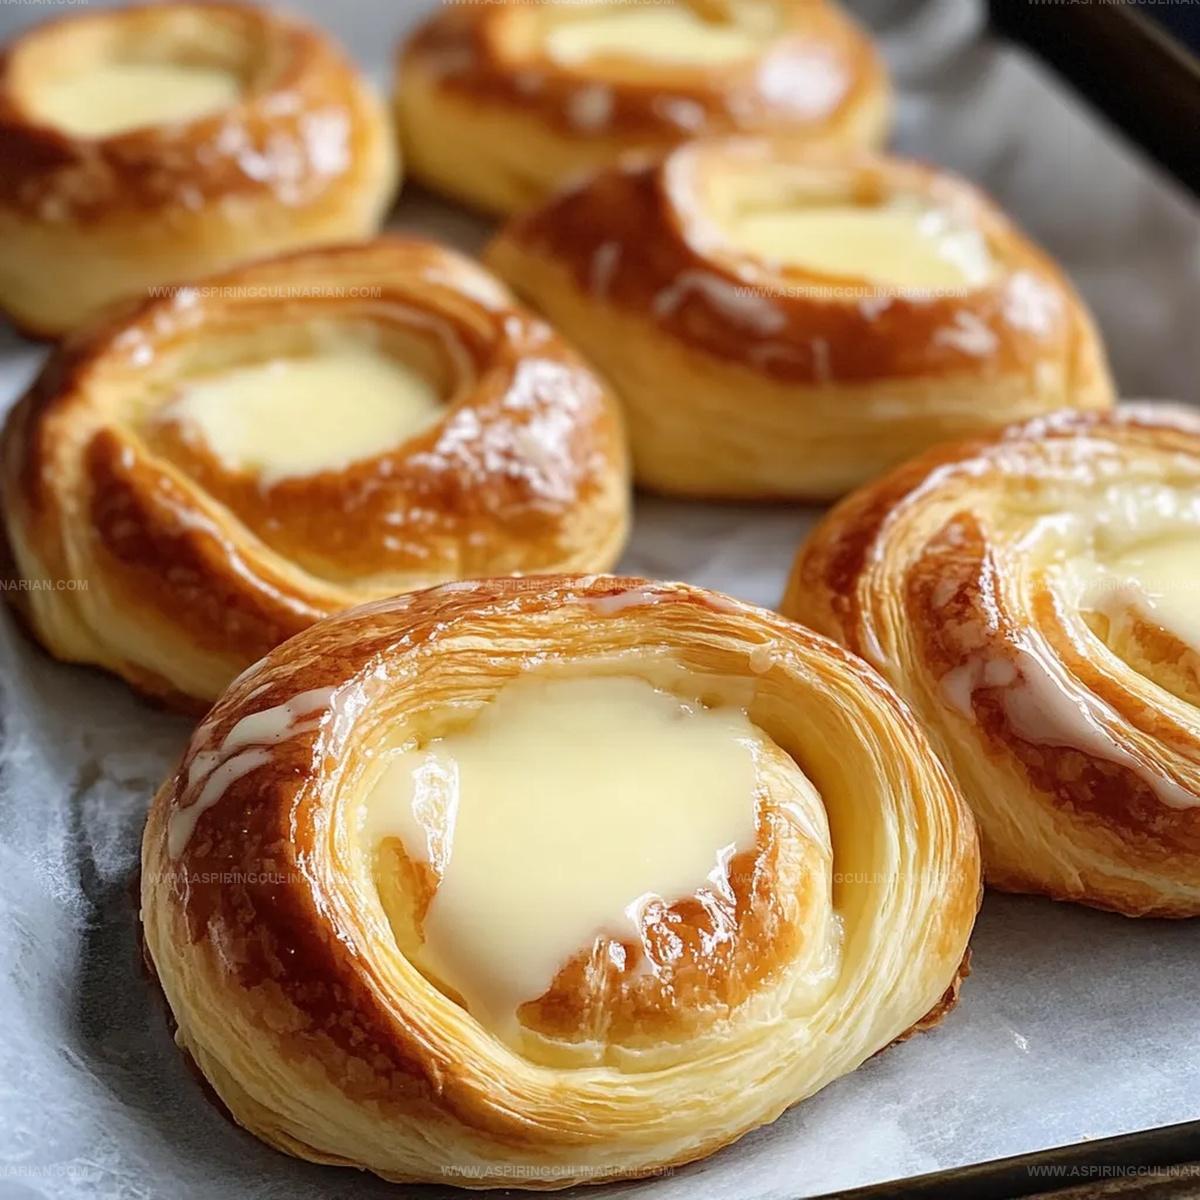
Golden-brown edges curl around a luscious cream cheese filling, beckoning you closer with each delicate fold.
These elegant pastries emerge from the oven with a delicate shimmer, promising a melt-in-your-mouth experience.
Flaky layers of delicate dough cradle a rich, tangy center that whispers of indulgence.
The aroma of freshly baked danishes will transform your kitchen into a charming European bakery.
Each bite delivers a perfect balance of sweet and creamy textures that elevate your morning routine.
Prepare to savor a moment of pure culinary joy with these delectable cheese danishes that are sure to become your new breakfast favorite.
What Makes Cheese Danishes a Timeless Treat
Cheese Danishes Ingredient Rundown for Perfect Pastries
Pastry Base:Filling Ingredients:Topping and Finishing Ingredients:Directions for Cheese Danishes from Mixing to Baking
Step 1: Warm Up the Oven
Crank up your oven to a toasty 350F (177C).
Give your baking sheet a quick spritz with non-stick cooking spray to prevent any sticky situations.
Step 2: Whip Up Creamy Filling
Grab a mixing bowl and combine these delightful ingredients:Blend everything until silky smooth and set aside.
Step 3: Unroll and Reshape Dough
Carefully unfurl the crescent dough tubes.
You’ll have 8 rectangular pieces.
Gently press those triangle perforations together to create solid rectangles.
Step 4: Butter and Sweeten
Brush each rectangle with melted butter.
Sprinkle a generous layer of brown sugar across the buttery surface.
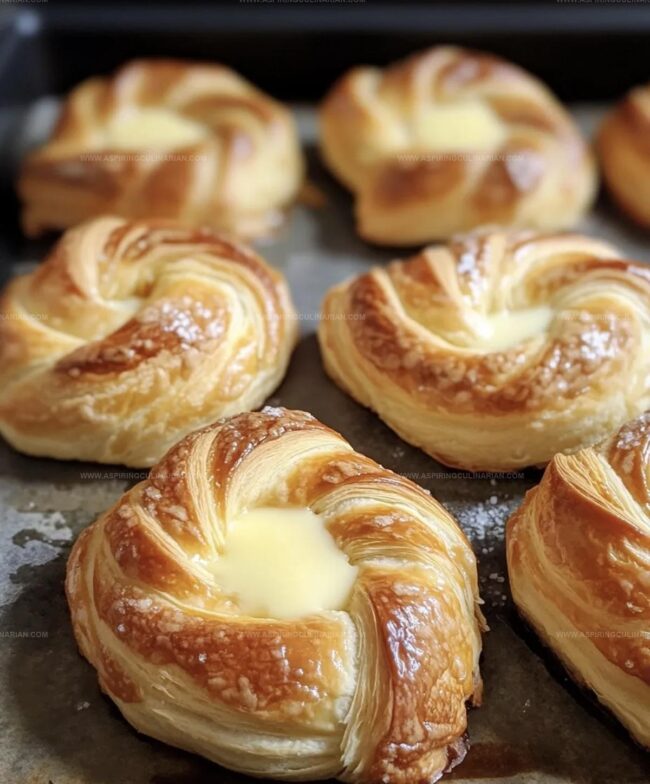
Step 5: Create Danish Swirls
Roll each rectangle from the long side into a log shape.
Pinch the edges to seal tight.
Coil each log into a circular shape, tucking the end underneath.
Press a small indentation in the center of each coil to cradle the filling.
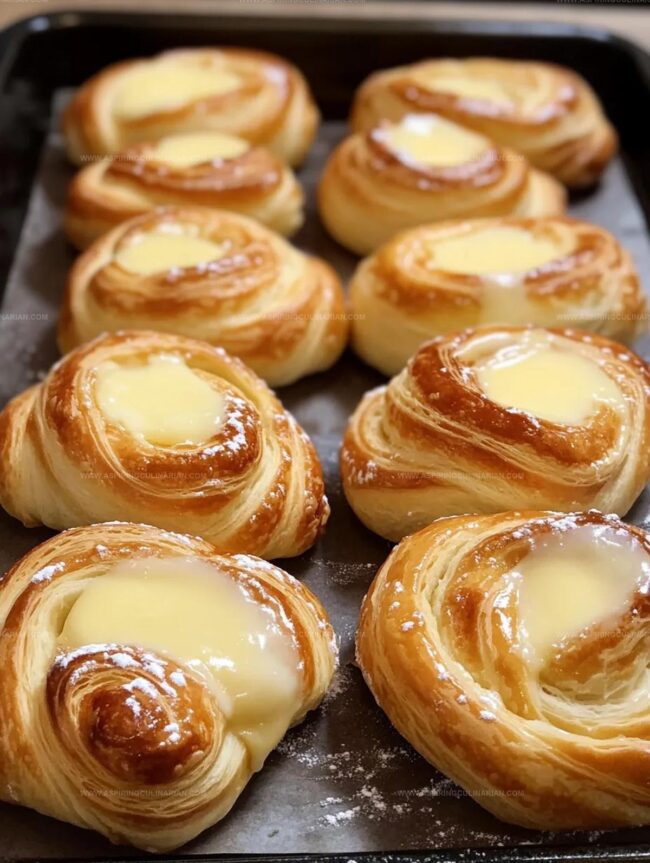
Step 6: Bake to Golden Perfection
Arrange the coiled dough on the baking sheet, leaving space between each pastry.
Dollop cream cheese filling into the center of each coil.
Slide into the oven and bake for 15-18 minutes until they turn a gorgeous golden brown and puff up beautifully.
Step 7: Craft a Silky Glaze
Whisk together these glaze ingredients:Blend until smooth, adding extra milk if needed to achieve a drizzle-worthy consistency.
Step 8: Final Flourish
Pull the danishes from the oven and let them cool for a quick 5 minutes.
Drizzle the glaze over the warm pastries and serve right away for maximum deliciousness.
Cheese Danishes Secret Tips for Great Results

Cheese Danishes Creative Flavor Combos to Try

Plating and Sharing Cheese Danishes
How to Keep Cheese Danishes Soft and Fresh
FAQs
The key ingredients are crescent dough, cream cheese, granulated sugar, vanilla extract, brown sugar, melted butter, powdered sugar, and milk.
Yes, it’s perfect for beginners. The recipe uses simple steps with pre-made crescent dough, making it easy to assemble and bake.
Absolutely! You can mix the cream cheese filling up to 2 days in advance and store it covered in the refrigerator until ready to use.
Lightly dust your work surface with flour to prevent the crescent dough from sticking and make rolling easier.
Print
Cheese Danishes Recipe
- Total Time: 35 minutes
- Yield: 8 1x
Description
Irresistible homemade Cheese Danishes bring European bakery magic straight to kitchen counters. Flaky pastry envelops creamy cheese filling, promising delightful moments of pure culinary pleasure you’ll savor with each delectable bite.
Ingredients
Main Ingredients:
- 2 tubes (8 ounces each) crescent rolls
- 1 package (8 ounces) cream cheese, room temperature
Sweeteners:
- 8 tablespoons light brown sugar
- 1/4 cup granulated white sugar
- 1/2 cup powdered sugar
Finishing Ingredients:
- 2 tablespoons salted butter, melted
- 1 teaspoon pure vanilla extract (for filling)
- 1 teaspoon pure vanilla extract (for glaze)
- 4 teaspoons milk
Instructions
- Preheat the oven to 350°F (177°C) and lightly coat a baking sheet with non-stick cooking spray to prevent sticking.
- Create the cream cheese filling by blending room temperature cream cheese, granulated sugar, and vanilla extract until smooth and creamy in a medium mixing bowl.
- Carefully unroll the crescent dough, merging the triangular perforations to form 8 solid rectangular pieces across both tubes.
- Generously brush each rectangular dough piece with melted butter, then evenly distribute brown sugar over the surface.
- Transform each rectangle into a log by rolling from the long side, sealing the edges tightly. Coil each log into a circular shape, tucking the end underneath and creating a small central indentation for filling.
- Arrange the coiled dough pieces on the prepared baking sheet, spacing them approximately 2 inches apart. Delicately spoon cream cheese mixture into the center of each coil.
- Bake for 15-18 minutes until the pastries achieve a golden brown color and appear puffy and elevated.
- While baking, whisk powdered sugar, vanilla extract, and milk in a small bowl to create a smooth glaze, adjusting milk quantity for desired drizzling consistency.
- After removing from the oven, allow danishes to cool for 5 minutes. Drizzle glaze over warm pastries and serve immediately to enjoy optimal flavor and texture.
Notes
- Allow cream cheese to sit at room temperature for about 30 minutes before mixing to ensure a smooth, lump-free filling that blends easily.
- Work with crescent dough quickly and gently to prevent it from warming up and becoming too sticky, which can make shaping difficult.
- Create a slightly deeper well in the center of each danish to help contain the cream cheese filling and prevent excessive leaking during baking.
- Adjust the glaze by adding milk or powdered sugar gradually to achieve the perfect drizzling texture that’s neither too thick nor too runny.
- Prep Time: 20 minutes
- Cook Time: 15 minutes
- Category: Breakfast, Snacks, Desserts
- Method: Baking
- Cuisine: Danish
Nutrition
- Serving Size: 8
- Calories: 240
- Sugar: 12 g
- Sodium: 250 mg
- Fat: 10 g
- Saturated Fat: 5 g
- Unsaturated Fat: 3 g
- Trans Fat: 0 g
- Carbohydrates: 34 g
- Fiber: 1 g
- Protein: 3 g
- Cholesterol: 30 mg
Lena Martinez
Contributing Writer & Culinary Educator
Expertise
Southwestern and Latin American cuisines, Vegetarian and plant-based recipe development, Culinary education and community outreach
Education
Santa Fe Community College, Santa Fe, NM
Certificate in Culinary Arts
Emphasized Southwestern cuisine and sustainable cooking practices
Lena grew up surrounded by the colors, spices, and traditions of the Southwest – flavors that sparked her love for bold, honest cooking. After earning her Culinary Arts certificate at Santa Fe Community College, she made it her mission to teach home cooks how to create flavorful, plant-powered meals without the fuss.
Her recipes are packed with vibrant ingredients, simple steps, and the kind of heart that turns a regular meal into something you’ll want to share. Outside the kitchen, Lena spends her time wandering farmers’ markets, trading family recipes, and helping young chefs find their voice through food.