The Ultimate Cheesy Arancini Balls Recipe: Golden Crispy Goodness
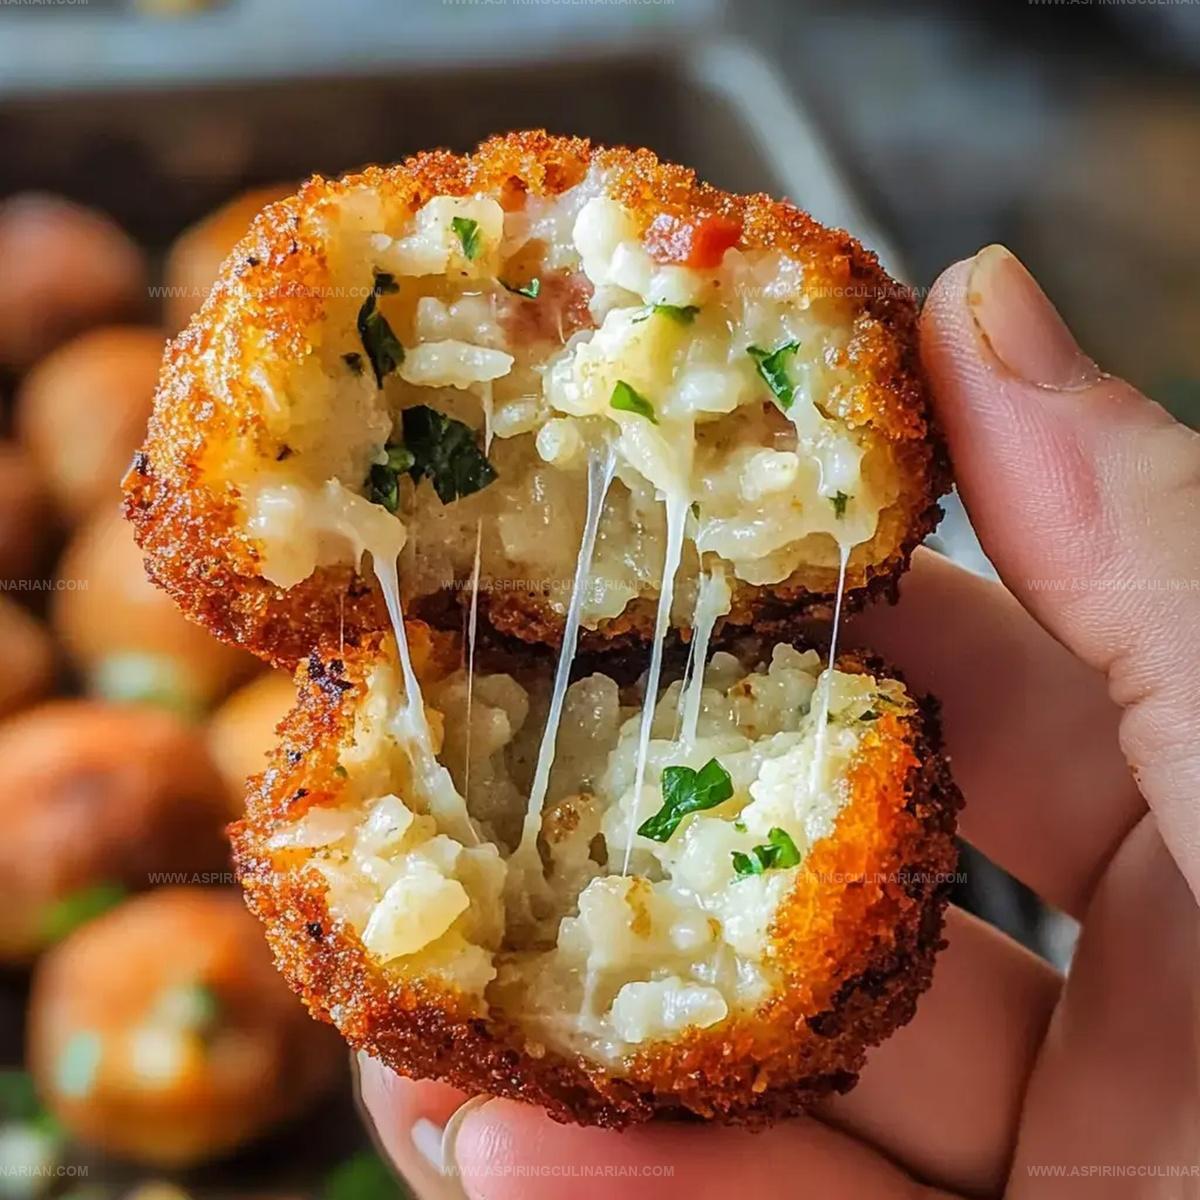
Crispy golden spheres of risotto, packed with melted mozzarella cheesy arancini balls, capture the heart of Italian street food magic.
These delectable rice fritters originate from Sicily’s rich culinary traditions.
Each bite delivers a crunchy exterior that gives way to a creamy, cheese-filled center.
Restaurants across Italy celebrate this beloved snack with passion and pride.
The combination of soft rice, sharp parmesan, and gooey mozzarella creates an irresistible texture that dances on your palate.
These bite-sized treats work perfectly as appetizers or party snacks that spark conversation.
You’ll fall in love with this simple yet impressive dish that brings a taste of Naples right to your kitchen.
Why Italian Rice Balls Are Worth the Effort

Ingredients Needed for Authentic Italian Rice Balls
Main Ingredients:Aromatics and Flavor Enhancers:Coating and Frying Ingredients:Additional Ingredients:How to Craft Italian Rice Balls Step-by-Step

Step 1: Sizzle The Aromatics
Grab a skillet and warm some oil with butter.
Toss in finely chopped onions and let them dance until they turn a beautiful golden brown, releasing their sweet, fragrant essence.
Step 2: Introduce Savory Ham
Sprinkle diced ham into the skillet, letting it sizzle and crisp up to a lovely golden color that adds depth and richness to your dish.
Step 3: Embrace The Rice
Pour in your rice, gently stirring to ensure each grain gets a luxurious coating of the flavorful oil and butter mixture.
Step 4: Splash Of Wine
Pour in a splash of white wine, allowing it to simmer and evaporate, leaving behind a subtle, sophisticated flavor.
Step 5: Create Creamy Risotto Base
Gradually add hot broth and a pinch of salt.
Let the rice simmer gently, absorbing the liquid and becoming wonderfully creamy and tender.
Step 6: Add Green Freshness
Fold in sweet green peas, letting them cook briefly to maintain their vibrant color and crisp texture.
Step 7: Rapid Cooling
Spread the risotto mixture onto a baking sheet, allowing it to cool quickly and reach room temperature.
Step 8: Herbaceous Finish
Sprinkle in fresh chopped parsley and grated parmesan, mixing thoroughly to distribute the flavors evenly.
Step 9: Shape With Care
Using slightly dampened hands, form the cooled mixture into perfect round balls.
Step 10: Cheesy Surprise
Create a small pocket in each rice ball and tuck a cube of mozzarella inside for a molten, cheesy center.
Step 11: Create A Crispy Coating
Roll each ball first in flour, then dip in beaten egg, and finally coat with breadcrumbs for an irresistible crunch.
Step 12: Prepare For Frying
Heat vegetable oil in a deep pan until it reaches 350 degrees Fahrenheit.
Step 13: Golden Transformation
Carefully lower the rice balls into the hot oil, frying in small batches until they turn a gorgeous golden brown.
Step 14: Serve With Flair
Transfer the arancini to paper towels to drain excess oil.
Sprinkle with a touch of salt and serve piping hot, ready to delight your guests.
Top Tips for Golden, Crispy Rice Balls

Italian Rice Ball Recipe Ideas and Add-Ons
Serving Italian Rice Balls Like a Pro
Storing Italian Rice Balls After Cooking
FAQs
The key ingredients are rice, ham, peas, mozzarella, parmesan, parsley, eggs, breadcrumbs, and broth.
While they require multiple steps, home cooks can easily master arancini with practice and patience.
Arborio or carnaroli rice are ideal because they have high starch content that helps rice balls hold together.
Yes, you can prepare the rice mixture in advance and refrigerate before forming and frying the balls.
Print
Cheesy Arancini Balls Recipe
- Total Time: 1 hour 5 minutes
- Yield: 6 1x
Description
Sicilian comfort meets culinary artistry in these golden cheesy arancini balls, crispy outside and creamy inside. Packed with rich risotto and melted mozzarella, these irresistible bites invite you to savor a taste of Italian tradition.
Ingredients
Primary Ingredients:
- 2 cups Jasmine rice
- 5 cups hot chicken broth
- 1 cup Chardonnay (dry white wine)
Protein and Cheese Components:
- 1 cup ham, finely diced (3 ounces)
- 1 cup parmesan cheese, shredded
- 4 ounces mozzarella, cut into 24 cubes
- 3 large eggs, beaten
Supporting Ingredients:
- 2 tablespoons olive oil
- 2 tablespoons unsalted butter
- 1 medium onion, finely diced (1 cup)
- 1 teaspoon salt
- 1 cup frozen peas, thawed
- 1/3 cup parsley, finely chopped
- 1 cup all-purpose flour
- 1 1/2 cups Italian bread crumbs
- Oil for frying
Instructions
- Gently caramelize diced onions in a blend of oil and butter until they turn a soft, translucent golden hue.
- Introduce diced ham to the pan, sautéing until edges crisp and turn a rich, appetizing brown.
- Incorporate rice, carefully stirring to ensure each grain gets evenly coated with the fragrant oil.
- Deglaze the pan with white wine, allowing the liquid to completely evaporate and infuse the rice with subtle flavor.
- Pour in hot broth, seasoning with salt, and allow the mixture to simmer gently for 15-17 minutes until rice becomes tender and liquid absorbs.
- Fold in sweet green peas, cooking for an additional 2 minutes to maintain their vibrant color and crisp texture.
- Spread the rice mixture onto a baking sheet, allowing it to cool and set completely at room temperature.
- Fold chopped fresh parsley and grated parmesan cheese into the cooled rice, creating a harmonious flavor profile.
- Using moistened hands, carefully shape the rice mixture into uniform, compact balls.
- Create a small pocket in each rice ball and nestle a cube of mozzarella at its center.
- Create a three-stage coating: dust each ball in flour, dip in beaten egg, then roll thoroughly in breadcrumbs.
- Heat vegetable oil to 350°F in a deep, heavy-bottomed pan, ensuring consistent temperature.
- Carefully lower rice balls into hot oil, frying in small batches until they achieve a crispy, golden-brown exterior.
- Transfer fried rice balls to paper towels to drain excess oil, sprinkle with a pinch of salt, and serve immediately while hot and crispy.
Notes
- Prevent sticky hands by keeping fingers wet when forming rice balls, ensuring smooth and even shaping.
- Chill the rice mixture thoroughly before forming balls to help them maintain structure and prevent falling apart during frying.
- Use high-quality breadcrumbs for extra crispy exterior, considering panko for ultimate crunchiness.
- Try alternative fillings like sun-dried tomatoes or different cheeses to customize the rice balls for various dietary preferences.
- Prep Time: 45 minutes
- Cook Time: 20 minutes
- Category: Appetizer, Snacks
- Method: Frying
- Cuisine: Italian
Nutrition
- Serving Size: 6
- Calories: 250
- Sugar: 2 g
- Sodium: 400 mg
- Fat: 10 g
- Saturated Fat: 4 g
- Unsaturated Fat: 6 g
- Trans Fat: 0 g
- Carbohydrates: 30 g
- Fiber: 1 g
- Protein: 8 g
- Cholesterol: 70 mg
Nathaniel Brooks
Founder & Recipe Developer
Expertise
Farm-to-table cuisine, Seasonal recipe development, Culinary storytelling
Education
Ivy Tech Community College – Indianapolis, IN
Culinary Arts / Hospitality Administration & Events
Focused on hands-on training in classical and modern culinary techniques.
Nathaniel’s story starts in the foothills of the Appalachian Mountains, where farm stands, backyard gardens, and old family recipes shaped his love for real food. After graduating from Ivy Tech Community College in Indianapolis, he spent years working in farm-to-table kitchens, learning how to turn local, seasonal ingredients into something memorable.
Today, Nathaniel pours that same spirit into every single recipe on Aspiring Culinarian – recipes that feel real, comforting, and connected to the land. When he’s not in the kitchen, you’ll find him foraging wild herbs, chasing sunsets with his camera, or writing about the flavors that shaped his roots.