
Irresistible Cheesy Pizza Bombs Recipe: Bite-Sized Joy
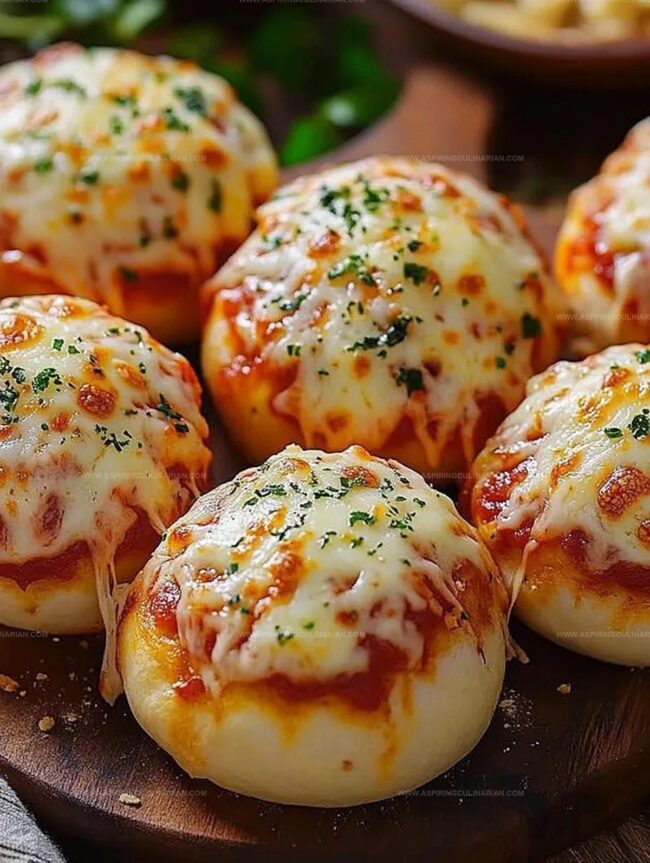
Bursting with melted cheese and wrapped in golden dough, these pizza bombs deliver an explosion of flavor that will make your taste buds dance.
Every bite of this pizza bombs recipe promises a delightful surprise waiting to unfold.
Crispy on the outside and gooey on the inside, they bring the best of pizza into a compact, irresistible package.
Packed with savory ingredients and simple to prepare, these little bombs are perfect for snacking or entertaining.
The combination of soft bread, rich cheese, and zesty marinara creates a mouthwatering experience that transforms an ordinary meal into something extraordinary.
Friends and family will be begging you to make these again and again.
Dive into this crowd-pleasing recipe and watch as these pizza bombs become your new favorite go-to appetizer.
Cheesy Pizza Bombs Win Over Every Pizza Fan
Ingredients You Need For Cheesy Pizza Bombs Tonight
Dough Base:Filling Ingredients:Topping and Seasoning Ingredients:Cheesy Pizza Bombs Quick And Simple Prep Method
Step 1: Fire Up the Oven
Get your oven ready by heating it to 375°F (190°C).
Grab a baking sheet or muffin tin and give it a light coating of cooking spray to prevent any sticky situations.
Step 2: Flatten the Dough
Take each biscuit and transform it into a perfect circle about 4 inches wide.
Use your hands or a rolling pin to gently spread the dough into a thin, even disk.
Step 3: Layer Flavor Foundations
Spread your culinary magic by adding these tasty ingredients to the center of each dough circle:Step 4: Create Flavor Pouches
Become a dough-sealing master by carefully gathering the edges of each circle.
Pinch the sides together with precision, creating a completely sealed ball.
Double-check for any potential cheese escape routes!
Step 5: Arrange for Baking Brilliance
Position each pizza bomb seam-side down on your prepared baking surface.
Give them a little breathing room to ensure even cooking.
Step 6: Add Tantalizing Toppings
Elevate your pizza bombs with these finishing touches:Step 7: Bake to Golden Perfection
Slide your creation into the preheated oven.
Bake for 12-15 minutes until the bombs turn a beautiful golden brown and cook through completely.
Step 8: Serve and Enjoy
Let the pizza bombs cool for a moment.
Serve them warm with a side of extra pizza sauce for dipping.
Watch as everyone devours these delightful flavor explosions!
Cheesy Pizza Bombs Baking Advice For The Best Batch
Cheesy Pizza Bombs Flavors That Shake Things Up
Best Ways To Serve Cheesy Pizza Bombs Hot
Store Cheesy Pizza Bombs For Snack Attacks Anytime
FAQs
Completely sealing prevents cheese from leaking out during baking, ensuring your pizza bombs stay intact and maintain their delicious filling.
Absolutely! You can experiment with various cheeses like cheddar or provolone, swap pepperoni for ham, or add vegetables like diced bell peppers or mushrooms.
Look for a golden brown exterior and ensure the dough looks firm and puffy. When gently pressed, the bombs should feel set and not doughy.
Melted butter helps create a beautiful golden color, adds flavor, and helps the Italian seasoning and Parmesan cheese stick to the surface of the pizza bombs.
Print
Cheesy Pizza Bombs Recipe
- Total Time: 30 minutes
- Yield: 8 1x
Description
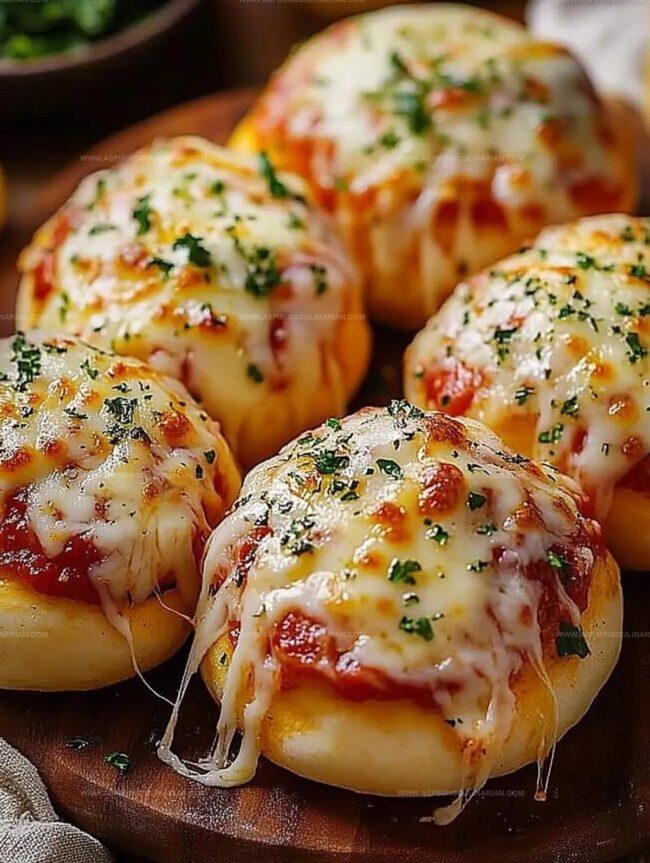
Savory cheesy pizza bombs deliver a delightful explosion of Italian-inspired flavors in one irresistible bite. Crispy golden exteriors give way to molten cheese and zesty marinara, promising a mouthwatering experience you’ll crave again and again.
Ingredients
Main Ingredients:
- 1 can (16 ounces / 454 grams) refrigerated biscuit dough (8 biscuits)
- 1 cup shredded mozzarella cheese
- 1/2 cup pizza sauce (plus extra for dipping)
Protein and Seasonings:
- 1/4 cup mini pepperoni (or regular pepperoni, chopped)
- 1 teaspoon Italian seasoning
Topping Ingredients:
- 1/4 cup melted butter
- 1 tablespoon grated Parmesan cheese
Instructions
- Prepare the oven by heating to 375F (190C) and lightly greasing a baking sheet or muffin tin to ensure easy release of the pizza bombs.
- Gently flatten each biscuit into a 4-inch circular shape using your fingertips or a rolling pin, creating a thin, even base for the fillings.
- Dollop a small amount of pizza sauce in the center of each flattened biscuit, then layer with shredded mozzarella and pepperoni pieces to create a flavor-packed core.
- Carefully gather the edges of the dough, meticulously pinching and sealing to form a completely enclosed ball, eliminating any potential cheese leakage during baking.
- Position the formed pizza bombs seam-side down on the prepared baking surface, spacing them to allow even heat circulation.
- Enhance the exterior by generously brushing with melted butter, then sprinkle with a blend of Italian seasoning and grated Parmesan for an aromatic finish.
- Bake in the preheated oven for 12-15 minutes until the bombs achieve a golden-brown exterior and are thoroughly cooked through.
- Let the pizza bombs rest briefly before serving, accompanied by additional pizza sauce for a delightful dipping experience.
Notes
- Seal tightly to prevent cheese leakage by pinching dough edges firmly and ensuring no gaps are visible during preparation.
- Try alternative fillings like BBQ chicken, ham and Swiss, or vegetarian options with roasted vegetables for diverse flavor profiles.
- Use gluten-free biscuit dough or low-carb alternatives to accommodate dietary restrictions without compromising taste and texture.
- Enhance flavor by adding fresh herbs like basil or oregano directly into the filling for an extra aromatic and fresh taste experience.
- Prep Time: 15 minutes
- Cook Time: 15 minutes
- Category: Snacks, Appetizer, Dinner
- Method: Baking
- Cuisine: Italian
Nutrition
- Serving Size: 8
- Calories: 260
- Sugar: 2 g
- Sodium: 600 mg
- Fat: 16 g
- Saturated Fat: 8 g
- Unsaturated Fat: 8 g
- Trans Fat: 0 g
- Carbohydrates: 22 g
- Fiber: 1 g
- Protein: 7 g
- Cholesterol: 25 mg
Lena Martinez
Contributing Writer & Culinary Educator
Expertise
Southwestern and Latin American cuisines, Vegetarian and plant-based recipe development, Culinary education and community outreach
Education
Santa Fe Community College, Santa Fe, NM
Certificate in Culinary Arts
Emphasized Southwestern cuisine and sustainable cooking practices
Lena grew up surrounded by the colors, spices, and traditions of the Southwest – flavors that sparked her love for bold, honest cooking. After earning her Culinary Arts certificate at Santa Fe Community College, she made it her mission to teach home cooks how to create flavorful, plant-powered meals without the fuss.
Her recipes are packed with vibrant ingredients, simple steps, and the kind of heart that turns a regular meal into something you’ll want to share. Outside the kitchen, Lena spends her time wandering farmers’ markets, trading family recipes, and helping young chefs find their voice through food.