
The Best Chewy Granola Bars Recipe for Sweet Snacking Bliss
Crafting homemade chewy granola bars at home sparks pure culinary joy and satisfaction.
These delightful snacks pack a nutritious punch with every bite.
Wholesome ingredients blend seamlessly to create a treat that satisfies hunger and delights taste buds.
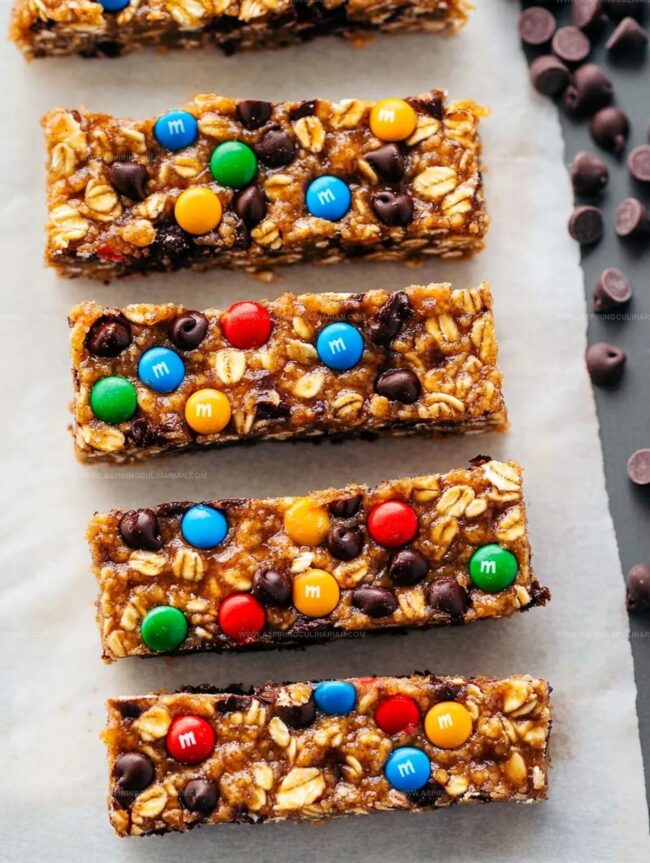
Each bar bursts with natural sweetness and hearty textures that make store-bought versions pale in comparison.
Rolled oats, honey, and nuts come together in a simple dance of flavors that elevate your snacking experience.
You’ll love how quick and easy these bars are to make with minimal kitchen skills required.
Pack them for school, work, or outdoor adventures, and watch everyone ask for seconds.
Chewy Granola Bars: Snack Highlights
Everything Needed for Chewy Granola Bars
Base Ingredients:Dry Ingredients:Topping Ingredients:Instructions for Homemade Granola Bars

Step 1: Prepare Baking Base
Line a square baking pan with parchment paper, ensuring extra paper hangs over the edges for easy bar removal.
This clever trick helps you lift out the entire batch of granola bars smoothly.
Step 2: Create Sticky Binding
Combine peanut butter, honey, and coconut oil in a saucepan.
Gently heat over medium temperature, stirring continuously until everything melts together.
Let the mixture simmer briefly, then remove from heat.
Allow it to cool slightly before mixing in salt and vanilla for extra flavor depth.
Step 3: Blend Crunchy Elements
Roughly chop cashews to add interesting texture.
Fold in:Let the mixture cool until it’s just warm.
Gently fold in chocolate chips and colorful M&M’s for a fun surprise in every bite.
Step 4: Shape Delicious Bars
Press the mixture firmly into the prepared pan using the bottom of a measuring cup.
This ensures compact, sturdy bars.
Sprinkle additional chocolate chips and M&M’s on top, pressing them gently into the surface.
Step 5: Chill and Slice
Refrigerate the pan for one hour to help bars set completely.
Use the parchment paper edges to lift the entire batch out of the pan.
Slice into 12 perfect individual granola bars using a sharp knife.
Tips for Soft, Sweet Granola Bars
New Granola Bar Mix-Ins and Swaps
Serving Chewy Granola Bars on the Go
Storing Granola Bars Perfectly
FAQs
These bars offer balanced nutrition with whole grains from oats, protein from cashews, and natural sweeteners like honey. They provide energy and satisfying nutrients compared to store-bought versions.
Yes, you can replace cashews with almonds or peanuts, swap honey with maple syrup, and use different chocolate chips or candy toppings based on your preference.
When stored in an airtight container at room temperature, these bars remain fresh for 5-7 days. For longer preservation, refrigerate and they’ll last up to 2 weeks.
Print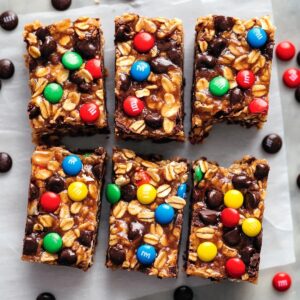
Chewy Granola Bars Recipe
- Total Time: 1 hour 15 minutes
- Yield: 12 1x
Description
Homemade chewy granola bars deliver irresistible comfort and wholesome goodness straight from your kitchen. Packed with nutritious ingredients and simple charm, these bars promise a delightful snack you’ll crave anytime.
Ingredients
Base Ingredients:
- 3/4 cup creamy peanut butter
- 1/2 cup honey
- 2 tablespoons (30 milliliters) coconut oil (solid)
- 1/2 teaspoon salt (adjust if using salted nuts/peanut butter)
- 1 1/2 teaspoons vanilla extract
Dry Ingredients:
- 2 cups old-fashioned oats
- 1/4 cup shredded coconut
- 3/4 cup roasted and salted cashews
Mix-ins:
- 6 tablespoons (85 grams) mini chocolate chips, divided
- 6 tablespoons (85 grams) mini M&M’s, divided
Instructions
- Prepare the baking vessel by lining an 8×8 or 9×9 inch pan with parchment paper, ensuring excess paper hangs over the edges for effortless removal.
- Create the binding base by combining peanut butter, honey, and coconut oil in a saucepan. Gently heat over medium temperature, stirring continuously until fully melted. Allow the mixture to simmer for one minute, then remove from heat and let cool for approximately 3 minutes. Incorporate salt and vanilla extract, mixing thoroughly.
- Roughly chop cashews into uneven pieces. Fold oats, shredded coconut, and chopped cashews into the cooled liquid mixture. Allow the combined ingredients to rest for 15-25 minutes until reaching a tepid temperature.
- Gently fold chocolate chips and M&M’s into the granola mixture, ensuring even distribution throughout the base.
- Transfer the mixture to the prepared pan, using a measuring cup to compress the ingredients firmly and create a uniform layer. Strategically sprinkle additional chocolate chips and M&M’s across the surface, delicately pressing them into the base.
- Refrigerate the pan for one hour to allow the bars to set and solidify completely.
- Remove the hardened granola bars from the refrigerator, lift the entire block using the parchment paper overhang, and slice into 12 consistent portions.
Notes
- Customize Texture by adjusting the amount of dry ingredients to achieve desired chewiness or crunchiness.
- Prevent Sticky Bars by ensuring the binding mixture is fully cooled before adding dry ingredients to maintain structural integrity.
- Create Dietary Alternatives by swapping peanut butter with almond or sunflower seed butter for nut-free options and using gluten-free oats for celiac-friendly version.
- Enhance Flavor Profiles by experimenting with different mix-ins like dried fruits, seeds, or alternative chocolate types to personalize the granola bars.
- Prep Time: 15 minutes
- Cook Time: 1 hour
- Category: Breakfast, Snacks, Desserts
- Method: Baking
- Cuisine: American
Nutrition
- Serving Size: 12
- Calories: 190
- Sugar: 10g
- Sodium: 70mg
- Fat: 9g
- Saturated Fat: 3g
- Unsaturated Fat: 6g
- Trans Fat: 0g
- Carbohydrates: 24g
- Fiber: 2g
- Protein: 4g
- Cholesterol: 0mg
Lena Martinez
Contributing Writer & Culinary Educator
Expertise
Southwestern and Latin American cuisines, Vegetarian and plant-based recipe development, Culinary education and community outreach
Education
Santa Fe Community College, Santa Fe, NM
Certificate in Culinary Arts
Emphasized Southwestern cuisine and sustainable cooking practices
Lena grew up surrounded by the colors, spices, and traditions of the Southwest – flavors that sparked her love for bold, honest cooking. After earning her Culinary Arts certificate at Santa Fe Community College, she made it her mission to teach home cooks how to create flavorful, plant-powered meals without the fuss.
Her recipes are packed with vibrant ingredients, simple steps, and the kind of heart that turns a regular meal into something you’ll want to share. Outside the kitchen, Lena spends her time wandering farmers’ markets, trading family recipes, and helping young chefs find their voice through food.