Easy Chicken Bacon Ranch Sliders Recipe: Irresistible Party Bites
Weeknight dinners demand quick, crowd-pleasing meals that pack serious flavor into every bite.
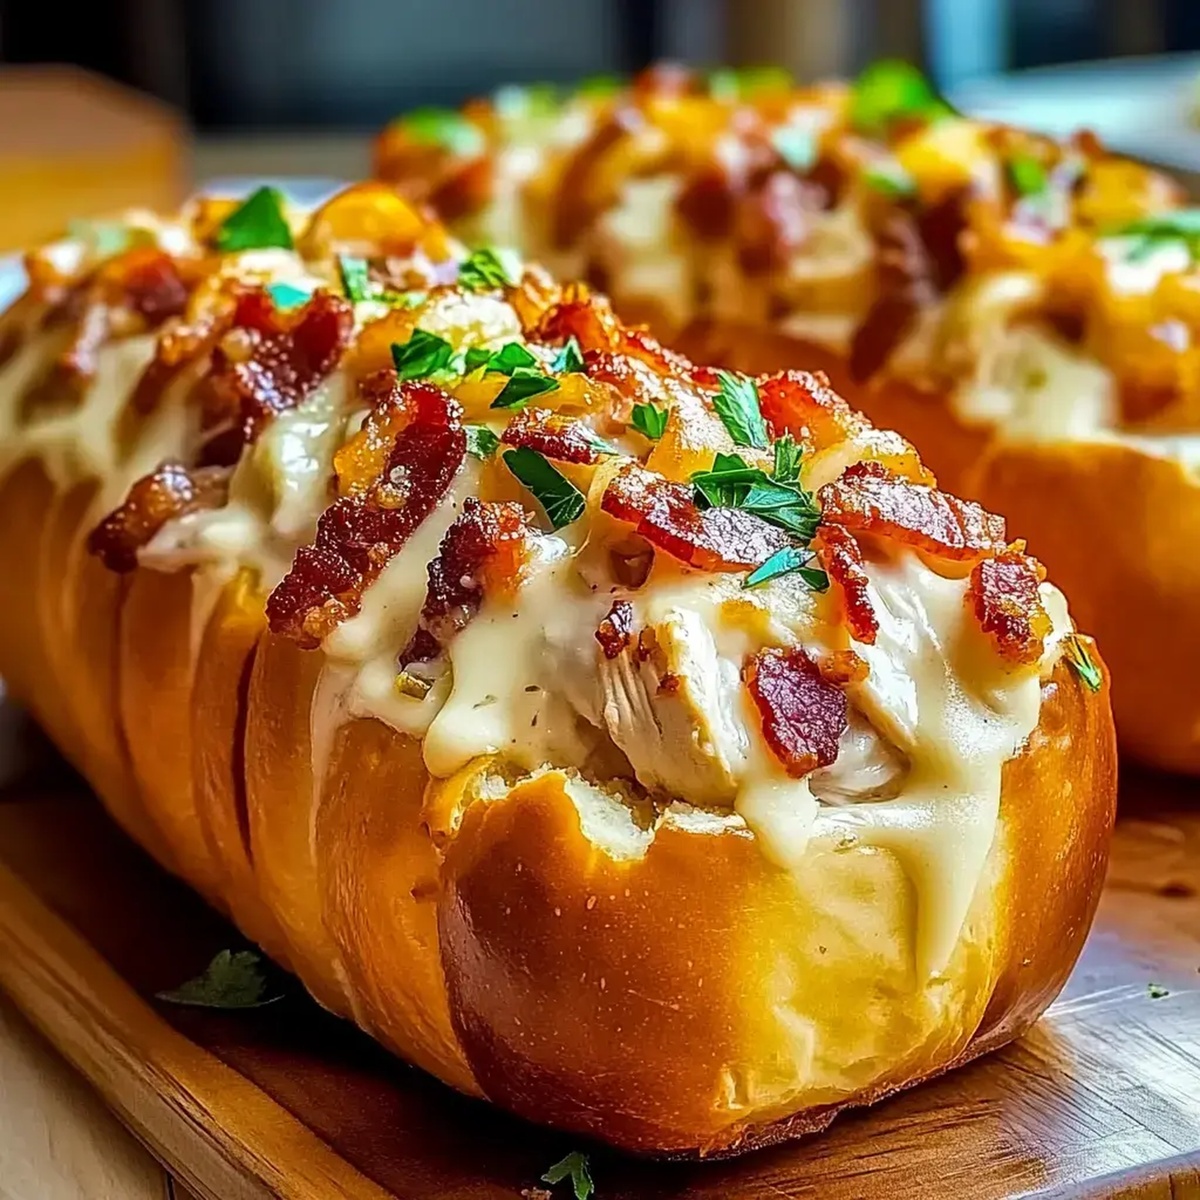
These mouthwatering chicken bacon ranch sliders combine crispy bacon, tender chicken, and zesty ranch dressing in a compact, irresistible package.
The sliders blend savory ingredients that make taste buds dance with excitement.
Melted cheese adds a creamy layer of indulgence to each mini sandwich.
Small but mighty, these sliders deliver big on satisfaction and convenience.
Crisp Hawaiian rolls provide the perfect golden base for this delectable ensemble.
You’ll want to make extra because these sliders disappear faster than you can serve them.
Loaded Hawaiian Roll Sliders Savory Details

Loaded Hawaiian Slider Ingredient Checklist
Main Ingredients:Flavor Enhancers:Topping and Seasoning:Making Loaded Hawaiian Roll Sliders

Step 1: Warm Up the Oven
Crank your oven to a cozy 350°F and give your 9×13 baking pan a quick spray of cooking oil to prevent any sticky situations.
Step 2: Create the Foundation
Gently lay out the bottom halves of your Hawaiian rolls in the prepared pan, creating a soft, pillowy base for your sliders.
Step 3: Whip Up the Flavor Explosion
In a mixing bowl, combine these tasty ingredients:Mix everything until it’s well blended and looks absolutely mouthwatering.
Step 4: Build Your Slider Masterpiece
Spread the delicious chicken mixture evenly across the roll bottoms.
Sprinkle an extra layer of cheese on top for maximum gooeyness.
Crown each slider with its matching roll top.
Step 5: Add the Golden Touch
Melt some butter and stir in garlic powder.
Lovingly brush this magical mixture over the entire tray of sliders, ensuring every inch gets some flavor love.
Step 6: Bake to Perfection
Cover the pan with foil and slide it into the preheated oven.
Bake for 15 minutes until the cheese transforms into a melty, dreamy blanket and the rolls turn a gorgeous golden brown.
Step 7: Serve and Devour
Remove from the oven, let cool for a moment, then watch these sliders disappear in record time.
Get ready for some serious compliments!
Pro Tips for Better Hawaiian Sliders

Tasty Ways to Change Up Sliders

Serving Loaded Hawaiian Sliders

How to Store Hawaiian Roll Sliders
FAQs
Yes, you can substitute chicken with ham, pulled pork, or turkey for variety in these sliders.
Pat chicken mixture dry before spreading and avoid adding extra liquid to maintain crisp roll texture.
These sliders can be assembled ahead of time and refrigerated, then baked just before serving for convenient preparation.
You can replace ranch with sour cream mixed with dried herbs or use mayonnaise with garlic powder as an alternative.
Print
Chicken Bacon Ranch Sliders Recipe
- Total Time: 35 minutes
- Yield: 12 1x
Description
Savor mouthwatering Chicken Bacon Ranch Sliders that blend zesty ranch, crispy bacon, and tender chicken in one irresistible bite. Perfect for game day or casual gatherings, these sliders will delight your taste buds and satisfy hungry crowds with minimal effort.
Ingredients
Main Ingredients:
- 4 cups cooked shredded chicken
- 15 Hawaiian sweet rolls, sliced
- 2 cups shredded cheddar cheese
Protein and Cheese Toppings:
- 1/2 cup crumbled bacon
- 3 tablespoons Parmesan cheese
- 1 cup Ranch dressing
Seasoning and Binding Ingredients:
- 1/4 cup butter, melted
- 1 teaspoon garlic powder
Instructions
- Prepare the baking dish by lightly coating a 9×13 inch pan with cooking spray, ensuring even coverage for easy removal.
- Carefully separate the Hawaiian roll bottoms and arrange them snugly in the prepared pan, creating a uniform base for the sliders.
- In a mixing bowl, combine shredded chicken with creamy ranch dressing, crispy crumbled bacon, and grated Parmesan cheese, blending until ingredients are well incorporated.
- Generously spread the chicken mixture across the roll bottoms, creating an even layer that covers each roll completely.
- Sprinkle shredded cheese over the chicken mixture, allowing it to cascade between the rolls and create pockets of melty goodness.
- Gently place the roll tops back onto the prepared base, creating a complete slider sandwich.
- Melt butter and infuse it with garlic powder, whisking to create a fragrant and flavorful topping.
- Carefully brush the garlic butter mixture over the roll tops, ensuring each slider is evenly coated for maximum flavor.
- Cover the pan with aluminum foil, creating a sealed environment for even heating.
- Bake in a preheated 350°F oven for 15-20 minutes, or until the cheese becomes completely melted and the rolls are heated through.
- Remove foil in the last 3-5 minutes of baking to allow the tops to become golden and slightly crisp.
Notes
- Choose pre-cooked rotisserie chicken for quicker preparation and enhanced flavor profile.
- Swap ranch dressing with Greek yogurt or low-fat alternatives for healthier version.
- Toast Hawaiian rolls lightly before assembling to enhance crispiness and prevent soggy texture.
- Customize filling by adding diced jalapeños or green onions for extra zest and personalized touch.
- Prep Time: 15 minutes
- Cook Time: 20 minutes
- Category: Lunch, Dinner, Appetizer, Snacks
- Method: Baking
- Cuisine: American
Nutrition
- Serving Size: 12
- Calories: 320
- Sugar: 2g
- Sodium: 720mg
- Fat: 18g
- Saturated Fat: 9g
- Unsaturated Fat: 6g
- Trans Fat: 0g
- Carbohydrates: 27g
- Fiber: 1g
- Protein: 16g
- Cholesterol: 60mg
Lena Martinez
Contributing Writer & Culinary Educator
Expertise
Southwestern and Latin American cuisines, Vegetarian and plant-based recipe development, Culinary education and community outreach
Education
Santa Fe Community College, Santa Fe, NM
Certificate in Culinary Arts
Emphasized Southwestern cuisine and sustainable cooking practices
Lena grew up surrounded by the colors, spices, and traditions of the Southwest – flavors that sparked her love for bold, honest cooking. After earning her Culinary Arts certificate at Santa Fe Community College, she made it her mission to teach home cooks how to create flavorful, plant-powered meals without the fuss.
Her recipes are packed with vibrant ingredients, simple steps, and the kind of heart that turns a regular meal into something you’ll want to share. Outside the kitchen, Lena spends her time wandering farmers’ markets, trading family recipes, and helping young chefs find their voice through food.