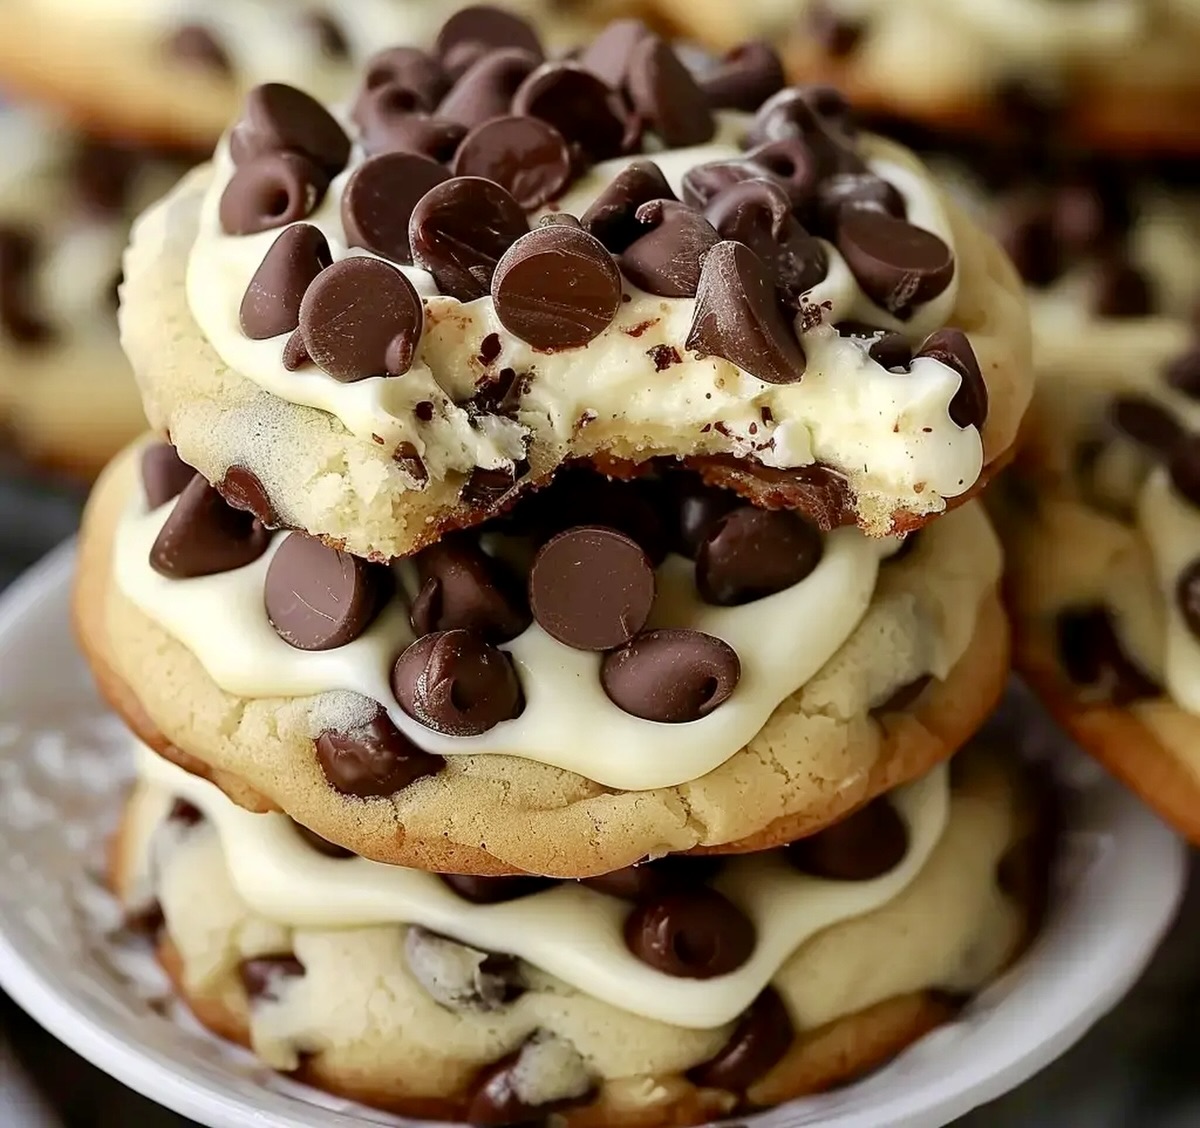
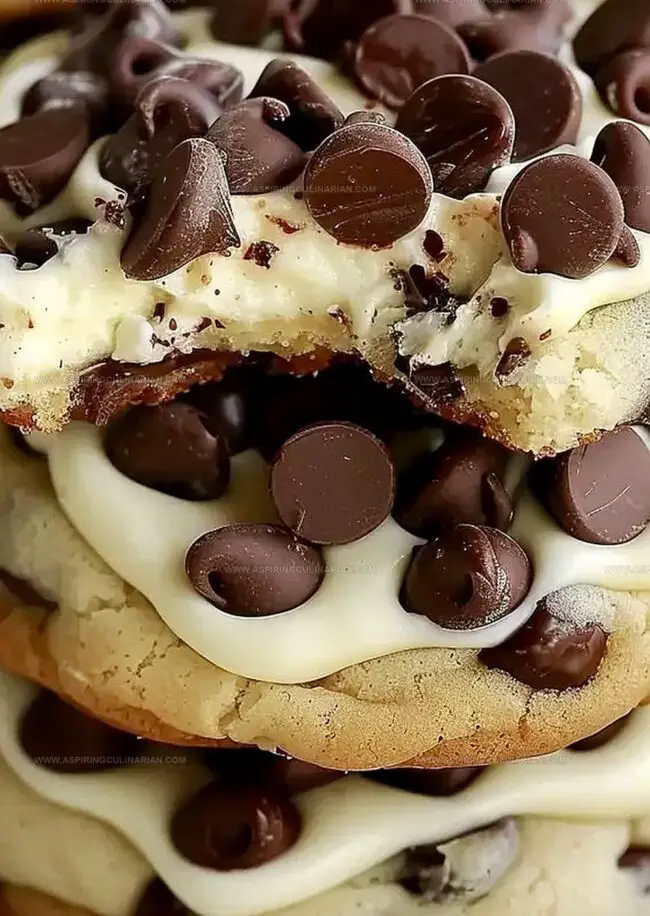
Dreamy Chocolate Chip Cheesecake Cookies Recipe for Sweet Bliss
Soft, buttery cookies packed with chocolate chip cheesecake goodness promise a delightful twist on classic treats.
These melt-in-your-mouth morsels blend creamy cheesecake with traditional chocolate chip cookie magic.
Each bite delivers rich, tangy cream cheese swirled with sweet chocolate chips that dance across your palate.
The recipe strikes a perfect balance between indulgent dessert and comforting classic.
Crumbly edges and tender centers make these cookies irresistibly tempting for any sweet tooth.
Bakers of all skill levels can whip up these decadent delights with simple ingredients and straightforward techniques.
Prepare to elevate your cookie game with this crowd-pleasing, irresistible recipe that’s sure to become a household favorite.
Chocolate Chip Cheesecake Cookies: Cookie Jar Classic
Ingredients For Cheesy Chocolate Chip Cookies
Dry Ingredients:Wet Ingredients:Sweet and Chocolate Ingredients:Baking Tools For Cookie Lovers
How To Bake Chocolate Chip Cheesecake Cookies
Step 1: Mix Dry Ingredients
Grab a medium bowl and whisk together flour, cornstarch, and baking powder until perfectly blended.
Set this magical mixture aside for later magic.
Step 2: Whip Creamy Base
In a large mixing bowl, grab an electric mixer and beat butter and cream cheese until they transform into a silky smooth mixture that looks absolutely dreamy.
Step 3: Introduce Liquid Friends
Pour in egg, milk, and vanilla extract.
Blend everything until the ingredients become best friends and create a harmonious mixture.
Step 4: Sweeten The Deal
Gradually sprinkle powdered sugar into the creamy mixture.
Keep mixing until the batter becomes light, fluffy, and irresistibly smooth.
Step 5: Create Cookie Dough
Gently fold in the dry ingredients until everything is perfectly combined.
Tenderly stir in mini chocolate chips, creating delightful pockets of chocolatey goodness.
Chill the dough in the refrigerator for about an hour to let the flavors mingle.
Step 6: Prepare Baking Station
Warm up the oven to 375F (190C).
Line two baking sheets with parchment paper, creating a welcoming surface for your cookies.
Step 7: Shape Delectable Morsels
Retrieve the chilled dough and roll it into 24-26 adorable balls.
Place them on baking sheets, leaving about 1.5 inches between each cookie.
Gently press down on each ball to create a slight flattened shape.
Step 8: Chocolate Chip Finale
For an extra burst of chocolate love, sprinkle additional mini chocolate chips on top of each cookie.
Step 9: Bake To Perfection
Slide the baking sheets into the oven and bake for approximately 10 minutes.
Watch for a gentle golden edge that signals cookie perfection.
Step 10: Cool And Celebrate
Allow cookies to rest on baking sheets for a few minutes.
Transfer them to a wire rack to cool completely.
Grab a plate, pour some milk, and indulge in your homemade Chocolate Chip Cheesecake Cookies!
Tips For Soft, Chewy Cookie Bites
Cookie Flavor Swaps & Add-Ins
Plating Cheesecake Cookies For Sharing
Storing Cookie Jar Favorites
FAQs
Cornstarch helps create a softer, more tender cookie texture by preventing excessive gluten formation and adding a delicate, melt-in-your-mouth quality to the cookies.
Yes, you can substitute mini chocolate chips with regular-sized ones, but mini chips distribute more evenly throughout the dough and provide a more balanced chocolate flavor in each bite.
Cream cheese adds richness, moisture, and a subtle tangy flavor to the cookies, making them more tender and giving them a unique cheesecake-like taste compared to traditional chocolate chip cookies.
Print
Chocolate Chip Cheesecake Cookies Recipe
- Total Time: 30 minutes
- Yield: 12 1x
Description
Delightful chocolate chip cheesecake cookies blend creamy cheesecake with classic cookie comfort. Rich flavors and textures create a memorable dessert experience for sweet enthusiasts.
Ingredients
Main Ingredients:
- 1 1/4 cups all-purpose flour
- 4 ounces (113 grams) cream cheese, softened
- 1/4 cup unsalted butter, softened
- 1 large egg
- 1 1/4 cups powdered sugar
- 5–6 tablespoons mini chocolate chips
Binding and Leavening Ingredients:
- 1/4 cup cornstarch
- 1/2 teaspoon baking powder
Flavor Enhancers:
- 1 tablespoon milk
- 1/2 teaspoon vanilla extract
Instructions
- Whisk flour, cornstarch, and baking powder in a medium bowl, creating a uniform dry mixture that will provide structure to the cookies.
- Using an electric mixer, cream butter and cream cheese until achieving a silky, homogeneous consistency that forms the rich base of the cookie.
- Incorporate egg, milk, and vanilla extract into the creamy mixture, blending thoroughly to ensure even distribution of liquid ingredients.
- Gradually introduce powdered sugar, whipping until the mixture becomes light and airy with a fluffy texture.
- Gently fold dry ingredients into the wet mixture, creating a cohesive dough. Fold in mini chocolate chips, then refrigerate for 60 minutes to enhance flavor development and improve cookie texture.
- Heat oven to 375F (190C) and line two baking sheets with parchment paper for even baking and easy cookie removal.
- Remove chilled dough and form 24-26 uniform balls, positioning them 1.5 inches apart on prepared sheets. Delicately press each ball to slightly flatten its surface.
- Optional: Garnish cookie tops with additional mini chocolate chips for extra chocolate intensity.
- Bake for 10 minutes, watching for subtle golden edges indicating perfect doneness without overcooking.
- Allow cookies to rest on baking sheets for several minutes, then transfer to a wire rack for complete cooling, enabling them to set and develop optimal texture.
Notes
- Chill the dough thoroughly for at least an hour to prevent spreading and ensure a perfectly soft, tender cookie texture.
- Use room temperature cream cheese and butter to guarantee smooth blending and prevent lumpy cookie dough.
- For gluten-free option, swap regular flour with a 1:1 gluten-free baking blend to make these cookies celiac-friendly.
- Experiment with chocolate variations like dark, milk, or white chocolate chips to customize the flavor profile and keep things exciting.
- Prep Time: 20 minutes
- Cook Time: 10 minutes
- Category: Snacks, Desserts
- Method: Baking
- Cuisine: American
Nutrition
- Serving Size: 12
- Calories: 147
- Sugar: 12 g
- Sodium: 62 mg
- Fat: 7 g
- Saturated Fat: 4 g
- Unsaturated Fat: 2 g
- Trans Fat: 0 g
- Carbohydrates: 19 g
- Fiber: 0.3 g
- Protein: 1.5 g
- Cholesterol: 25 mg
Lena Martinez
Contributing Writer & Culinary Educator
Expertise
Southwestern and Latin American cuisines, Vegetarian and plant-based recipe development, Culinary education and community outreach
Education
Santa Fe Community College, Santa Fe, NM
Certificate in Culinary Arts
Emphasized Southwestern cuisine and sustainable cooking practices
Lena grew up surrounded by the colors, spices, and traditions of the Southwest – flavors that sparked her love for bold, honest cooking. After earning her Culinary Arts certificate at Santa Fe Community College, she made it her mission to teach home cooks how to create flavorful, plant-powered meals without the fuss.
Her recipes are packed with vibrant ingredients, simple steps, and the kind of heart that turns a regular meal into something you’ll want to share. Outside the kitchen, Lena spends her time wandering farmers’ markets, trading family recipes, and helping young chefs find their voice through food.