
The Most Heavenly Chocolate Fudge Bars Recipe Ever Made
Rich chocolate fudge bars have become my ultimate sweet obsession lately.
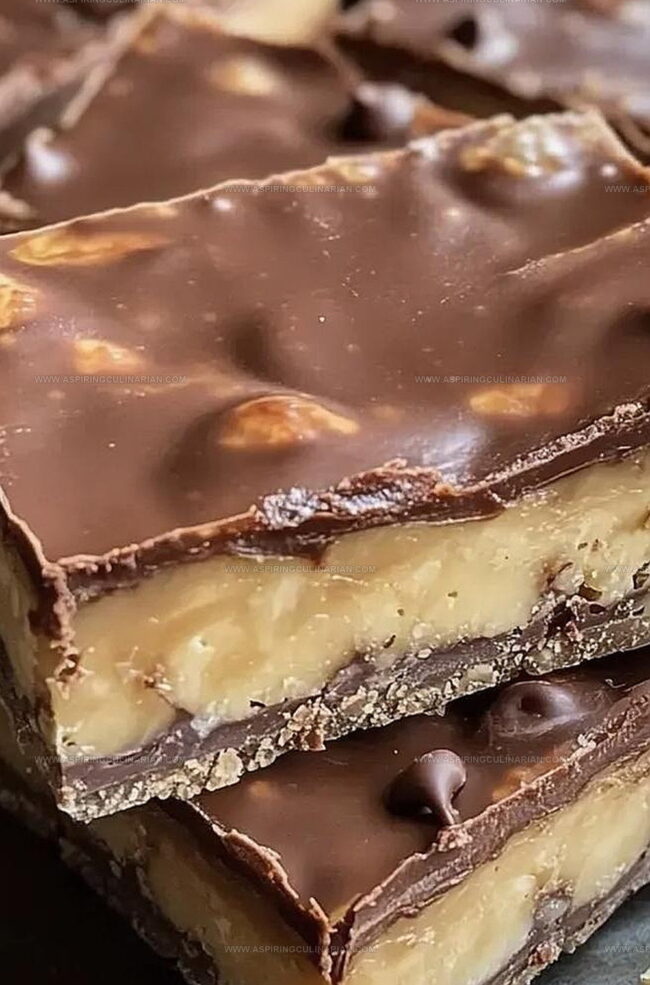
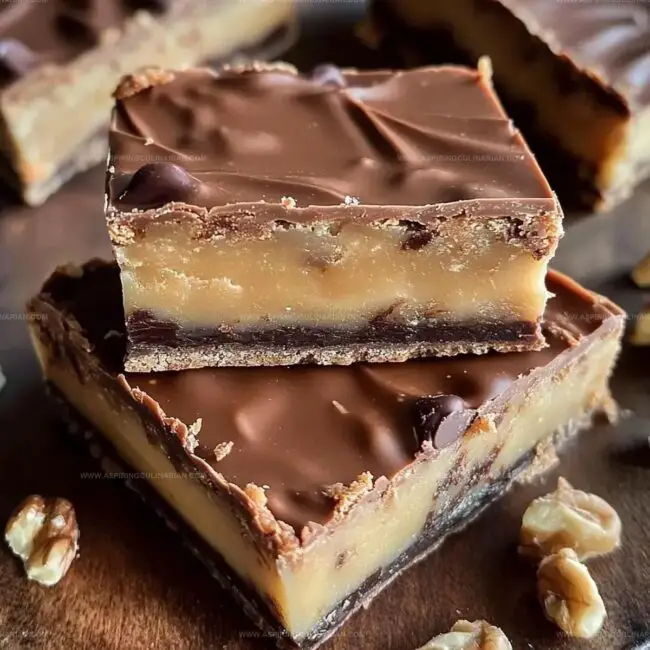
Decadent layers of smooth chocolate melt perfectly between crisp, buttery crusts.
Every bite promises pure indulgence with minimal effort.
Baking these treats feels like a delightful kitchen adventure waiting to unfold.
Amateur and professional bakers alike can master this simple recipe.
Creamy textures and intense chocolate flavors will absolutely captivate your taste buds.
Jump into this delectable journey and create something unforgettably delicious.
Rich Chocolate Bars: Reasons They’ll Disappear Fast
The Chocolate Bar Ingredients That Make All the Difference
Base Ingredients:Flavor Enhancers:Binding and Leavening Ingredients:Making Rich Chocolate Bars – A Simple, Stepwise Approach
Step 1: Prep The Oven
Warm up your oven to 350°F (175°C).
Take an 8×8-inch baking pan and create a smooth parchment paper lining, allowing some overhang for easy removal later.
Step 2: Whip Up Creamy Base
In a large mixing bowl, grab your electric mixer and blend together:Whip these ingredients until they transform into a light, fluffy cloud-like mixture that looks almost like soft white frosting.
Step 3: Splash Of Flavor
Pour in vanilla extract and mix thoroughly, ensuring the aromatic liquid integrates completely with the creamy butter-sugar base.
Step 4: Dry Ingredient Magic
In a separate bowl, combine your dry ingredients:Whisk these together until they’re perfectly blended and free of any lumps.
Step 5: Merge Wet And Dry
Gradually introduce the dry ingredient mixture into the wet ingredients.
Use a gentle mixing technique, stirring just until everything comes together smoothly.
Avoid overmixing to keep the bars tender.
Step 6: Chocolate Chip Adventure
Gently fold in your chocolate chips and optional nuts, distributing them evenly throughout the batter for maximum deliciousness.
Step 7: Baking Brilliance
Transfer the batter into your prepared pan, spreading it evenly with a spatula.
Slide the pan into the preheated oven and bake for 25-30 minutes.
Look for golden-brown edges as your signal of perfect doneness.
Step 8: Cool And Slice
Remove the pan from the oven and let it cool completely on a wire rack.
Once cooled, use the parchment paper handles to lift the entire batch out.
Slice into beautiful rectangular bars, ready to be devoured.
Key Tips for Dense, Fudgy, Irresistible Chocolate Bars

Exciting Variations for Homemade Chocolate Bars
Serving Up Rich Chocolate Bars for Any Occasion
Best Storage for Chocolate Bars to Keep Them Fresh
FAQs
Use high-quality dark or semi-sweet chocolate chips for rich flavor. Ghirardelli or Lindt brands provide excellent taste and smooth melting.
Yes, substitute regular flour with gluten-free all-purpose flour blend. Ensure baking powder is also gluten-free for complete adaptation.
Look for golden edges and a slightly firm center. A toothpick inserted should come out with a few moist crumbs, not completely clean.
Optional but recommended. Toasting nuts enhances their flavor and adds deeper, nuttier notes to the chocolate bars. Simply toast in a dry skillet for 3-5 minutes before adding.
Print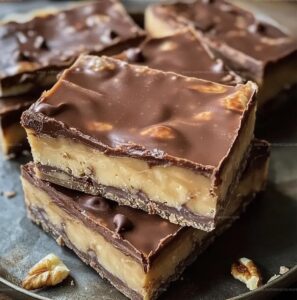
Chocolate Fudge Bars Recipe
- Total Time: 50 minutes
- Yield: 12 1x
Description
Indulgent chocolate fudge bars promise rich, velvety layers of pure dessert bliss. Chocolate lovers will savor each decadent bite, experiencing a perfect balance of intense flavor and smooth, melt-in-your-mouth texture.
Ingredients
Main Ingredients:
- 2 cups (400 g) granulated sugar
- 1 cup (200 g) unsalted butter
- 1 cup (250 g) all-purpose flour
- 1 cup (250 g) semi-sweet chocolate chips
Flavor and Texture Enhancers:
- 2 teaspoons vanilla extract
- 1 teaspoon baking powder
- 1/4 teaspoon salt
Optional Add-ins:
- 1 cup (120 g) chopped walnuts or almonds
Instructions
- Warm the oven to 350F and prepare an 8×8 inch baking pan by lining it with parchment paper, ensuring complete coverage of the bottom and sides.
- Use an electric mixer to blend butter and sugar until the mixture becomes airy and pale, creating a smooth, whipped texture.
- Introduce vanilla extract into the creamed mixture, stirring until fully incorporated and evenly distributed.
- In a separate mixing bowl, combine flour, baking powder, and salt, gently whisking to create a uniform dry ingredient blend.
- Slowly integrate the dry ingredient mixture into the wet ingredients, stirring with minimal motion to prevent overworking the batter.
- Gently incorporate chocolate chips and chopped nuts throughout the dough, distributing them evenly for consistent flavor in each bite.
- Transfer the prepared batter into the lined baking pan, smoothing the surface with a spatula to ensure an even layer and pressing the mixture into the corners.
- Place the pan in the preheated oven and bake for 25-30 minutes, watching for golden-brown edges as an indicator of doneness.
- Remove from oven and allow the bars to cool completely at room temperature, which helps them set and makes cutting easier.
- Once fully cooled, lift the parchment to remove the entire batch and slice into precise rectangular bars using a sharp knife.
Notes
- Achieving the perfect texture requires creaming butter and sugar until they’re extremely light and airy, which helps create a tender chocolate bar.
- For gluten-free variations, swap regular flour with almond or coconut flour, ensuring the same rich chocolate flavor while accommodating dietary needs.
- Using high-quality dark chocolate chips intensifies the chocolate taste and provides delightful melty pockets throughout the bars.
- Toasting nuts before adding them enhances their nutty flavor and provides a delicious crunch, elevating the overall taste experience.
- Prep Time: 20 minutes
- Cook Time: 30 minutes
- Category: Desserts, Snacks
- Method: Baking
- Cuisine: American
Nutrition
- Serving Size: 12
- Calories: 340
- Sugar: 33g
- Sodium: 75mg
- Fat: 22g
- Saturated Fat: 12g
- Unsaturated Fat: 9g
- Trans Fat: 0.5g
- Carbohydrates: 40g
- Fiber: 3g
- Protein: 4g
- Cholesterol: 50mg
Nathaniel Brooks
Founder & Recipe Developer
Expertise
Farm-to-table cuisine, Seasonal recipe development, Culinary storytelling
Education
Ivy Tech Community College – Indianapolis, IN
Culinary Arts / Hospitality Administration & Events
Focused on hands-on training in classical and modern culinary techniques.
Nathaniel’s story starts in the foothills of the Appalachian Mountains, where farm stands, backyard gardens, and old family recipes shaped his love for real food. After graduating from Ivy Tech Community College in Indianapolis, he spent years working in farm-to-table kitchens, learning how to turn local, seasonal ingredients into something memorable.
Today, Nathaniel pours that same spirit into every single recipe on Aspiring Culinarian – recipes that feel real, comforting, and connected to the land. When he’s not in the kitchen, you’ll find him foraging wild herbs, chasing sunsets with his camera, or writing about the flavors that shaped his roots.