
The Irresistible Chocolate Peanut Butter Bars Recipe You Need Now
Sweet meets salty in these irresistible chocolate peanut butter bars that promise pure indulgence.
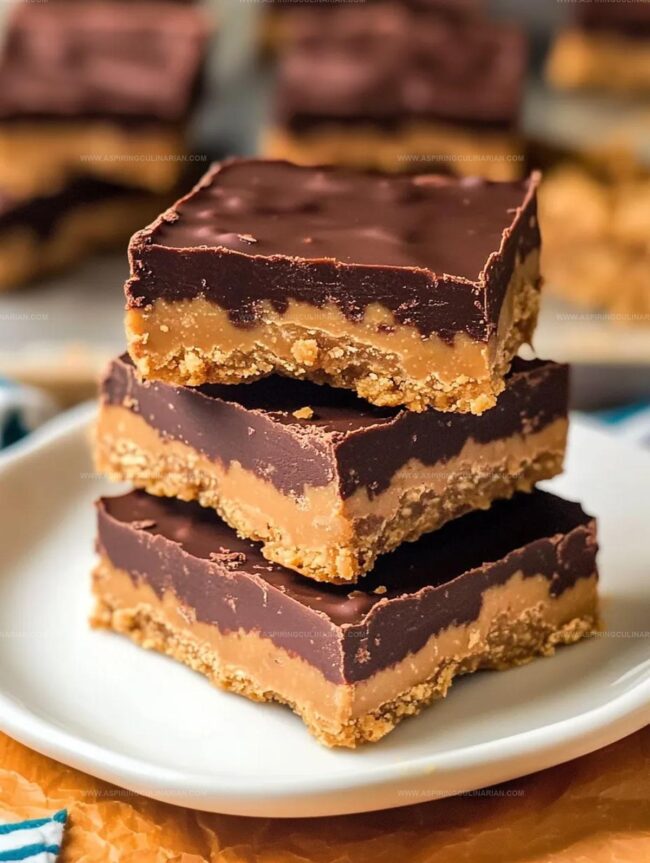
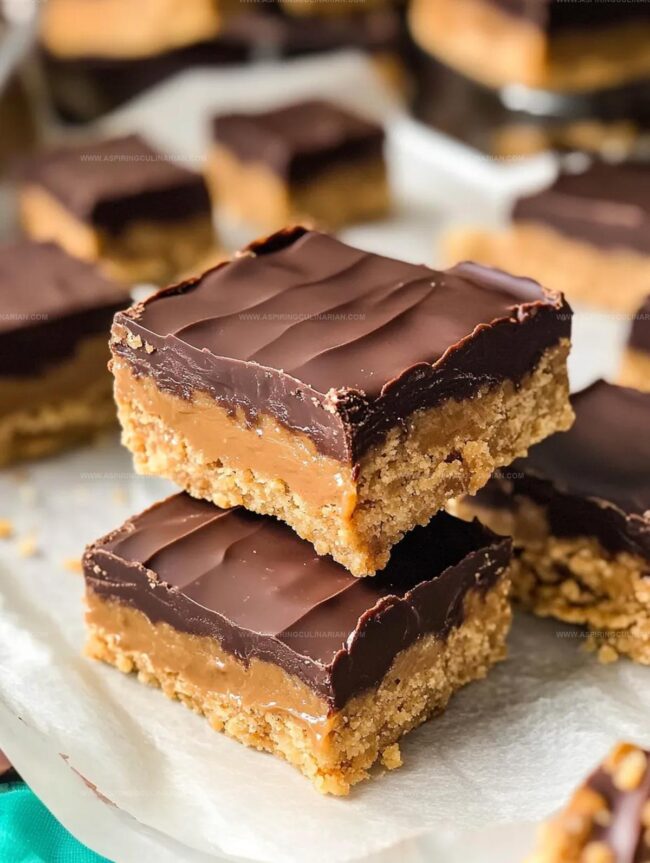
Layers of creamy, rich chocolate and smooth peanut butter create a decadent treat everyone adores.
No baking required means you can whip up this dessert in minutes.
The combination of chocolate and peanut butter delivers a mouthwatering experience that melts in your mouth.
Each bite brings a perfect balance of sweetness and nutty flavor.
Simple ingredients and minimal effort make these bars a go-to dessert for any occasion.
Prepare to satisfy your deepest chocolate and peanut butter cravings with this ultimate no-bake delight.
Why Chocolate Peanut Butter Bars Wow
Chocolate Peanut Butter Bar Ingredients
Base Ingredients:Chocolate Topping:Pan Preparation:Steps for Peanut Butter Bars
Step 1: Prepare the Baking Vessel
Line an 8×8 inch baking dish with aluminum foil or parchment paper, ensuring extra material hangs over the sides.
This clever trick will help you easily lift the bars out of the pan later.
Step 2: Create Peanut Butter Magic
Grab a large microwave-safe bowl and melt the butter until smooth.
Toss in these delightful ingredients:Stir everything together until the mixture becomes a wonderfully creamy blend.
Step 3: Build the Flavor Foundation
Spread the peanut butter mixture across the bottom of the prepared pan.
Use gentle pressure to create a smooth, even layer that will serve as the delicious base of your bars.
Step 4: Melt Chocolate Perfection
Find a medium microwave-safe bowl and transform chocolate chips into a silky smooth mixture.
Microwave in short 30-second bursts, stirring between each interval until the chocolate becomes completely liquid and glossy.
Step 5: Layer on the Chocolate Goodness
Carefully pour the melted chocolate over the peanut butter layer.
Use an offset spatula to spread it evenly, creating a beautiful, uniform top.
Step 6: Chill and Set
Place the pan in the refrigerator and let the bars cool for one full hour.
This waiting time allows the layers to firm up and become perfectly set.
Step 7: Slice and Serve
Remove the bars from the pan using the overhanging foil or parchment.
Slice into 16 perfect squares.
These irresistible treats are now ready to be devoured and enjoyed!
Tips for Perfect Bar Texture

Flavor Twists for Peanut Bars

Serving Peanut Butter Bars Creatively
How to Store Peanut Butter Bars
FAQs
Yes, they have the same classic chocolate and peanut butter combination but are made as bars instead of individual cups, offering a homemade version of the popular candy.
Absolutely! You can substitute peanut butter with almond butter, cashew butter, or sunflower seed butter for a different flavor profile while maintaining the same texture.
No, you just need a microwave, mixing bowl, 8×8 baking pan, and basic measuring tools. An offset spatula helps create smooth layers, but a regular spatula works too.
Print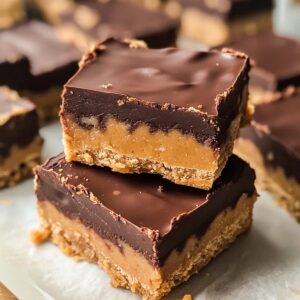
Chocolate Peanut Butter Bars Recipe
- Total Time: 1 hour 20 minutes
- Yield: 12 1x
Description
Sweet chocolate peanut butter bars blend creamy indulgence with nostalgic comfort. Rich layers of silky chocolate and smooth peanut butter create a delightful dessert you’ll crave again and again.
Ingredients
Main Ingredients:
- 1 cup creamy peanut butter
- 1 1/2 cups graham cracker crumbs
- 1/2 cup (113 grams) salted butter
Binding and Sweetening Ingredients:
- 1 1/2 cups powdered sugar
Coating Ingredients:
- 12 ounces (340 grams) semi-sweet chocolate chips, melted
Instructions
- Prepare the baking vessel by lining an 8×8 dish with foil or parchment paper, ensuring extended edges for easy extraction of the dessert bars.
- Create the foundational peanut butter layer by microwaving butter until fully melted, then incorporating powdered sugar, graham cracker crumbs, and peanut butter into a homogeneous mixture.
- Distribute the peanut butter blend evenly across the lined pan, applying firm pressure to establish a compact, uniform base layer.
- Craft the chocolate topping through gentle microwave melting, using 30-second intervals and stirring between each cycle until chocolate chips transform into a silky, glossy consistency.
- Delicately cascade the molten chocolate over the peanut butter foundation, utilizing an offset spatula to achieve a smooth, consistent coverage.
- Stabilize the dessert by chilling in the refrigerator for approximately 60 minutes, allowing the layers to solidify and bond together.
- Once set, extract the dessert from the pan using the overhanging edges, then slice into 16 precise, uniform squares for serving.
Notes
- Swap graham crackers with gluten-free alternatives like almond flour or crushed gluten-free cookies for a celiac-friendly version.
- Use dark chocolate chips for a richer, less sweet chocolate layer that complements the sweet peanut butter base.
- Chill bars completely before cutting to ensure clean, precise edges and prevent crumbling during slicing.
- Store bars in an airtight container in the refrigerator for up to a week, allowing flavors to meld and maintain perfect texture.
- Prep Time: 20 minutes
- Cook Time: 1 hour
- Category: Desserts, Snacks
- Method: None
- Cuisine: American
Nutrition
- Serving Size: 12
- Calories: 235
- Sugar: 15 g
- Sodium: 155 mg
- Fat: 14 g
- Saturated Fat: 6 g
- Unsaturated Fat: 8 g
- Trans Fat: 0 g
- Carbohydrates: 26 g
- Fiber: 1 g
- Protein: 4 g
- Cholesterol: 20 mg
Lena Martinez
Contributing Writer & Culinary Educator
Expertise
Southwestern and Latin American cuisines, Vegetarian and plant-based recipe development, Culinary education and community outreach
Education
Santa Fe Community College, Santa Fe, NM
Certificate in Culinary Arts
Emphasized Southwestern cuisine and sustainable cooking practices
Lena grew up surrounded by the colors, spices, and traditions of the Southwest – flavors that sparked her love for bold, honest cooking. After earning her Culinary Arts certificate at Santa Fe Community College, she made it her mission to teach home cooks how to create flavorful, plant-powered meals without the fuss.
Her recipes are packed with vibrant ingredients, simple steps, and the kind of heart that turns a regular meal into something you’ll want to share. Outside the kitchen, Lena spends her time wandering farmers’ markets, trading family recipes, and helping young chefs find their voice through food.