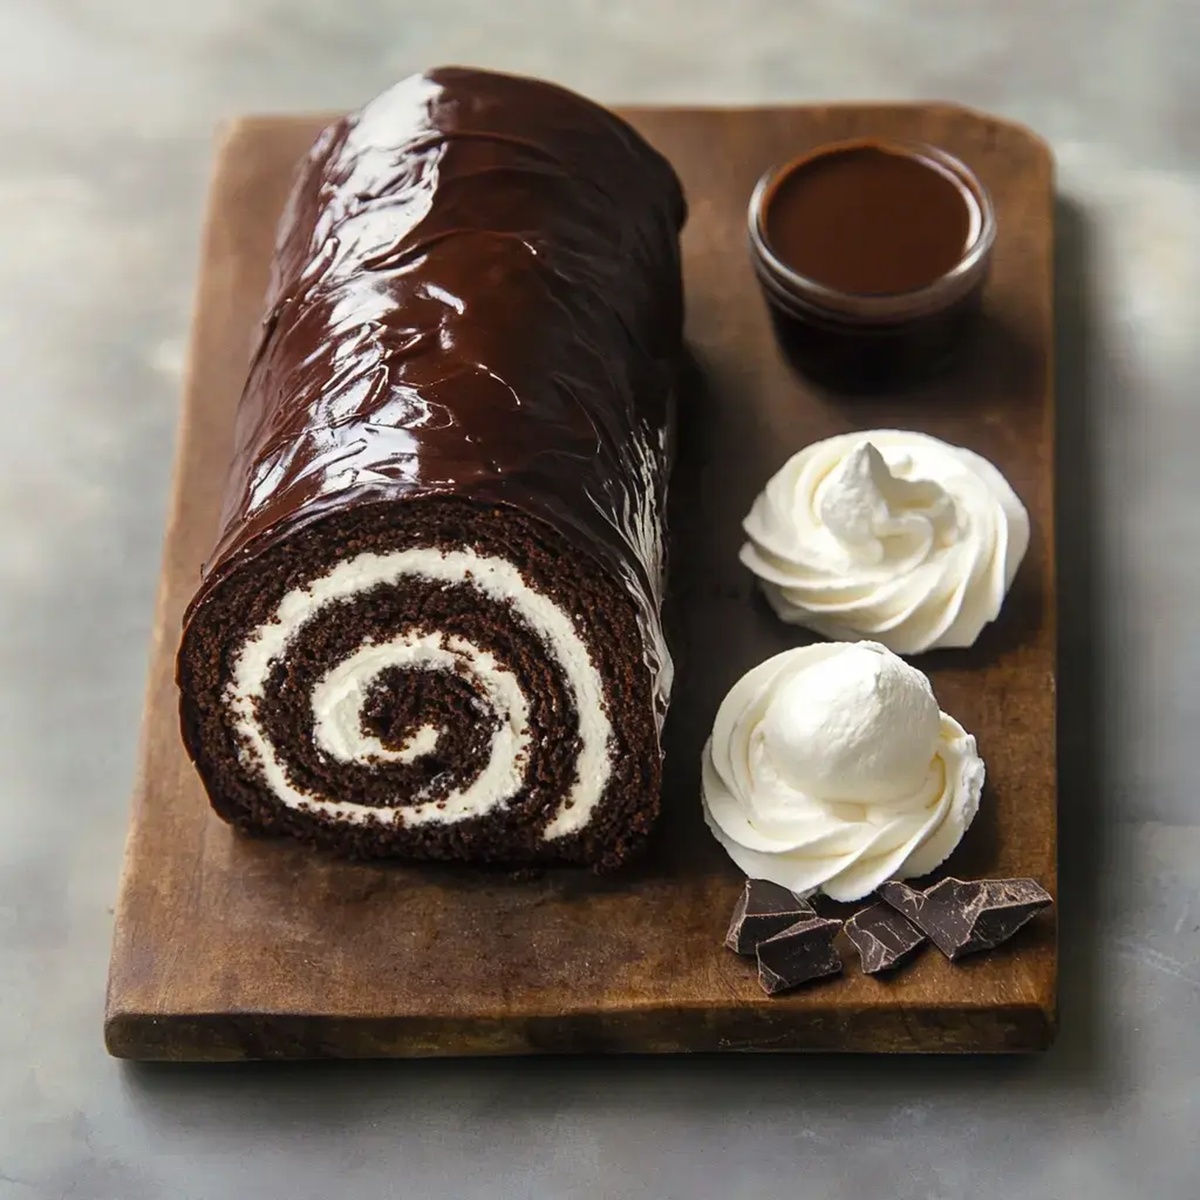
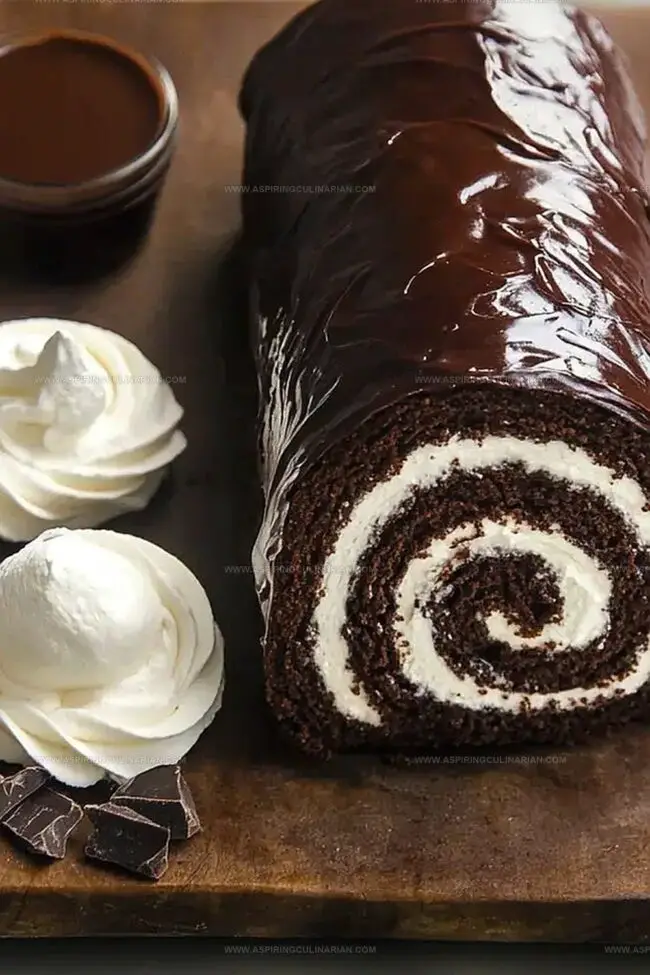
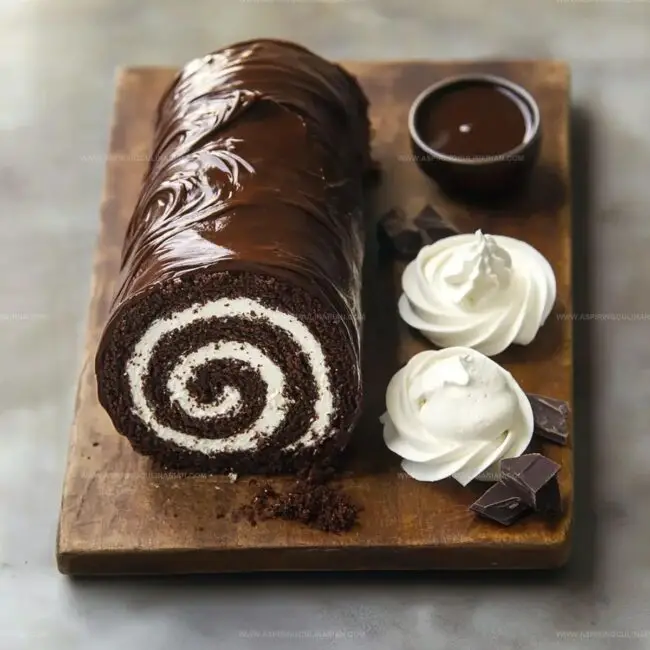
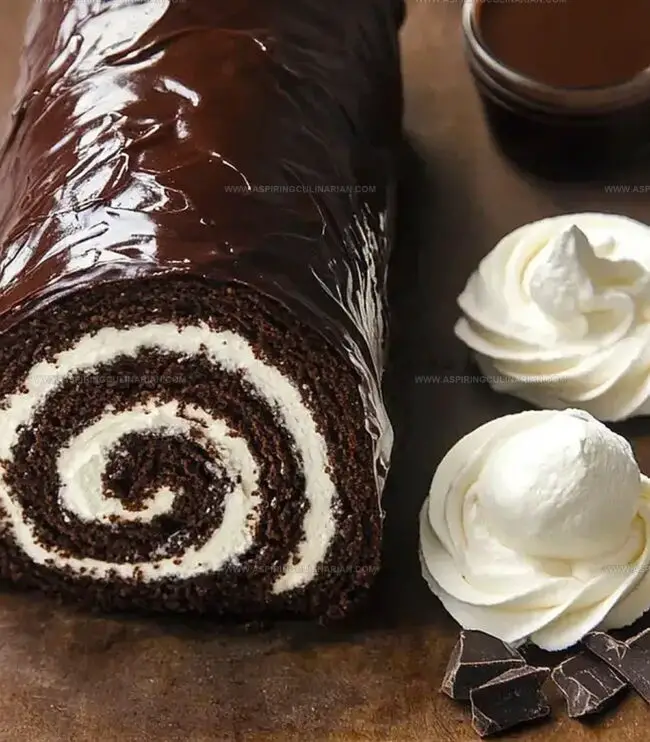
The Best Chocolate Swiss Roll Recipe for Sweet Indulgence
Sweet aromas of chocolate swiss roll dance through kitchens, promising pure dessert delight.
Bakers adore this classic pastry that combines soft sponge with creamy filling.
The chocolate swiss roll delivers decadent layers of rich flavor in every single slice.
Elegant yet simple, this dessert works magic for special occasions and casual gatherings.
Light chocolate sponge rolled with velvety cream creates a treat that melts hearts instantly.
Smooth, delicate, and irresistibly indulgent, this recipe transforms ordinary ingredients into an extraordinary dessert.
Prepare to seduce taste buds with this stunning chocolate confection.
Why Classic Rolled Dessert Has Lasting Charm
Classic Rolled Dessert – What You’ll Need
Main Ingredients:Liquid Ingredients:Filling and Topping Ingredients:Additional Ingredients:Rolling Up a Classic Dessert – Instructions
Step 1: Prepare Baking Workspace
Grab a jelly roll pan and line it with parchment paper.
Warm up the oven to 350F, ensuring it’s ready for baking.
Step 2: Combine Dry Ingredients
Whisk together the following dry ingredients:Step 3: Whip Fluffy Base
Beat eggs, sugar, and vanilla in a stand mixer or with an electric hand mixer.
Whip the mixture until it becomes light, airy, and triples in volume, about 4 minutes.
Step 4: Gently Incorporate Dry Mixture
Carefully fold the dry ingredient mixture into the whipped egg base.
Use a spatula and make gentle sweeping motions to maintain the airiness.
Step 5: Add Warm Liquid
Pour in the hot milk and melted butter mixture.
Stir until completely combined and smooth.
Step 6: Spread And Bake
Transfer the batter into the prepared pan.
Use an offset spatula to spread it evenly across the surface.
Bake in the preheated oven for 10-12 minutes until the cake springs back when touched.
Step 7: Initial Rolling
Immediately after removing from the oven, carefully roll the hot cake with the parchment paper.
This helps prevent cracking and sets the shape.
Step 8: Cooling Technique
Allow the cake to cool while periodically unrolling and re-rolling.
This prevents the cake from sticking and maintains flexibility.
Step 9: Prepare Creamy Filling
Whip the filling ingredients until they reach a stiff, spreadable consistency:Step 10: Fill And Roll
Unroll the cooled cake carefully.
Spread the prepared filling evenly across the surface.
Gently roll the cake back up, removing parchment as you go.
Step 11: Chill And Set
Wrap the rolled cake in plastic wrap and refrigerate for 1 hour to help it hold its shape and allow flavors to meld.
Step 12: Create Ganache Topping
Prepare a smooth ganache by combining chocolate and cream.
Heat gently and stir until glossy and pourable.
Step 13: Final Touch And Serve
Pour the ganache over the chilled cake.
Let it set for a few minutes.
Slice and serve chilled or at room temperature.
Top Tips for a Perfect Rolled Dessert
Rolled Dessert Variations to Try at Home
Serving Classic Rolled Dessert with Flair
Best Practices for Classic Rolled Dessert Storage
FAQs
Whipping for 4 minutes creates air bubbles that make the cake light, fluffy, and helps it rise properly, ensuring a soft and delicate texture.
Rough folding can deflate the air bubbles created during whipping, resulting in a dense and heavy cake instead of a light, airy roll.
Repeated rolling prevents cracking and helps the cake maintain flexibility, making it easier to fill and roll without breaking when you add the final filling.
The batter should look smooth and uniform with no streaks of dry ingredients, and it should maintain its volume without deflating completely.
Print
Chocolate Swiss Roll Recipe
- Total Time: 32 minutes
- Yield: 8 1x
Description
Indulgent Chocolate Swiss Roll brings sweet nostalgia from Swiss pastry kitchens, rolling tender chocolate sponge with silky cream into a mesmerizing dessert. Sweet chocolate layers and delicate filling promise pure deliciousness you cannot resist.
Ingredients
Main Ingredients:
- 4 large eggs, room temperature
- 3/4 cup granulated sugar
- 3/4 cup all-purpose flour
- 1/3 cup Dutch process cocoa
Leavening and Flavor Enhancers:
- 1 teaspoon baking powder
- 1 teaspoon espresso powder
- 1/2 teaspoon salt
Liquid and Additional Ingredients:
- 1 teaspoon vanilla extract
- 5 tablespoons (75 milliliters) milk
- 1/4 cup (60 milliliters) unsalted butter, melted
- 1 1/2 cups (360 milliliters) heavy cream, cold
- 3/4 cup powdered sugar
- 1/2 cup (120 milliliters) heavy cream
- 4 ounces (113 grams) semi-sweet chocolate, chopped
- 1 teaspoon corn syrup (optional)
Instructions
- Prepare the oven at 350°F and line a jelly roll pan with parchment paper for even baking and easy removal.
- Combine all dry ingredients thoroughly, ensuring no lumps remain for a smooth texture.
- Vigorously whip eggs, sugar, and vanilla for precisely 4 minutes until the mixture becomes light and fluffy.
- Gently fold dry ingredients into the whipped mixture, maintaining the airy consistency.
- Incorporate the hot milk-butter mixture, stirring carefully to integrate without deflating the batter.
- Distribute the batter evenly across the prepared pan, creating a uniform layer for consistent baking, and bake for 10-12 minutes until lightly golden.
- Immediately transfer the hot cake from the oven and roll tightly within parchment paper to set its shape.
- Allow the cake to cool, periodically unrolling and re-rolling to prevent cracking and maintain flexibility.
- Prepare the filling by whipping ingredients until they reach a stiff, spreadable consistency.
- Carefully unroll the cooled cake, spread the filling evenly, then delicately roll the cake back up.
- Refrigerate the rolled dessert for 1 hour to set and enhance flavor melding.
- Create a smooth ganache and drizzle over the chilled cake for a luxurious finish.
- Slice and serve chilled, or allow to sit at room temperature for a softer texture.
Notes
- Roll carefully while the cake is still hot to prevent cracking, using a clean kitchen towel dusted with powdered sugar helps prevent sticking.
- Whipping eggs and sugar thoroughly creates a light, airy texture essential for a delicate rolled dessert.
- Fold dry ingredients gently to maintain the airiness and prevent deflating the whipped egg mixture.
- For gluten-free adaptation, substitute all-purpose flour with a gluten-free blend and add a pinch of xanthan gum for better structure.
- Prep Time: 20 minutes
- Cook Time: 12 minutes
- Category: Desserts, Snacks
- Method: Baking
- Cuisine: Swiss
Nutrition
- Serving Size: 8
- Calories: 320
- Sugar: 24 g
- Sodium: 150 mg
- Fat: 20 g
- Saturated Fat: 12 g
- Unsaturated Fat: 8 g
- Trans Fat: 0 g
- Carbohydrates: 30 g
- Fiber: 1 g
- Protein: 6 g
- Cholesterol: 120 mg
Nathaniel Brooks
Founder & Recipe Developer
Expertise
Farm-to-table cuisine, Seasonal recipe development, Culinary storytelling
Education
Ivy Tech Community College – Indianapolis, IN
Culinary Arts / Hospitality Administration & Events
Focused on hands-on training in classical and modern culinary techniques.
Nathaniel’s story starts in the foothills of the Appalachian Mountains, where farm stands, backyard gardens, and old family recipes shaped his love for real food. After graduating from Ivy Tech Community College in Indianapolis, he spent years working in farm-to-table kitchens, learning how to turn local, seasonal ingredients into something memorable.
Today, Nathaniel pours that same spirit into every single recipe on Aspiring Culinarian – recipes that feel real, comforting, and connected to the land. When he’s not in the kitchen, you’ll find him foraging wild herbs, chasing sunsets with his camera, or writing about the flavors that shaped his roots.