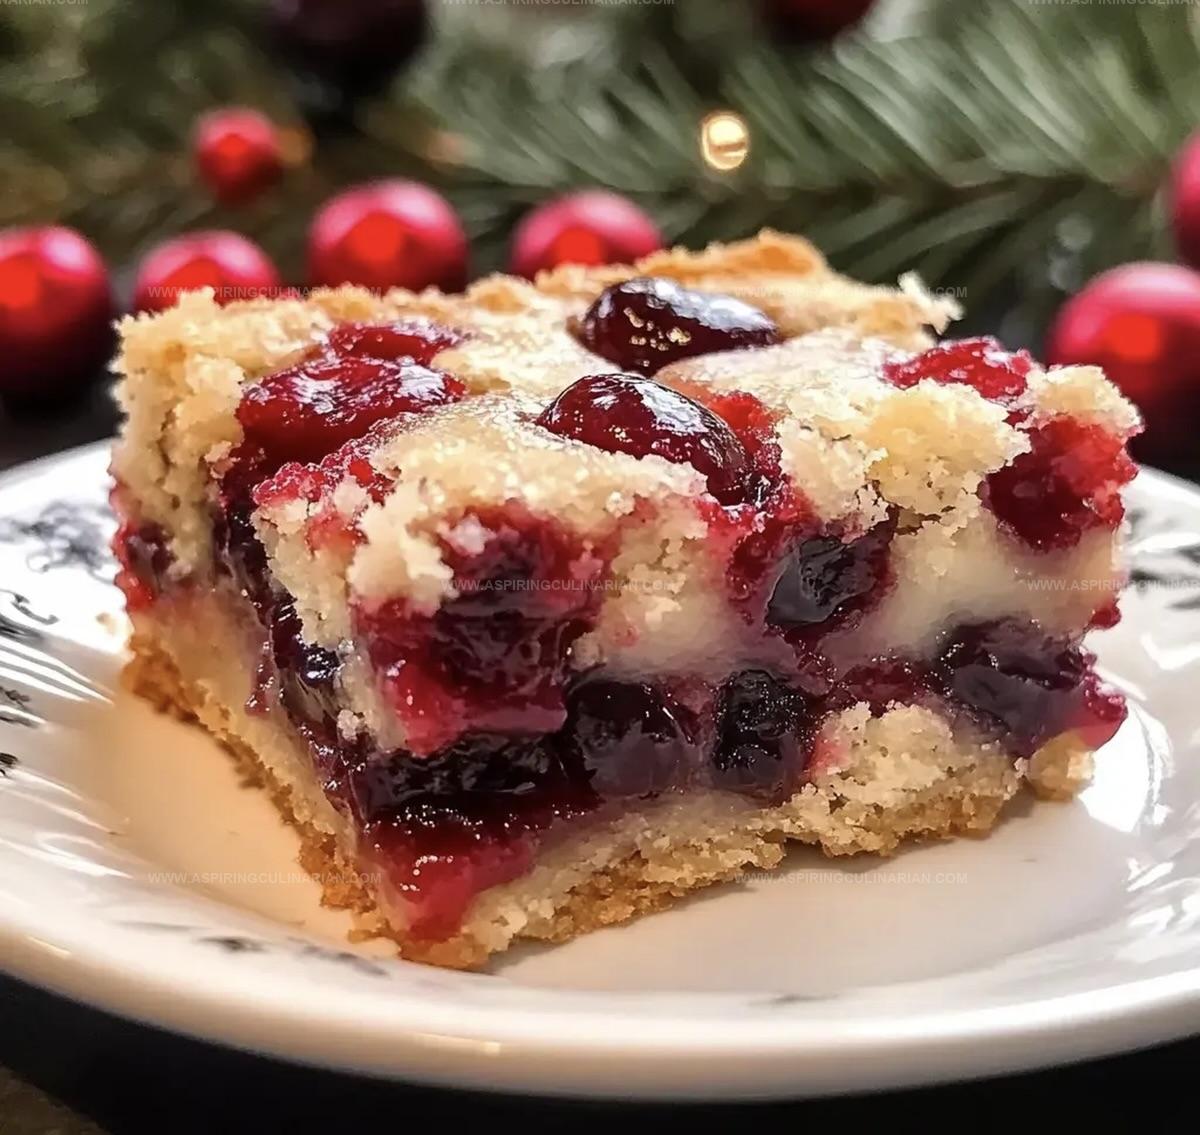
The Jolly Christmas Cherry Bars Recipe: Sweet Holiday Magic
Festive holiday gatherings become magical with these delightful Christmas cherry bars that sparkle with sweet memories.
Creamy layers meld perfectly between buttery crusts and vibrant ruby-red fruit.
Delicate crumbles promise pure comfort during seasonal celebrations.
Bright maraschino cherries dance across soft cream cheese bases, creating irresistible textures.
Dessert enthusiasts will adore this simple yet elegant treat that comes together effortlessly.
Every bite connects you to cherished moments of joy and warmth.
Let’s make something spectacular that will have everyone asking for seconds!
Christmas Cherry Bars – Reasons to Bake for the Holidays
Ingredients for Festive Christmas Cherry Bar Desserts
Base Ingredients:Dry Ingredients:Filling and Topping Ingredients:How to Make Cherry Bars for Christmas Gatherings
Step 1: Warm Up the Oven
Preheat the oven to 350F (175C).
Grab a 10×15-inch baking pan and give it a light coating of grease to prevent sticking.
Step 2: Whip Up Butter and Sugar
In a spacious mixing bowl, blend softened butter and granulated sugar until the mixture becomes light, airy, and creamy.
Step 3: Incorporate Eggs
Gently add eggs one at a time, thoroughly mixing after each addition to create a smooth, consistent batter.
Step 4: Splash of Flavor
Pour in vanilla extract and stir to distribute the rich, aromatic essence throughout the mixture.
Step 5: Combine Dry Ingredients
In a separate bowl, whisk together:Ensure all dry ingredients are well blended.
Step 6: Merge Wet and Dry Mixtures
Slowly incorporate the dry ingredient mixture into the wet ingredients.
Mix until just combined, being careful not to overmix.
Step 7: Create the Base Layer
Spread approximately three-quarters of the dough evenly across the prepared baking pan.
This will form the delicious foundation of your bars.
Step 8: Add Cherry Goodness
Carefully spread the cherry pie filling over the dough layer, ensuring an even distribution.
Step 9: Top with Remaining Dough
Drop small spoonfuls of the reserved dough randomly over the cherry filling, creating a rustic, artistic pattern.
Step 10: Bake to Perfection
Place the pan in the preheated oven and bake for 30-35 minutes.
Look for a golden-brown top and test with a toothpick – it should come out clean when inserted into the center.
Step 11: Prepare Glorious Glaze
While the bars are baking, whisk together:Blend until the mixture is silky smooth.
Step 12: Finish with Glaze
Once the bars are slightly cooled, drizzle the glaze over the top, creating an enticing finishing touch.
Step 13: Serve and Enjoy
Allow the bars to cool completely, then slice into delectable squares.
Serve and watch as everyone falls in love with these festive treats!
Tips for Soft, Cherry-Filled Christmas Bars
Christmas Cherry Bar Variations for More Cheer
Presenting Cherry Bars on Holiday Platters
Storing Christmas Cherry Bars for Best Freshness
FAQs
Yes, you can substitute cherry pie filling with other fruit fillings like blueberry, raspberry, or apple to create variety.
Definitely! Replace the all-purpose flour with a gluten-free flour blend to make the recipe suitable for those with gluten sensitivities.
Look for a golden brown top and insert a toothpick in the center – it should come out clean, indicating the bars are fully cooked.
Absolutely! These bars freeze wonderfully for up to 3 months when wrapped tightly in plastic wrap and stored in an airtight container.
Print
Christmas Cherry Bars Recipe
- Total Time: 50 minutes
- Yield: 24 1x
Description
Rich, buttery Christmas Cherry Bars meld festive sweetness with classic holiday charm, offering delightful crimson-studded squares perfect for seasonal celebrations. Crumbly shortbread base and tangy cherry filling create irresistible dessert bars you’ll want to share with family and friends.
Ingredients
Main Ingredients:
- 3 cups all-purpose flour
- 1 12 cups granulated sugar
- 4 large eggs
- 1 cup unsalted butter, softened
- 1 can (21 ounces/595 grams) cherry pie filling
Leavening and Seasoning:
- 1 teaspoon baking powder
- 1/2 teaspoon salt
- 1 teaspoon vanilla extract
- 1/2 teaspoon almond extract
Glaze:
- 1 cup powdered sugar
- 2 tablespoons milk
Instructions
- Warm the oven to 350F (175C) and coat a 10×15-inch baking pan with grease to prevent sticking.
- Using an electric mixer, blend softened butter and granulated sugar until the mixture becomes airy and pale.
- Incorporate eggs individually into the butter mixture, thoroughly mixing after each egg to ensure smooth integration.
- Fold in vanilla extract, blending until evenly distributed.
- In a separate mixing bowl, combine flour, baking powder, and salt, whisking to eliminate any potential lumps.
- Gradually fold dry ingredients into the wet mixture, stirring gently until a consistent dough forms.
- Distribute approximately three-quarters of the dough evenly across the prepared baking pan, creating a uniform base layer.
- Carefully spread cherry pie filling across the dough, ensuring complete and even coverage.
- Dot the reserved dough over the cherry filling using small spoonfuls, creating a rustic, textured topping.
- Position the pan in the preheated oven and bake for 30-35 minutes until the surface turns golden brown and a toothpick emerges clean when inserted.
- During baking, prepare the glaze by whisking powdered sugar, milk, and almond extract until achieving a smooth, pourable consistency.
- Allow the baked bars to cool slightly, then drizzle the glaze across the surface for added sweetness.
- Once completely cooled, slice into individual bars and serve.
Notes
- Softened butter ensures smooth mixing and creates a tender, melt-in-your-mouth texture for the bars.
- Room temperature eggs blend more evenly, preventing lumpy batter and ensuring consistent consistency.
- Use fresh, high-quality cherry pie filling for the most vibrant flavor and best results.
- For gluten-free option, swap all-purpose flour with a 1:1 gluten-free baking blend to maintain the original texture.
- Prep Time: 20 minutes
- Cook Time: 30 minutes
- Category: Desserts, Snacks
- Method: Baking
- Cuisine: American
Nutrition
- Serving Size: 24
- Calories: 240
- Sugar: 18 g
- Sodium: 110 mg
- Fat: 12 g
- Saturated Fat: 7 g
- Unsaturated Fat: 5 g
- Trans Fat: 0.2 g
- Carbohydrates: 32 g
- Fiber: 1 g
- Protein: 3 g
- Cholesterol: 55 mg
Nathaniel Brooks
Founder & Recipe Developer
Expertise
Farm-to-table cuisine, Seasonal recipe development, Culinary storytelling
Education
Ivy Tech Community College – Indianapolis, IN
Culinary Arts / Hospitality Administration & Events
Focused on hands-on training in classical and modern culinary techniques.
Nathaniel’s story starts in the foothills of the Appalachian Mountains, where farm stands, backyard gardens, and old family recipes shaped his love for real food. After graduating from Ivy Tech Community College in Indianapolis, he spent years working in farm-to-table kitchens, learning how to turn local, seasonal ingredients into something memorable.
Today, Nathaniel pours that same spirit into every single recipe on Aspiring Culinarian – recipes that feel real, comforting, and connected to the land. When he’s not in the kitchen, you’ll find him foraging wild herbs, chasing sunsets with his camera, or writing about the flavors that shaped his roots.