
Jolly Christmas Cookie Bars Recipe: A Festive Sweet Treat
Crafting delightful Christmas cookie bars brings pure joy to holiday baking adventures.
Sweet aromas fill kitchen spaces with nostalgic memories.
Festive treats like these connect generations through shared culinary traditions.
Soft, buttery textures melt in your mouth, creating instant happiness.
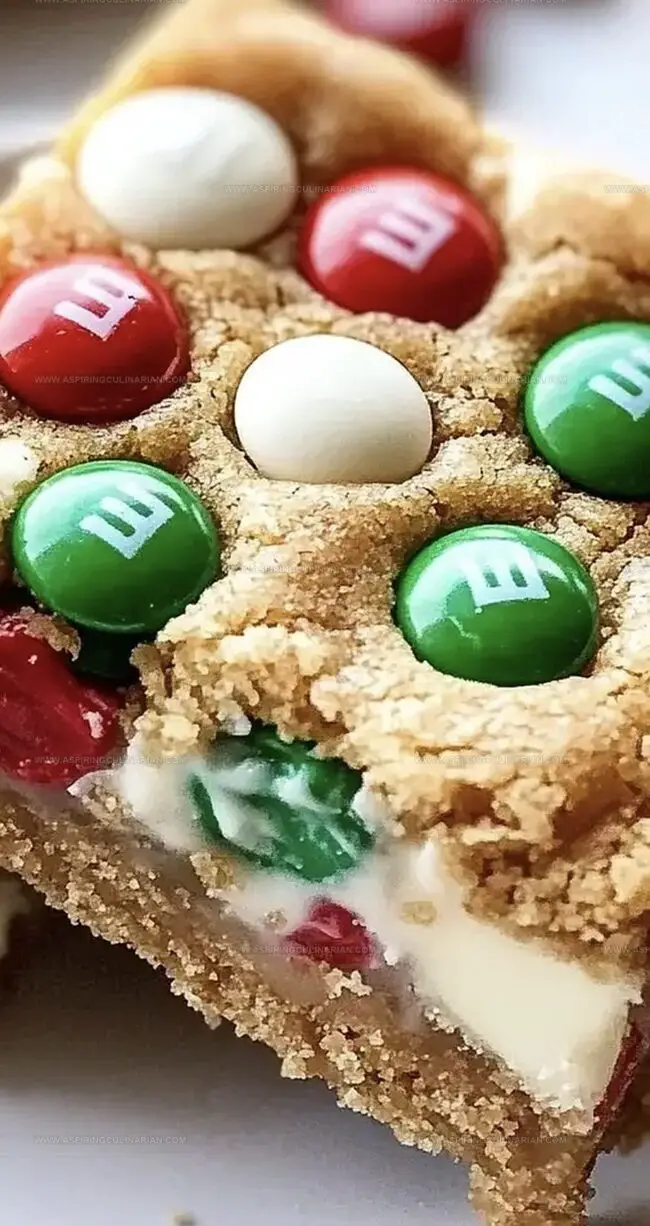
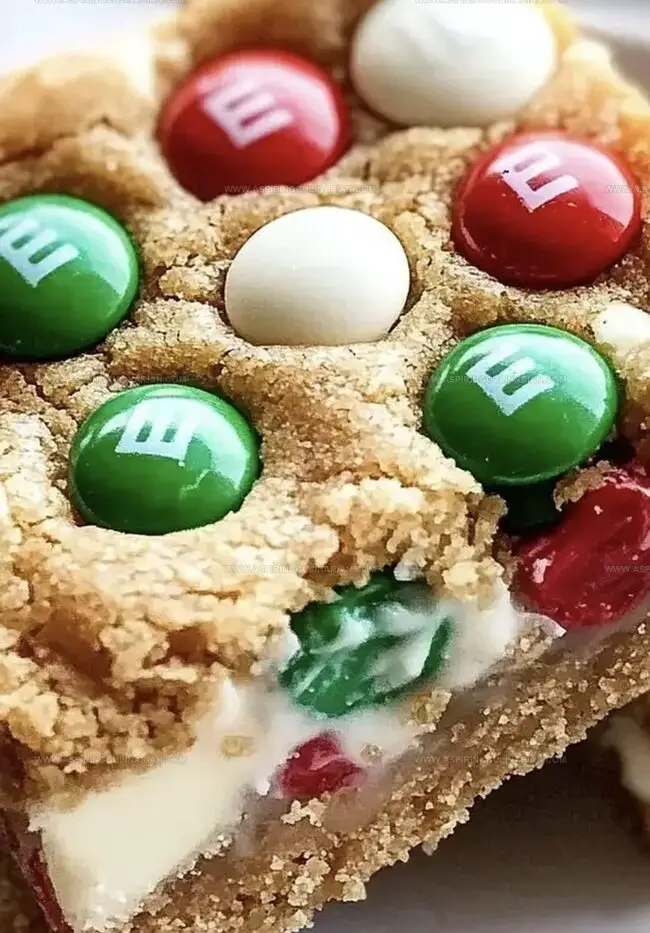
Colorful sprinkles and rich chocolate chips make these bars irresistible.
Simple ingredients transform into magical desserts that spark celebration.
Come explore this delectable recipe and spread some delicious holiday cheer!
Christmas Cookie Bars Festive Details Worth Sharing
All Ingredients Needed for Christmas Cookie Bars
Main Ingredients:Chocolate and Sweet Additions:Pantry Staples:Steps for Baking a Batch of Christmas Cookie Bars
Step 1: Warm Up the Oven
Crank the oven to a toasty 350F (175C).
Grab your 9×13-inch baking pan and give it a quick spray with cooking oil or line it with parchment paper for easy cleanup.
Step 2: Create a Buttery Base
Grab a big mixing bowl and whisk together:Blend until silky smooth.
Crack in the eggs and splash of vanilla extract.
Mix until everything looks perfectly combined.
Step 3: Blend Dry Ingredients
In a separate bowl, whisk together:Slowly add these dry ingredients to your wet mixture, stirring gently until just combined.
Don’t overmix!
Step 4: Add Colorful Goodies
Fold in most of the M&Ms and white chocolate chips, saving a handful for the topping.
This will make your cookies look extra festive.
Step 5: Spread the Love
Transfer the dough to your prepared pan, spreading it evenly with a spatula.
Sprinkle the remaining M&Ms on top, pressing them lightly into the surface.
Step 6: Bake to Perfection
Slide the pan into the preheated oven and bake for 25-30 minutes.
You’ll know they’re done when the edges turn golden and a toothpick comes out clean from the center.
Step 7: Chill and Slice
Let the bars cool completely in the pan.
Once cooled, slice into squares and get ready to enjoy your delicious treat!
Handy Suggestions for Festive Cookie Bar Success
Creative Twists for Christmas Cookie Bar Recipes
Presentation Ideas for Holiday Cookie Bars
Tips for Storing Christmas Cookie Bars
FAQs
Yes, you can swap white chocolate chips with milk, dark, or semi-sweet chocolate chips based on your preference. Just maintain the same quantity in the recipe.
Check for golden brown edges and a toothpick that comes out mostly clean with a few moist crumbs. Avoid overbaking to keep the bars soft and chewy.
Absolutely! The colorful M&Ms make these cookie bars fun and appealing to children. They’re sweet, festive, and easy to enjoy.
These Christmas Cookie Bars can be prepared a day in advance and stored at room temperature in an airtight container. They stay fresh and delicious for up to 3-4 days.
Print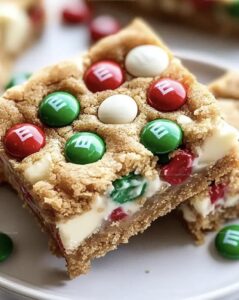
Christmas Cookie Bars Recipe
- Total Time: 45 minutes
- Yield: 12 1x
Description
Holiday magic meets sweet indulgence in these Christmas cookie bars, blending rich flavors and festive cheer. Buttery layers of chocolate, nuts, and seasonal spices create a delightful treat you’ll crave all winter long.
Ingredients
Main Ingredients:
- 2 1/2 cups all-purpose flour
- 2 large eggs
- 1 cup unsalted butter, melted
- 1 cup brown sugar, packed
- 1/2 cup granulated sugar
- 1 cup red and green M&Ms
- 1/2 cup white chocolate chips
Leavening and Seasoning:
- 1 teaspoon baking soda
- 1/2 teaspoon salt
- 2 teaspoons vanilla extract
Flavoring:
None
Instructions
- Prepare the baking environment by heating the oven to 350F (175C) and lining a 9×13-inch pan with parchment paper or greasing thoroughly.
- Create a smooth wet mixture by whisking melted butter with brown and granulated sugars until fully integrated, then incorporate eggs and vanilla extract until well combined.
- Separately combine the dry ingredients – flour, baking soda, and salt – ensuring even distribution of the powdery components.
- Gently merge the dry mixture into the wet ingredients, stirring minimally to prevent overmixing and maintain a tender texture.
- Delicately fold most of the M&Ms and white chocolate chips into the developing dough, preserving a portion for decorative topping.
- Transfer the dough evenly across the prepared pan, using gentle pressure to create a uniform layer and strategically place remaining M&Ms on the surface.
- Position the pan in the preheated oven and bake for 25-30 minutes, monitoring until the edges turn golden and a inserted toothpick emerges clean.
- Allow the baked bars to cool completely within the pan, which helps set the structure and ensures clean cutting lines when slicing into squares.
Notes
- Swap M&Ms with seasonal colored candies or crushed peppermint for a Christmas-themed twist.
- Avoid overmixing the batter to prevent tough, dense bars; stir just until ingredients are combined.
- Substitute all-purpose flour with a gluten-free blend for those with dietary restrictions.
- These bars stay fresh for up to 5 days in an airtight container at room temperature, making them ideal for holiday gatherings.
- Prep Time: 15 minutes
- Cook Time: 30 minutes
- Category: Desserts, Snacks
- Method: Baking
- Cuisine: American
Nutrition
- Serving Size: 12
- Calories: 252
- Sugar: 18 g
- Sodium: 118 mg
- Fat: 13 g
- Saturated Fat: 8 g
- Unsaturated Fat: 5 g
- Trans Fat: 0.2 g
- Carbohydrates: 33 g
- Fiber: 1 g
- Protein: 2 g
- Cholesterol: 30 mg
Nathaniel Brooks
Founder & Recipe Developer
Expertise
Farm-to-table cuisine, Seasonal recipe development, Culinary storytelling
Education
Ivy Tech Community College – Indianapolis, IN
Culinary Arts / Hospitality Administration & Events
Focused on hands-on training in classical and modern culinary techniques.
Nathaniel’s story starts in the foothills of the Appalachian Mountains, where farm stands, backyard gardens, and old family recipes shaped his love for real food. After graduating from Ivy Tech Community College in Indianapolis, he spent years working in farm-to-table kitchens, learning how to turn local, seasonal ingredients into something memorable.
Today, Nathaniel pours that same spirit into every single recipe on Aspiring Culinarian – recipes that feel real, comforting, and connected to the land. When he’s not in the kitchen, you’ll find him foraging wild herbs, chasing sunsets with his camera, or writing about the flavors that shaped his roots.