
Dazzling Christmas Cookie Pinwheels Recipe for Festive Bakers
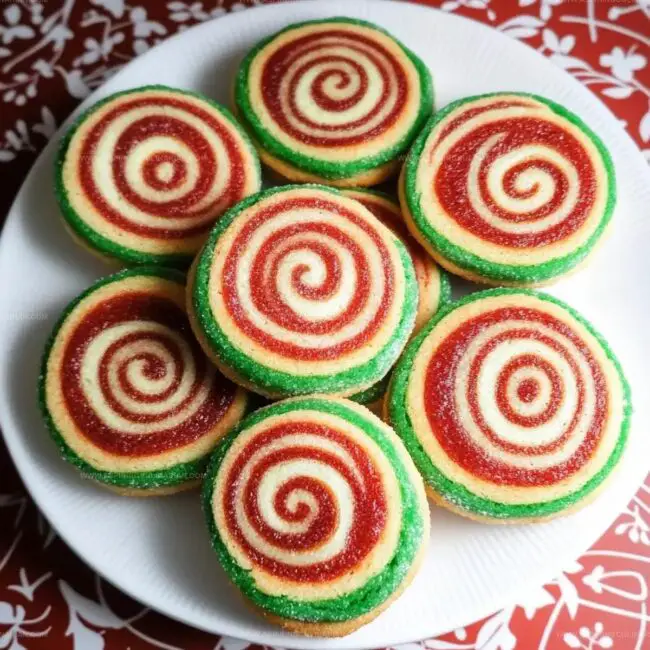
Swirling with festive charm, these christmas cookie pinwheels dance between buttery sweetness and delightful visual appeal.
Bakers adore this colorful pinwheel cookie recipe that brings whimsy to holiday dessert tables.
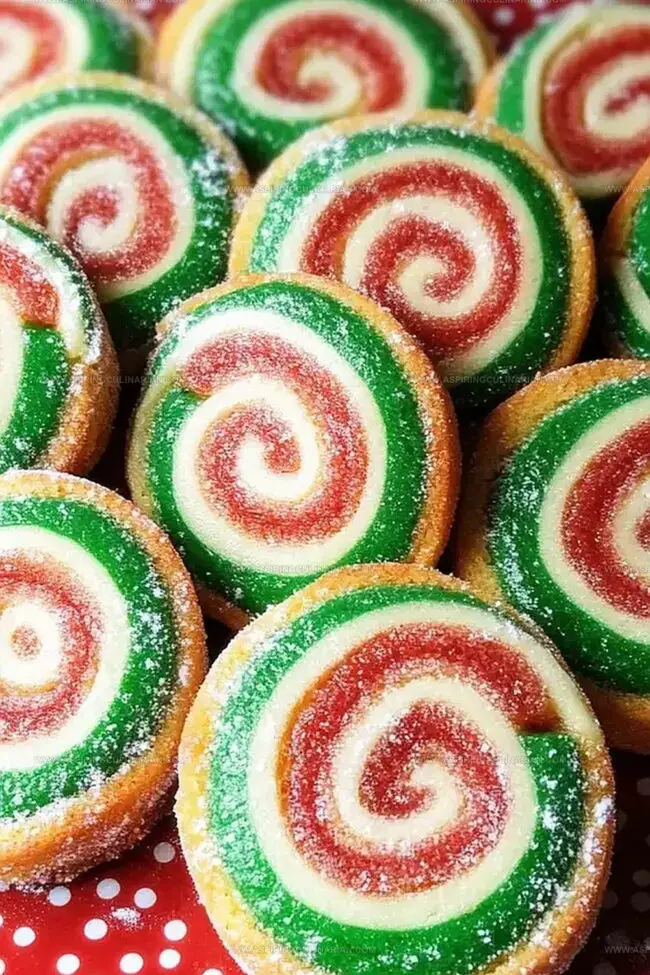
The spiraling layers create a mesmerizing treat that catches every eye at seasonal gatherings.
Soft dough and vibrant colors combine to make a cookie that feels like edible art.
Each twist represents pure holiday magic and culinary creativity.
Sprinkled with nostalgic joy, these cookies promise to become your new favorite Christmas tradition.
Roll up your sleeves and transform simple ingredients into a delectable masterpiece that will spark smiles and create lasting memories.
Festive Swirled Holiday Cookies: Why You’ll Love Baking Them
What’s in Festive Swirled Holiday Cookies
Primary Ingredients:Flavor Enhancers:Color and Decoration:Swirled Cookie Instructions, Start to Finish

Step 1: Prepare Dry Ingredients
Grab a medium bowl and whisk together flour, baking powder, and salt until they’re perfectly blended and free of lumps.
Step 2: Create Butter Base
In a separate large mixing bowl, cream butter and sugar until the mixture becomes light, fluffy, and looks like a cloud.
Gently mix in the egg and vanilla extract, stirring until everything is smooth and well combined.
Step 3: Combine Dough
Slowly add the dry ingredient mixture to the butter base in two separate batches.
Stir gently until the ingredients just come together, being careful not to overmix the dough.
Step 4: Divide and Color
Split the dough into three equal portions.
Leave one portion in its natural color.
Add red food coloring to one portion and green food coloring to another, kneading gently until the colors are evenly distributed.
Step 5: Roll and Layer Dough
On separate pieces of parchment paper, roll each colored dough into a 10-inch square.
Carefully stack the layers with red on the bottom, plain white in the middle, and green on top.
Step 6: Create Cookie Log
Carefully roll the layered dough into a tight log, starting from one side.
Wrap the log in plastic wrap and refrigerate for at least one hour to firm up.
Step 7: Slice and Bake
Preheat the oven to 350°F.
Remove the chilled dough log and slice into 1/4-inch thick rounds.
Place cookies on a lined baking sheet and bake for 12-15 minutes until the edges are lightly golden.
Swirled Cookie Pro Tips for Bakers
Swirled Holiday Cookies: Fun Recipe Ideas
Serving Up Festive Swirled Cookies with Style
Swirled Holiday Cookies – How to Keep Them Fresh
FAQs
Chill the dough thoroughly before rolling and stacking. Work with cold dough and handle it minimally to maintain clean color separation.
Yes, gel food coloring works best for vibrant colors without adding extra moisture to the dough. Use sparingly and mix thoroughly.
Refrigerate the dough for 30 minutes to firm up. If it’s still too soft, add a little more flour and chill again before rolling.
Roll each color evenly to the same thickness. Use a ruler to ensure consistent square sizes and gentle pressure when rolling the log to create tight, defined swirls.
Print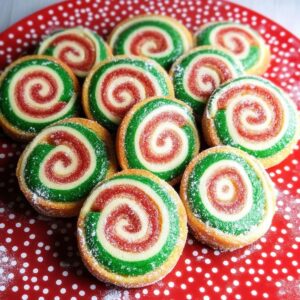
Christmas Cookie Pinwheels Recipe
- Total Time: 45 minutes
- Yield: 24 1x
Description
Festive Christmas cookie pinwheels swirl holiday cheer with delightful red and white spirals of buttery dough. Crisp, sweet layers promise delicious memories for winter celebrations you’ll savor with family and friends.
Ingredients
Main Ingredients:
- 2 cups (480 ml) all-purpose flour
- 12 tablespoons (170 g) unsalted butter, room temperature
- 3/4 cup (150 g) sugar
- 1 egg
Leavening and Seasoning:
- 1/2 teaspoon baking powder
- 1/4 teaspoon salt
Flavoring and Coloring:
- 1 teaspoon vanilla extract
- 1/2–1 teaspoon red food coloring
- 1/2–1 teaspoon green food coloring
Instructions
- Whisk together flour, baking powder, and salt in a medium mixing bowl to create a uniform dry mixture.
- Cream butter and sugar until light and airy using an electric mixer, then incorporate egg and vanilla extract until well blended.
- Gradually fold dry ingredients into wet mixture, mixing just until a cohesive dough forms.
- Separate dough into three equal portions. Use gel food coloring to tint one section vibrant red and another festive green, leaving the third portion its natural color.
- Roll each colored dough portion into a thin, even 10-inch square on parchment paper, ensuring consistent thickness.
- Layer the dough squares carefully: red at bottom, plain white in middle, and green on top.
- Tightly roll the stacked dough from one side to create a compact cylindrical log, ensuring minimal air pockets.
- Wrap the log in plastic wrap and refrigerate for 60 minutes to firm up and enhance flavor melding.
- Preheat oven to 350°F and line baking sheets with parchment paper.
- Unwrap chilled log and slice into 1/4-inch thick rounds using a sharp knife.
- Arrange cookie slices on prepared baking sheets, spacing them slightly apart.
- Bake for 12-15 minutes until edges are lightly golden and centers appear set.
- Remove from oven and let cookies cool on baking sheet for 5 minutes before transferring to wire rack.
Notes
- Try natural food coloring like beet juice for red and spinach powder for green to avoid artificial dyes.
- Use room temperature butter and egg for smoother, more evenly mixed dough that creates better cookie texture.
- For gluten-free version, swap wheat flour with almond or gluten-free blend and add extra xanthan gum for binding.
- Chill dough longer than 1 hour for sharper color definition and more stable swirl pattern when slicing cookies.
- Prep Time: 30 minutes
- Cook Time: 15 minutes
- Category: Desserts, Snacks
- Method: Baking
- Cuisine: American
Nutrition
- Serving Size: 24
- Calories: 130
- Sugar: 5 g
- Sodium: 60 mg
- Fat: 6 g
- Saturated Fat: 4 g
- Unsaturated Fat: 2 g
- Trans Fat: 0 g
- Carbohydrates: 19 g
- Fiber: 0 g
- Protein: 1 g
- Cholesterol: 20 mg
Nathaniel Brooks
Founder & Recipe Developer
Expertise
Farm-to-table cuisine, Seasonal recipe development, Culinary storytelling
Education
Ivy Tech Community College – Indianapolis, IN
Culinary Arts / Hospitality Administration & Events
Focused on hands-on training in classical and modern culinary techniques.
Nathaniel’s story starts in the foothills of the Appalachian Mountains, where farm stands, backyard gardens, and old family recipes shaped his love for real food. After graduating from Ivy Tech Community College in Indianapolis, he spent years working in farm-to-table kitchens, learning how to turn local, seasonal ingredients into something memorable.
Today, Nathaniel pours that same spirit into every single recipe on Aspiring Culinarian – recipes that feel real, comforting, and connected to the land. When he’s not in the kitchen, you’ll find him foraging wild herbs, chasing sunsets with his camera, or writing about the flavors that shaped his roots.