
Magical Christmas Crinkle Cookies Recipe for Holiday Joy
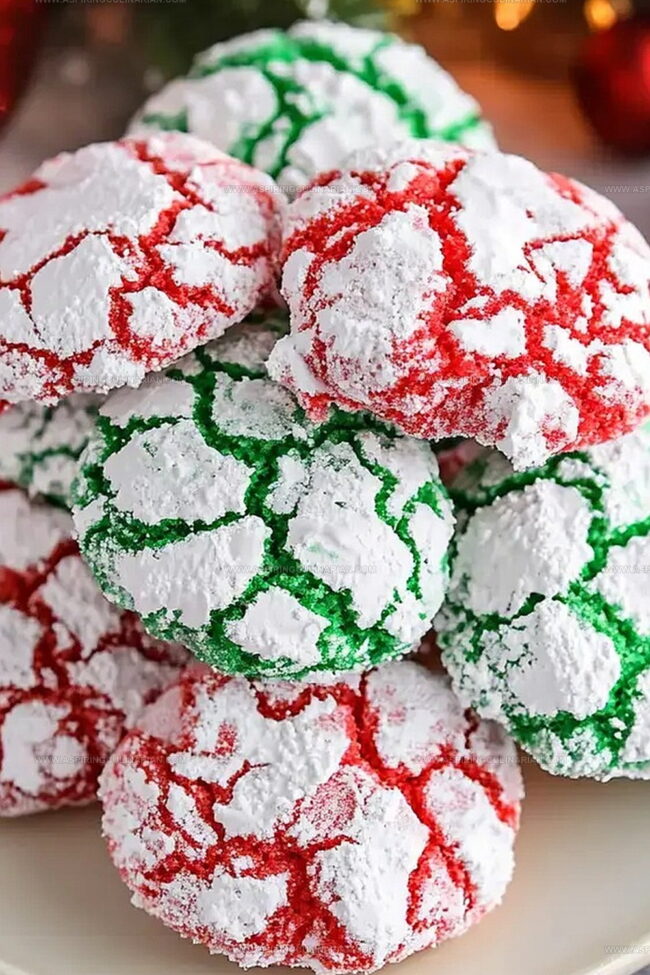
Festive holiday gatherings always sparkle with delightful christmas crinkle cookies that bring pure joy to the table.
Sweet powdered sugar coats these rich chocolate delights like freshly fallen snow.
Soft centers melt in your mouth while crispy edges provide a perfect textural contrast.
Every baker knows these treats create instant smiles among guests and loved ones.
Generations have cherished this classic recipe, passing down memories through each delectable bite.
Your kitchen will smell absolutely magical while these cookies bake to chocolatey perfection.
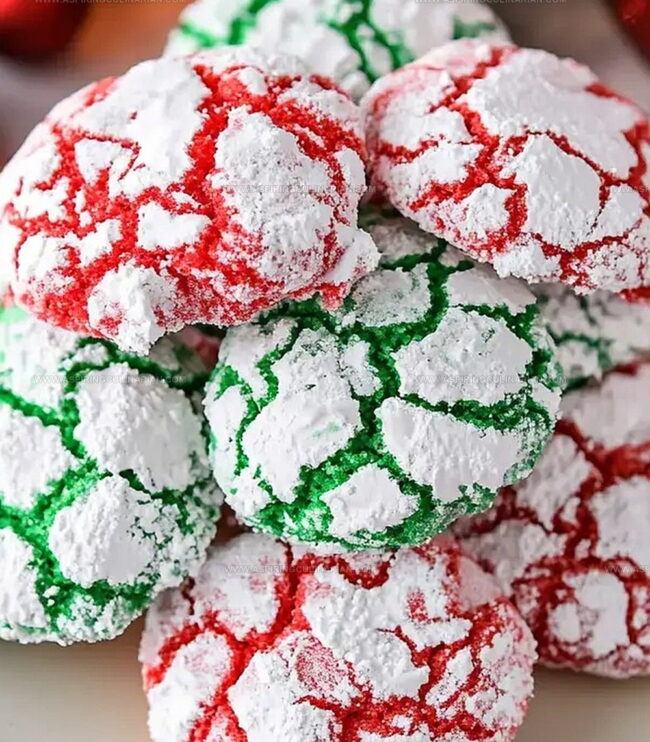
Dust them generously with confectioner’s sugar and watch everyone’s eyes light up with holiday cheer.
Discover the Joys of Baking Festive Cookies
Festive Cookies Ingredient Rundown
Base Ingredients:Coloring Ingredients:Finishing Ingredients:Baking Festive Cookies from Start to Finish

Step 1: Warm Up The Oven
Fire up your oven to a toasty 375 degrees Fahrenheit.
This will create the perfect baking environment for your delightful treats.
Step 2: Prepare Your Baking Space
Cover your baking sheet with parchment paper to ensure easy cookie removal and minimal cleanup.
Step 3: Create Cookie Base
Combine your ingredients in a large mixing bowl:Stir everything together until you have a smooth, well-blended dough.
Step 4: Divide And Conquer
Split your cookie dough into two separate mixing bowls, preparing for a colorful transformation.
Step 5: Add Festive Colors
In each bowl, add food coloring:Mix thoroughly until the colors are evenly distributed throughout the dough.
Step 6: Roll In Sweet Coating
Scoop out small dough portions and gently roll them in powdered sugar, creating a delightful snowy exterior.
Step 7: Arrange On Baking Sheet
Place your sugar-coated dough balls on the prepared baking sheet, spacing them about 1.5 inches apart to allow room for spreading.
Step 8: Bake To Perfection
Slide the baking sheet into the preheated oven and bake for 9-12 minutes until the edges are lightly golden.
Step 9: Cool And Enjoy
Let the cookies rest on the baking sheet for 2 minutes, then transfer them to a cooling rack to complete their transformation into delectable holiday treats.
Tips from the Kitchen for Festive Cookies
Festive Cookies Mix and Match Options
Sharing Festive Cookies with Friends and Family
Storing Festive Cookies After Baking
FAQs
Yes, white or vanilla cake mix works best to show off the festive red and green colors. Yellow cake mix can also work, but might slightly alter the final look.
Gel food coloring is recommended because it provides vibrant colors without changing the dough’s consistency. Standard liquid food coloring will work but might make the dough slightly wetter.
Look for slightly golden edges and a set center. The cookies will still be soft when you remove them from the oven but will firm up as they cool.
The powdered sugar creates a crackled, slightly crisp exterior and adds a sweet, delicate coating that makes the cookies look festive and professional.
Print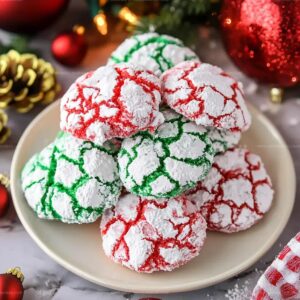
Christmas Crinkle Cookies Recipe
- Total Time: 32 minutes
- Yield: 24 1x
Description
Festive Christmas crinkle cookies bring holiday cheer with powdered sugar-dusted chocolate delights. Chocolate lovers will savor these melt-in-your-mouth treats that sparkle with seasonal magic and warmth.
Ingredients
Main Ingredients:
- 1 box (13.25 ounces / 375 grams) white cake mix
- 2 eggs
- 1/3 cup (79 milliliters) olive oil
Decorative Ingredients:
- 1/3 cup (40 grams) powdered sugar
- Red food coloring
- Green food coloring
Instructions
- Preheat the oven to 375°F and prepare a baking sheet with parchment paper for easy cookie removal.
- In a large mixing bowl, combine cake mix, eggs, and oil until a smooth, uniform dough forms.
- Divide the dough evenly into two separate mixing bowls to create festive color variations.
- Add red food coloring to one bowl and green food coloring to the other, thoroughly mixing until the colors are consistent throughout.
- Gently roll small portions of dough into 1.5 tablespoon-sized balls, coating each completely in powdered sugar for a delicate, sweet exterior.
- Arrange the sugar-coated dough balls on the prepared baking sheet, spacing them approximately 1.5 inches apart to allow room for spreading during baking.
- Place the baking sheet in the preheated oven and bake for 9-12 minutes, or until the edges of the cookies are lightly golden and set.
- Remove the cookies from the oven and let them rest on the baking sheet for 2 minutes to firm up slightly.
- Carefully transfer the cookies to a cooling rack, allowing them to cool completely and develop a tender, melt-in-your-mouth texture.
Notes
- Swap cake mix for gluten-free alternatives to accommodate dietary restrictions, ensuring everyone can enjoy these festive treats.
- Use natural food coloring from beet or spinach juice for a healthier, chemical-free color option that adds subtle nutrition.
- Chill dough for 30 minutes before rolling to prevent spreading and create perfectly round, uniform cookies with crisp edges.
- Try flavor extracts like peppermint or almond to transform these cookies into unique seasonal variations that surprise and delight.
- Prep Time: 20 minutes
- Cook Time: 12 minutes
- Category: Desserts, Snacks
- Method: Baking
- Cuisine: American
Nutrition
- Serving Size: 24
- Calories: 120 kcal
- Sugar: 7 g
- Sodium: 150 mg
- Fat: 5 g
- Saturated Fat: 1 g
- Unsaturated Fat: 3.5 g
- Trans Fat: 0 g
- Carbohydrates: 18 g
- Fiber: 0.5 g
- Protein: 2 g
- Cholesterol: 25 mg
Nathaniel Brooks
Founder & Recipe Developer
Expertise
Farm-to-table cuisine, Seasonal recipe development, Culinary storytelling
Education
Ivy Tech Community College – Indianapolis, IN
Culinary Arts / Hospitality Administration & Events
Focused on hands-on training in classical and modern culinary techniques.
Nathaniel’s story starts in the foothills of the Appalachian Mountains, where farm stands, backyard gardens, and old family recipes shaped his love for real food. After graduating from Ivy Tech Community College in Indianapolis, he spent years working in farm-to-table kitchens, learning how to turn local, seasonal ingredients into something memorable.
Today, Nathaniel pours that same spirit into every single recipe on Aspiring Culinarian – recipes that feel real, comforting, and connected to the land. When he’s not in the kitchen, you’ll find him foraging wild herbs, chasing sunsets with his camera, or writing about the flavors that shaped his roots.