
Irresistible Classic Butter Cookies Recipe for Sweet Cravings
Butter lovers swoon over this classic butter cookies recipe that melts in your mouth with delicate, buttery perfection.
These delightful treats bring golden memories of childhood bakeries and cozy kitchen moments.
Simple ingredients combine to create an irresistible cookie that celebrates pure, rich flavor.
Crisp edges and tender centers make each bite a delectable experience.
European bakers have long cherished these delicate, melt-in-your-mouth morsels.
The recipe promises a straightforward path to creating bakery-worthy cookies right in your own kitchen.
Serve these elegant cookies with afternoon tea or as a sweet companion to your favorite coffee.
Sweet Holiday Classic: Why It’s Timeless

Ingredients in a Sweet Holiday Classic
Main Ingredients:Dry Ingredients:Flavor Enhancers:Optional Finishing Touches:Sweet Holiday Classic Step-by-Step
Step 1: Preheat and Prepare
Warm up your oven to 350°F and grab a baking sheet.
Line it with a silicone mat to prevent sticking and ensure easy cookie removal.
Step 2: Cream Butter and Sugar
In a large mixing bowl, whip the butter and sugar together until they become light, fluffy, and perfectly blended.
This creates the foundation for your delicious cookies.
Step 3: Incorporate Egg Yolks
Gently fold in the egg yolks and vanilla extract.
Mix thoroughly until the ingredients are completely combined and create a smooth, rich mixture.
Step 4: Create Cookie Dough
Gradually add the dry ingredients to your wet mixture.
Pour in the milk and continue beating until a stiff, cohesive dough forms.
The dough should hold its shape and feel slightly firm.
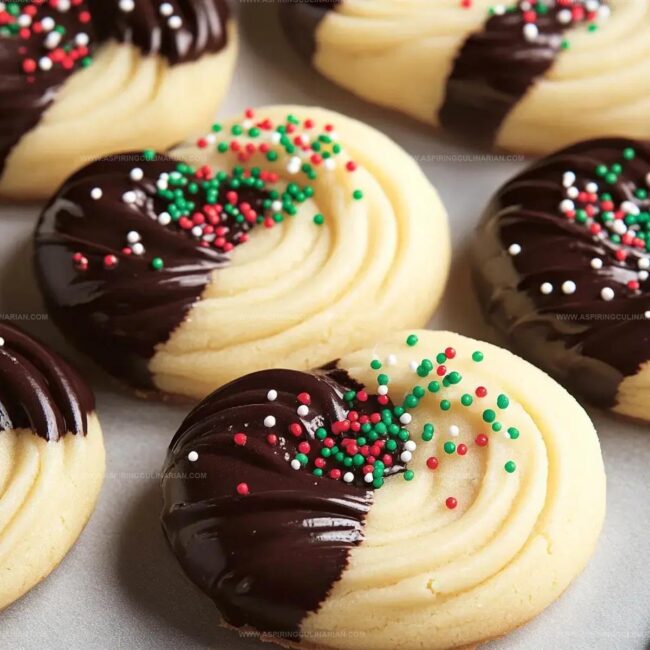
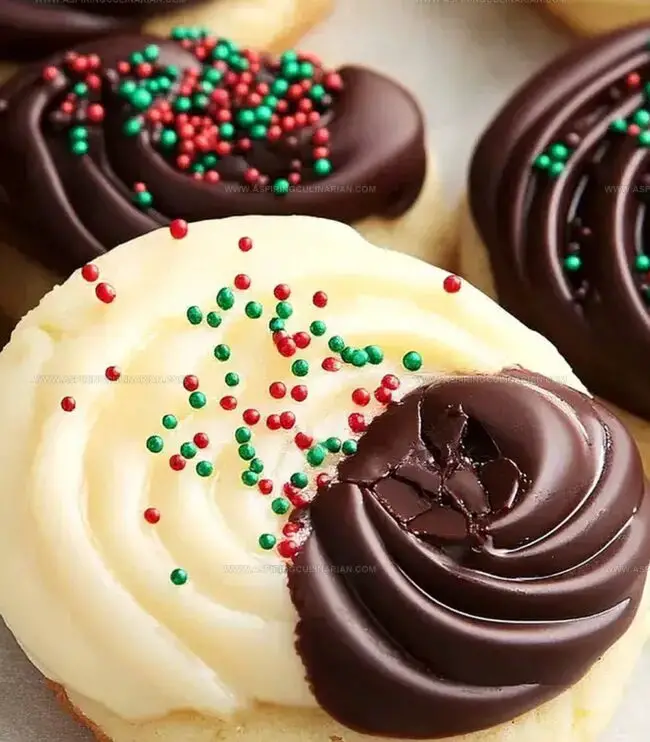
Step 5: Shape Elegant Swirls
Prepare a piping bag fitted with an Ateco 825 tip.
Carefully pipe beautiful 1½-inch swirls onto the prepared baking sheet.
Ensure each cookie is spaced about 2 inches apart to allow room for spreading.
Step 6: Bake to Golden Perfection
Slide the baking sheet into the preheated oven.
Bake each tray individually for 9-11 minutes.
Look for slightly golden edges as a sign of doneness.
Step 7: Cool and Set
Allow the cookies to rest on the baking sheet for 5-10 minutes.
This helps them firm up.
Carefully transfer to a wire cooling rack to cool completely.
Step 8: Optional Chocolate Finale
For an extra touch of indulgence, dip the cooled cookies in melted chocolate.
Sprinkle with festive decorations while the chocolate is still wet for a stunning finish.
Tips for Sweet Holiday Classic Perfection
Holiday Classic – Fresh Recipe Options
Serving a Sweet Holiday Classic with Charm
Keeping Holiday Classics Tasting Fresh
FAQs
The Ateco 825 tip creates beautiful classic swirls and gives professional-looking results with elegant ridges.
Yes, you can refrigerate the dough for up to 2 days before piping and baking, which helps develop richer flavor.
Chill the piped cookie dough for 15 minutes before baking to help maintain the intricate swirl shape and prevent excessive spreading.
Absolutely! With clear steps and simple ingredients, even novice bakers can successfully create these delightful holiday treats with practice.
Print
Classic Butter Cookies Recipe
- Total Time: 30 minutes
- Yield: 24 1x
Description
Crisp Danish Classic Butter Cookies bring sweet memories of grandma’s kitchen, melting with buttery richness. Delicate golden rounds promise simple pleasure, inviting you to savor each tender, crumbly bite.
Ingredients
Main Ingredients:
- 2 1/2 cups all-purpose flour
- 1 cup (226g) unsalted butter, room temperature
- 3 large egg yolks
- 2/3 cup (126g) granulated sugar
Flavoring Ingredients:
- 2 teaspoons vanilla or almond extract
- 2 tablespoons milk
Finishing Ingredients:
- 1/8 teaspoon salt
- 10 ounces (283g) Ghirardelli Chocolate Wafers (optional)
- Sprinkles for decoration (optional)
Instructions
- Preheat oven to 350°F and position a silicone-lined baking sheet for perfect cookie preparation.
- Cream butter and sugar in a mixing bowl until light and fluffy, creating a smooth base.
- Incorporate egg yolks and vanilla extract, blending thoroughly for a rich, aromatic mixture.
- Gradually fold in dry ingredients, alternating with milk, and mix until a firm, cohesive dough develops.
- Transfer dough to a piping bag fitted with Ateco 825 tip, creating elegant 1.5-inch swirled shapes.
- Carefully place piped cookies on prepared sheet, ensuring 2-inch spacing between each delicate morsel.
- Bake individually for 9-11 minutes, watching for golden edges that indicate perfect doneness.
- Allow cookies to rest on baking sheet for 5-10 minutes to set their structure.
- Gently transfer to wire cooling rack to complete cooling process.
- Optional final touch: Dip cooled cookies in melted chocolate and sprinkle with decorative toppings for festive flair.
Notes
- Use room temperature butter and eggs for smoother, more even mixing that creates a consistent dough texture.
- Chill dough for 15-30 minutes before piping to help maintain crisp swirl shapes and prevent spreading during baking.
- Hold piping bag at 90-degree angle and apply steady, consistent pressure to create uniform, elegant cookie swirls with clean edges.
- Swap regular flour with gluten-free blend and use plant-based butter for delicious vegan or gluten-sensitive versions that maintain the classic holiday cookie charm.
- Prep Time: 20 minutes
- Cook Time: 10 minutes
- Category: Desserts, Snacks
- Method: Baking
- Cuisine: American
Nutrition
- Serving Size: 24
- Calories: 133
- Sugar: 5g
- Sodium: 23mg
- Fat: 8g
- Saturated Fat: 5g
- Unsaturated Fat: 3g
- Trans Fat: 0g
- Carbohydrates: 15g
- Fiber: 0.5g
- Protein: 2g
- Cholesterol: 36mg
Nathaniel Brooks
Founder & Recipe Developer
Expertise
Farm-to-table cuisine, Seasonal recipe development, Culinary storytelling
Education
Ivy Tech Community College – Indianapolis, IN
Culinary Arts / Hospitality Administration & Events
Focused on hands-on training in classical and modern culinary techniques.
Nathaniel’s story starts in the foothills of the Appalachian Mountains, where farm stands, backyard gardens, and old family recipes shaped his love for real food. After graduating from Ivy Tech Community College in Indianapolis, he spent years working in farm-to-table kitchens, learning how to turn local, seasonal ingredients into something memorable.
Today, Nathaniel pours that same spirit into every single recipe on Aspiring Culinarian – recipes that feel real, comforting, and connected to the land. When he’s not in the kitchen, you’ll find him foraging wild herbs, chasing sunsets with his camera, or writing about the flavors that shaped his roots.