Spooktacular Colorful Halloween Fudge Recipe for Sweet Treats
Sweet treats can spark magic during Halloween fudge celebrations that bring joy to every gathering.
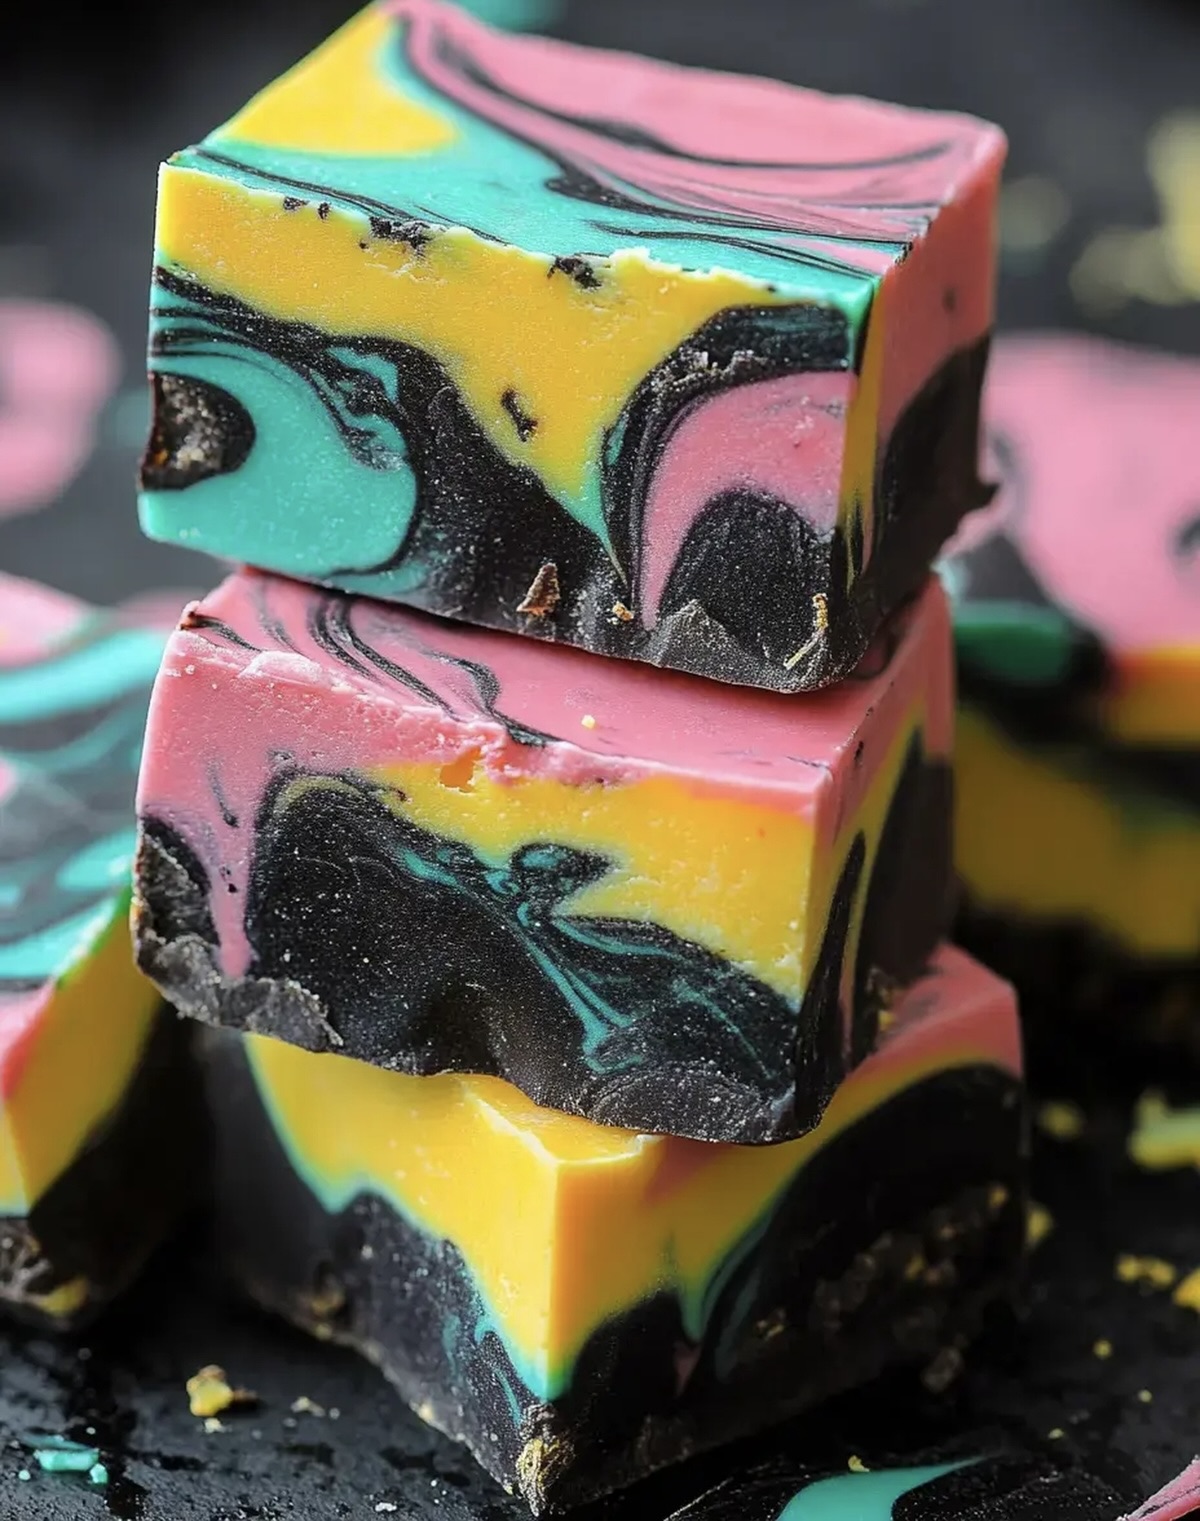
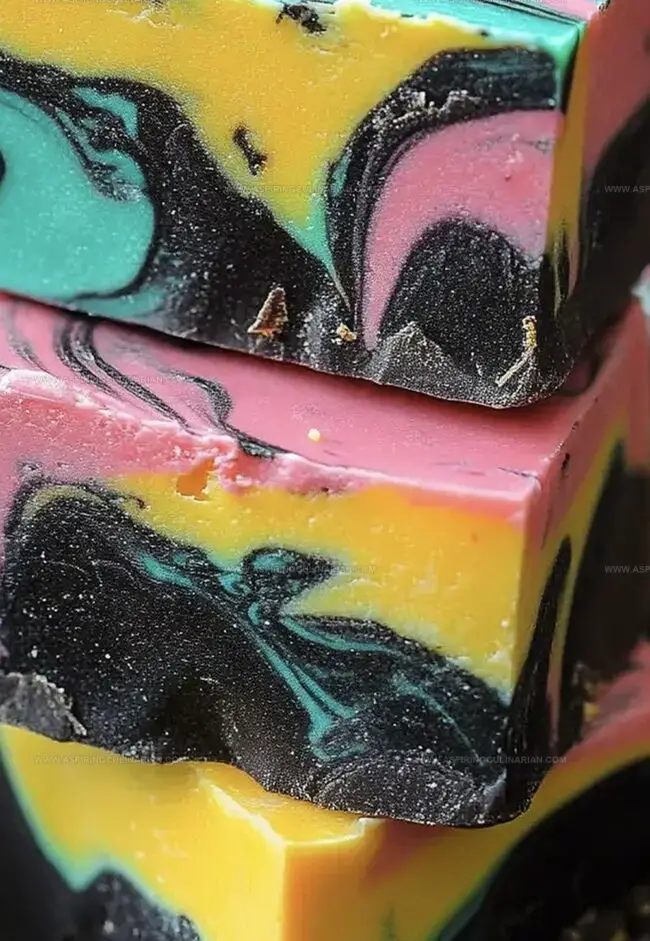
Festive colors swirl through this delightful confection like playful spirits dancing.
Kids absolutely adore the vibrant purple and orange marbled patterns.
Creamy chocolate mixed with seasonal hues creates a sensational dessert everyone will remember.
Simple ingredients and quick preparation make this recipe perfect for busy households.
Minimal kitchen skills are required to craft these delectable squares.
You’ll instantly become the star of any Halloween party with this spectacular confection.
Colorful Halloween Fudge Treats Worth Celebrating

Ingredients Checklist for Colorful Halloween Fudge
Main Ingredients:Flavoring and Enhancers:Coloring Ingredients:Preparation Ingredient:How to Prepare Fun and Festive Halloween Fudge
Step 1: Prep Your Workspace
Grab an 8×8-inch baking pan and line it completely with parchment paper, making sure the paper covers the bottom and sides smoothly for easy fudge removal later.
Step 2: Craft Creamy Base
In a medium saucepan over gentle heat, combine:Stir the ingredients continuously until they transform into a silky, glossy mixture with no lumps.
Step 3: Enhance Flavor Profile
Pour vanilla extract into the melted mixture, stirring gently to distribute the rich, aromatic essence throughout the creamy base.
Step 4: Create Colorful Palette
Carefully divide the smooth mixture into four separate mixing bowls.
Add unique food coloring to each bowl:Stir each bowl until the colors blend seamlessly and vibrantly.
Step 5: Design Playful Pattern
Grab your prepared pan and start dropping tablespoons of each colored mixture randomly.
Create a swirling, marbled design by alternating colors and slightly swirling with a toothpick for a mesmerizing effect.
Step 6: Chill And Slice
Allow the fudge to set overnight in the refrigerator.
Once firm, lift the parchment paper and cut into bite-sized squares.
Enjoy your spooky, colorful Halloween treat!
Smart Tips for Perfect Halloween Fudge Results
Holiday Fudge Ideas for a Special Twist
Suggestions for Serving Colorful Fudge to Guests
How to Store Halloween Fudge for Events
FAQs
Line the 8×8-inch pan with parchment paper, allowing some overhang for easy removal. This creates a non-stick surface and helps you lift the entire fudge block out smoothly.
Yes, gel food coloring works better for fudge. It provides more vibrant colors and won’t thin out the mixture. Use small amounts and mix thoroughly to achieve the desired Halloween-themed colors.
Use a sharp knife dipped in hot water and wiped dry between each cut. This technique helps create clean, precise squares without pulling or tearing the fudge.
Print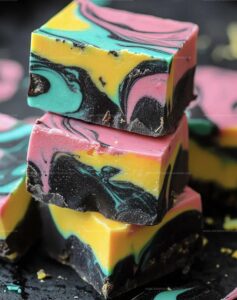
Colorful Halloween Fudge Recipe
- Total Time: 8 hours 30 minutes
- Yield: 16 1x
Description
Halloween magic sparkles through this spooky Colorful Halloween Fudge, blending creamy white chocolate with festive orange and purple swirls. Sweet treats bring Halloween cheer right to your kitchen, enticing dessert lovers with playful seasonal charm.
Ingredients
Main Ingredients:
- 3 cups white chocolate chips
- 1 (14 ounces / 396 grams) can sweetened condensed milk
Binding Ingredients:
- 4 tablespoons butter
Flavor and Color Enhancers:
- 1 teaspoon vanilla extract
- Gel food coloring: yellow, pink, teal, and black
Instructions
- Prepare a parchment-lined 8×8-inch baking pan, ensuring complete coverage with overhang for easy removal.
- Using a medium saucepan, gently heat white chocolate chips, sweetened condensed milk, and butter over low-medium temperature, continuously stirring until achieving a silky, uniform consistency.
- Remove from heat and incorporate vanilla extract, blending thoroughly.
- Carefully partition the molten mixture evenly into four separate mixing vessels.
- Introduce distinct food colorings into each bowl – selecting vibrant yellow, soft pink, teal blue, and deep black – stirring each until color is uniformly distributed.
- Artfully cascade tablespoon-sized dollops of each colored mixture into the prepared pan, creating an abstract, marbled visual design with intentional color placement.
- Allow fudge to solidify completely at room temperature overnight or approximately 8-10 hours.
- Once set, utilize parchment paper edges to lift entire fudge block from pan, then slice into precise, uniform squares using a sharp knife.
- Serve and enjoy the festive, multicolored Halloween treat.
Notes
- Lining the pan with parchment paper ensures easy removal and clean cuts for your festive fudge.
- Use gel food coloring for more vibrant, intense Halloween-themed colors that won’t water down the fudge texture.
- Chill the fudge in the refrigerator for faster setting if you’re short on time, but overnight setting provides the best consistency.
- For a gluten-free version, double-check that all ingredients, especially white chocolate chips, are certified gluten-free.
- Prep Time: 8 hours 20 minutes
- Cook Time: 10 minutes
- Category: Desserts, Snacks
- Method: Baking
- Cuisine: American
Nutrition
- Serving Size: 16
- Calories: 226
- Sugar: 24 g
- Sodium: 28 mg
- Fat: 13 g
- Saturated Fat: 8 g
- Unsaturated Fat: 5 g
- Trans Fat: 0.1 g
- Carbohydrates: 27 g
- Fiber: 0.2 g
- Protein: 1.4 g
- Cholesterol: 15 mg
Nathaniel Brooks
Founder & Recipe Developer
Expertise
Farm-to-table cuisine, Seasonal recipe development, Culinary storytelling
Education
Ivy Tech Community College – Indianapolis, IN
Culinary Arts / Hospitality Administration & Events
Focused on hands-on training in classical and modern culinary techniques.
Nathaniel’s story starts in the foothills of the Appalachian Mountains, where farm stands, backyard gardens, and old family recipes shaped his love for real food. After graduating from Ivy Tech Community College in Indianapolis, he spent years working in farm-to-table kitchens, learning how to turn local, seasonal ingredients into something memorable.
Today, Nathaniel pours that same spirit into every single recipe on Aspiring Culinarian – recipes that feel real, comforting, and connected to the land. When he’s not in the kitchen, you’ll find him foraging wild herbs, chasing sunsets with his camera, or writing about the flavors that shaped his roots.