Playful Cookie Monster Cake Jars Recipe: Blue & Sweet Fun
Indulgent desserts sometimes surprise us with unexpected twists, and these cookie monster cake jars recipe creations deliver pure childhood nostalgia with a modern bakery flair.
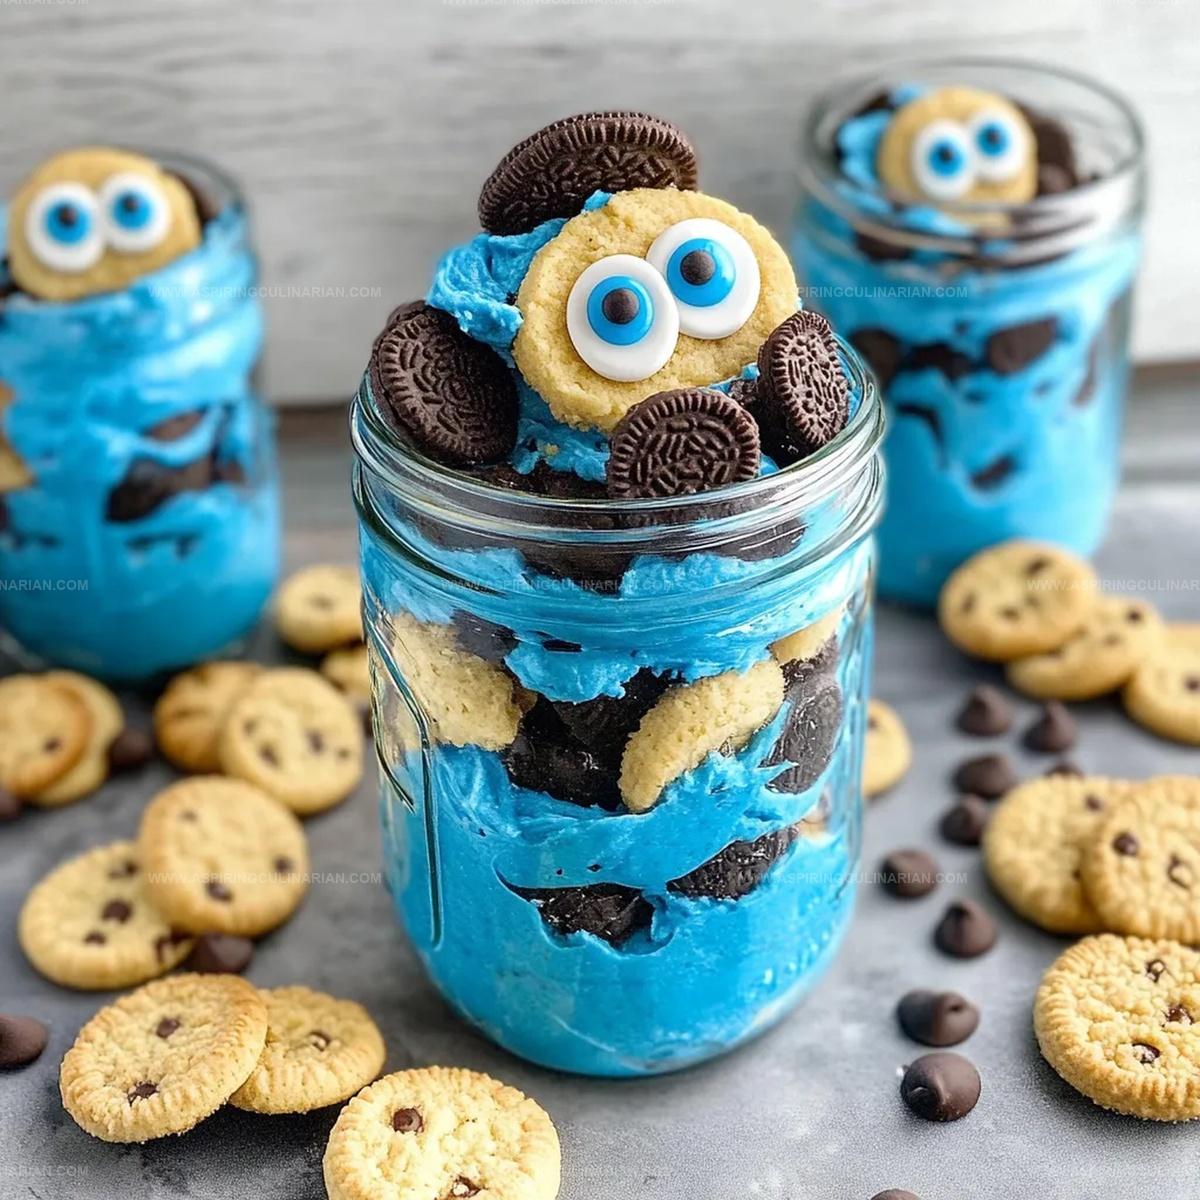
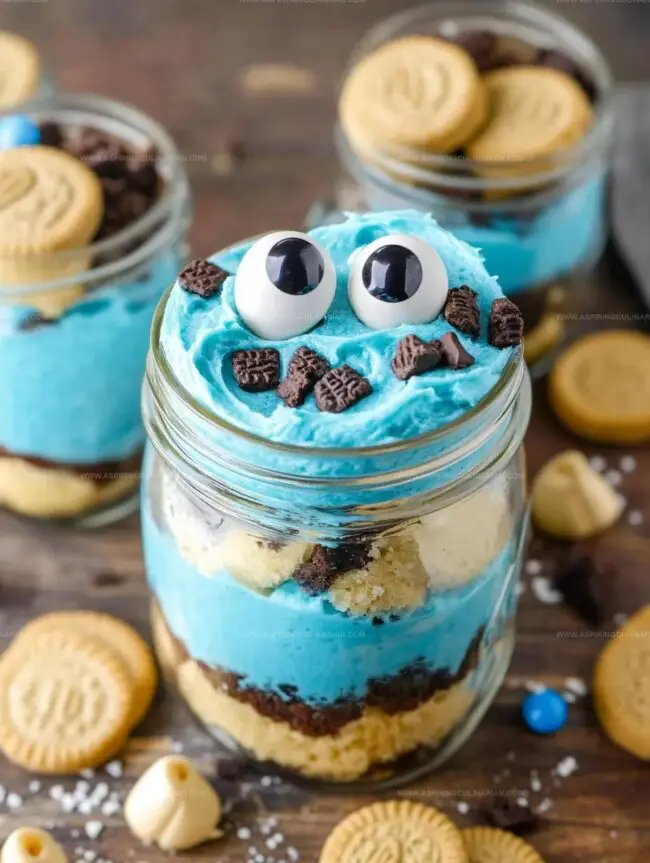
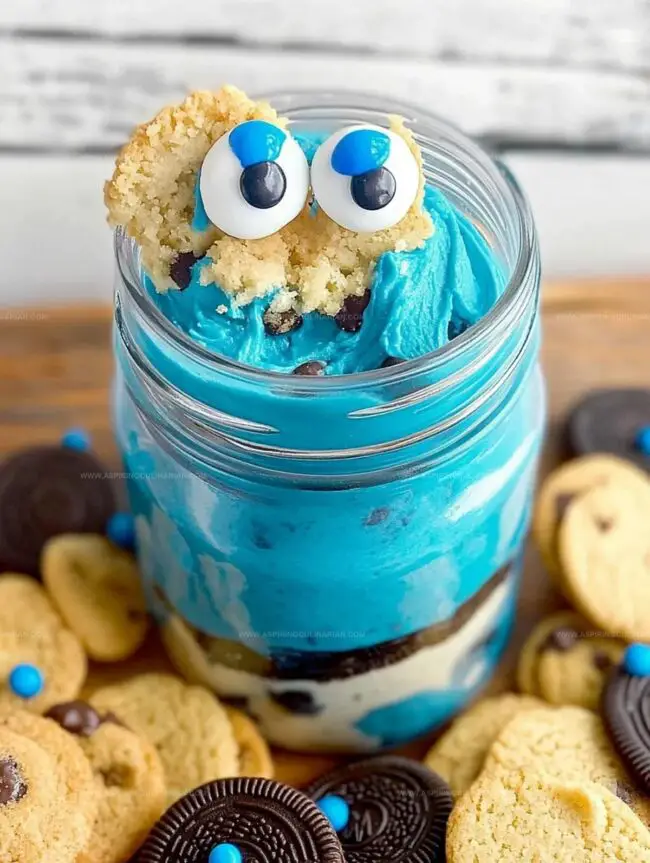
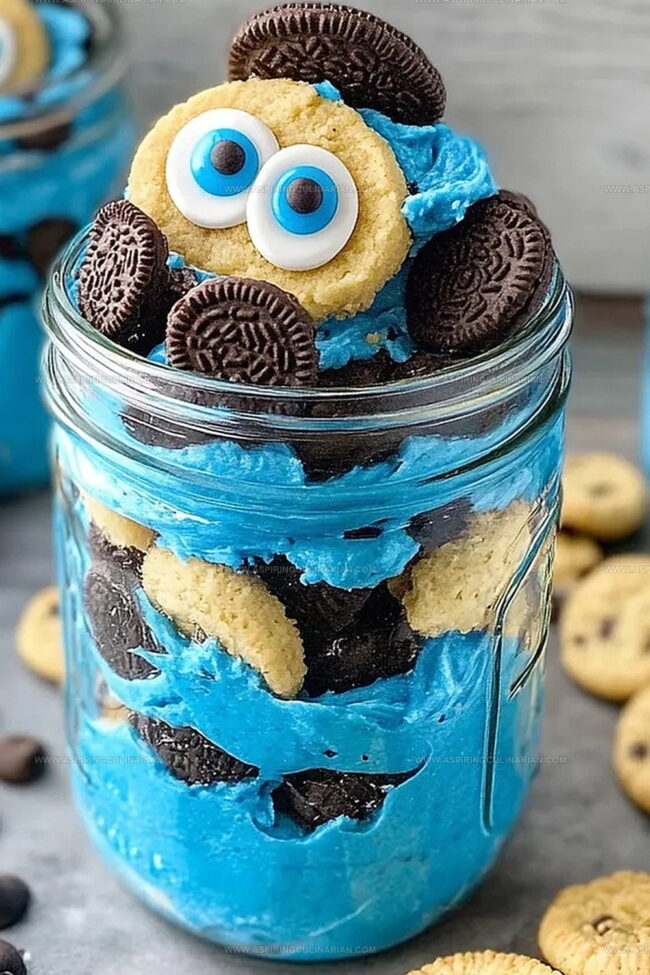
Blue buttercream swirls dance atop layers of moist chocolate cake, capturing that beloved fuzzy character’s essence.
Crumbled chocolate chip cookies add delightful texture and crunch to each spoonful.
Layered carefully in charming glass jars, these treats bring whimsy to any gathering or sweet moment.
Children and adults alike will marvel at the playful blue hues and rich flavors.
The combination of soft cake, creamy frosting, and cookie pieces creates an irresistible dessert that promises to delight every single bite.
Prepare to fall in love with this adorable and delicious sweet sensation.
Cookie Monster Cake Jars Bring The Fun Factor
Gather Ingredients For Cookie Monster Cake Jars Today
Main Ingredients:Garnish and Finishing Touches:Create Cookie Monster Cake Jars In Three Steps
Step 1: Whip Up the Cake Base
Grab your favorite cake mix and follow the box instructions.
While mixing, chop up some Oreos and gently fold them into the batter.
This adds a delightful crunch and extra cookie goodness.
Step 2: Bake to Perfection
Pour the batter into your prepared pan and bake according to the package directions.
Let the cake cool completely – patience is key for a spectacular dessert!
Step 3: Create Magical Blue Frosting
In a large mixing bowl, blend:Mix until smooth and creamy, creating a perfect base for your Cookie Monster magic.
Step 4: Build Frosting Flavor
Add to the butter mixture:Mix thoroughly, starting slow and increasing speed to create a silky smooth texture.
Step 5: Transform Frosting into Cookie Monster Blue
Incorporate these ingredients:Beat the mixture, gradually increasing speed.
Continue mixing for 2-3 minutes until the frosting is light and fluffy.
Step 6: Check Frosting Consistency
Test the frosting with a spoon.
If it needs adjustment, add a splash of milk and beat for an additional 4-5 minutes until it’s perfectly pipeable.
Step 7: Prepare Assembly Station
Fill a piping bag with blue frosting.
Gather mason jars, chopped cookies, cake crumbles, and decorative elements.
Step 8: Layer Cake Crumbles
Scoop 1-2 layers of crumbled cake into each mason jar.
Gently press down to create a compact base.
Step 9: Add First Cookie Layer
Pipe a generous layer of blue frosting over the cake.
Sprinkle chopped chocolate chip and Oreo cookies on top.
Step 10: Continue Layering
Repeat the process:Finish with a beautiful frosting swirl on top.
Step 11: Create Cookie Monster Face
Carefully place:Position these to bring your Cookie Monster to life!
Step 12: Final Festive Touch
Optional: Wrap a blue ribbon around each jar’s rim, securing with glue dots for an extra cute presentation.
Try These Tips For Cookie Monster Cake Jars
Mix Up Cookie Monster Cake Jars Your Style

Display Cookie Monster Cake Jars For Extra Smiles
Cookie Monster Cake Jars Storage For Every Baker
FAQs
Any standard vanilla or chocolate cake mix will work perfectly. The key is following the box instructions precisely to ensure a moist cake base.
Yes, you can prepare the cake jars up to 2-3 days in advance. Store them covered in the refrigerator and add the cookie decorations just before serving to keep everything fresh and crisp.
Not at all! A simple large star tip (like tip 1M) will help you create beautiful swirls easily. Just apply consistent pressure while piping and you’ll get professional-looking results.
Print
Cookie Monster Cake Jars Recipe
- Total Time: 1 hour 25 minutes
- Yield: 12 1x
Description
Indulgent Cookie Monster cake jars bring nostalgic Sesame Street charm to dessert tables with layers of blue-tinted goodness. Creamy frosting, crumbled cookies, and playful blue hues create a whimsical treat you’ll devour with pure childhood delight.
Ingredients
Main Ingredients:
- 15 ounces (425 grams) white or vanilla cake mix
- 1 cup (2 sticks) unsalted butter, room temperature
- 1/2 cup vegetable shortening
- 18–20 Oreos, chopped
- 8–10 chocolate chip cookies, chopped
Cake Mix Additional Ingredients:
- Ingredients called for on cake mix box (typically eggs, oil, and water)
Decorative and Flavoring Ingredients:
- 3 cups powdered sugar
- 2–3 tablespoons milk or coffee creamer
- 1 teaspoon vanilla extract
- 1 drop electric blue Americolor gel color
- 2 drops royal blue Chef Masters gel color
- 8 candy eyes
- 2 chocolate chip cookies, cut in half
- Blue ribbon (optional, for decorating jars)
- Glue dots (optional, for securing ribbon)
Instructions
- Preheat the oven according to cake mix instructions and prepare cake pan(s) with non-stick spray.
- Mix cake batter following package directions, gently incorporating chopped Oreos into the mixture.
- Transfer batter into prepared pan(s) and bake at recommended temperature for specified time.
- Allow cake to cool completely on a wire rack for approximately 30-40 minutes.
- In a large mixing bowl, cream together room temperature butter and vegetable shortening until smooth and uniform.
- Gradually incorporate powdered sugar and vanilla extract, mixing at low speed and increasing to medium.
- Add remaining powdered sugar, milk, and blue gel food coloring, blending from low to high speed.
- Beat frosting for 2-3 minutes until fluffy and spreadable, adjusting consistency with additional milk if needed.
- Fill piping bag with blue frosting using a large decorative tip.
- Crumble cooled cake into small, even pieces.
- Layer mason jars with cake crumbs, gently pressing down to create compact base.
- Pipe blue frosting over cake layer, generously covering the crumbs.
- Sprinkle chopped chocolate chip cookies and Oreo pieces between cake and frosting layers.
- Repeat layering process until jar is nearly full, ending with a decorative frosting swirl.
- Place candy eyeballs on top of frosting to create Cookie Monster’s face.
- Position half a chocolate chip cookie beneath eyes to represent mouth.
- Optional: Embellish jar rim with blue ribbon secured by adhesive dots.
Notes
- Customize cake mix by folding in crushed Oreos for extra texture and flavor depth.
- Allow cake to cool completely to prevent frosting from melting and ensure clean layering.
- Use gel food coloring for vibrant blue shade without watering down frosting consistency.
- Adjust milk quantity gradually to achieve perfect piping frosting texture, preventing runny or too-stiff results.
- Crumble cake while slightly warm for easier, more even compacting in mason jars.
- Try different cookie combinations like chocolate chip, graham crackers, or peanut butter cookies for unique variations.
- Make dairy-free by substituting butter with vegan alternatives and using non-dairy milk or creamer.
- Prepare jars ahead and refrigerate for up to 3 days, keeping cookie crunch intact.
- Prep Time: 45 minutes
- Cook Time: 40 minutes
- Category: Desserts, Snacks
- Method: Baking
- Cuisine: American
Nutrition
- Serving Size: 12
- Calories: 360
- Sugar: 25 g
- Sodium: 250 mg
- Fat: 18 g
- Saturated Fat: 8 g
- Unsaturated Fat: 10 g
- Trans Fat: 0 g
- Carbohydrates: 48 g
- Fiber: 1 g
- Protein: 3 g
- Cholesterol: 30 mg
Lena Martinez
Contributing Writer & Culinary Educator
Expertise
Southwestern and Latin American cuisines, Vegetarian and plant-based recipe development, Culinary education and community outreach
Education
Santa Fe Community College, Santa Fe, NM
Certificate in Culinary Arts
Emphasized Southwestern cuisine and sustainable cooking practices
Lena grew up surrounded by the colors, spices, and traditions of the Southwest – flavors that sparked her love for bold, honest cooking. After earning her Culinary Arts certificate at Santa Fe Community College, she made it her mission to teach home cooks how to create flavorful, plant-powered meals without the fuss.
Her recipes are packed with vibrant ingredients, simple steps, and the kind of heart that turns a regular meal into something you’ll want to share. Outside the kitchen, Lena spends her time wandering farmers’ markets, trading family recipes, and helping young chefs find their voice through food.