
Death by Chocolate Cake Recipe: Decadent Bliss in Every Slice
Chocolate lovers swoon over this decadent death by chocolate cake recipe that promises pure indulgence.
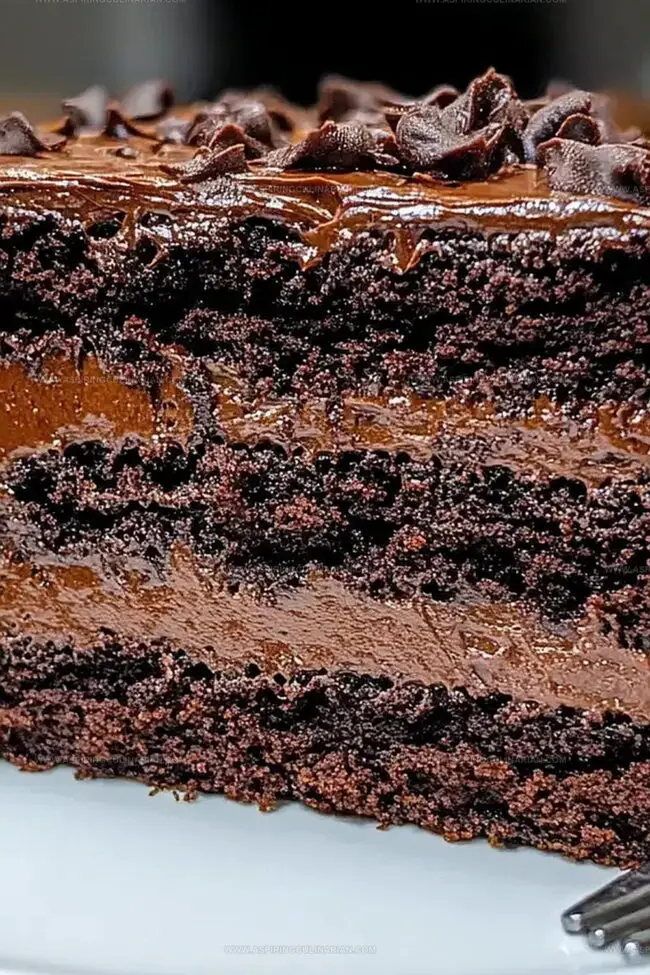
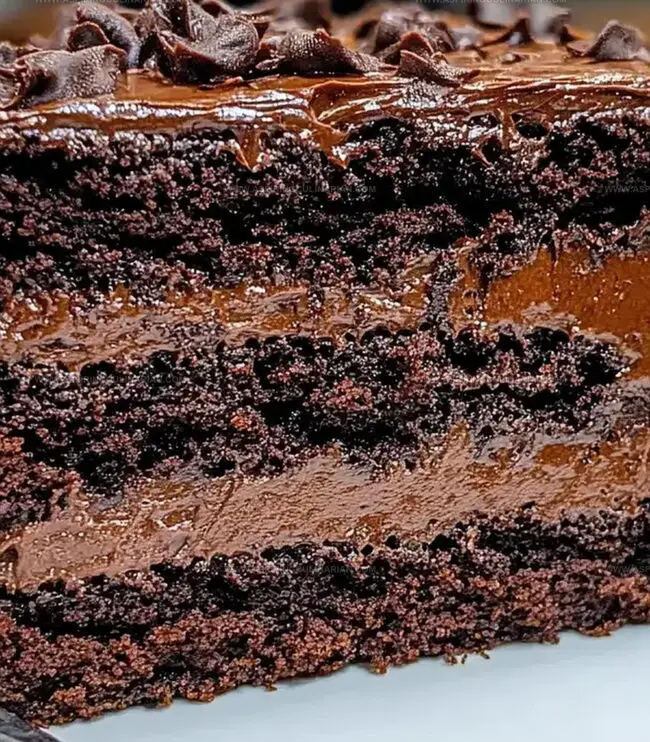
Rich, velvety layers of moist chocolate cake melt in your mouth with each delightful bite.
Dark chocolate ganache drips seductively between each tender layer, creating an irresistible dessert.
Dense chocolate frosting blankets the entire cake in luxurious waves of cocoa bliss.
Intense chocolate flavors dance across your palate with every forkful of this sinful treat.
Prepare to experience a chocolate experience so divine it practically defines dessert perfection.
This recipe transforms ordinary baking into an extraordinary chocolate celebration you won’t forget.
Ultimate Chocolate Dream: Why It’s a Showstopper
All You Need for Ultimate Chocolate Dream
Liquid Ingredients:Dry Ingredients:Baking and Decorative Ingredients:Creating an Ultimate Chocolate Dream Cake

Step 1: Create Simple Chocolate Syrup
Combine water and sugar in a saucepan over medium heat.
Whisk continuously until sugar dissolves completely.
Stir in cocoa powder until smooth and integrated.
Remove from heat and let it cool to room temperature.
Step 2: Prepare Baking Station
Preheat oven to 350°F.
Grease and line three 8-inch round cake pans with parchment paper.
Ensure all baking tools and ingredients are readily accessible.
Step 3: Mix Dry Cake Ingredients
In a large mixing bowl, sift together:Whisk ingredients until thoroughly combined and free of lumps.
Step 4: Blend Wet Cake Ingredients
In a separate bowl, whisk together:Blend until ingredients are smooth and well incorporated.
Step 5: Create Cake Batter
Gradually pour wet ingredients into dry ingredients.
Gently fold until just combined.
Avoid overmixing to maintain cake’s light texture.
Step 6: Bake Chocolate Cake Layers
Divide batter evenly among prepared cake pans.
Spread batter smoothly.
Bake in preheated oven for 23-26 minutes.
Test doneness with a toothpick inserted in center.
Step 7: Cool And Level Cake Layers
Remove cakes from oven.
Let cool in pans for 15 minutes.
Transfer to wire rack.
Once completely cooled, level tops using a serrated knife for even stacking.
Step 8: Prepare Chocolate Buttercream
In a stand mixer, beat softened butter until creamy.
Add:Gradually incorporate powdered sugar.
Mix in heavy cream.
Fold in melted chocolate until silky smooth.
Step 9: Assemble Cake Layers
Brush each cake layer with prepared chocolate syrup.
Spread buttercream between layers.
Stack layers carefully and evenly.
Step 10: Decorate Chocolate Masterpiece
Cover entire cake with remaining buttercream.
Press chocolate chips around cake sides.
Pipe decorative rosettes or swirls on top.
Garnish with chocolate shavings if desired.
Tips for Chocolate Dessert Excellence
Recipe Variations for Ultimate Chocolate Dream
Serving Up Ultimate Chocolate Dream Dessert
Keeping Chocolate Dream Dessert Fresh
FAQs
The simple syrup with cocoa powder creates an intense chocolate base that adds moisture and deepens the cake’s overall chocolate taste.
After baking, let the cakes cool for 15 minutes, then use a long serrated knife to carefully level the tops for uniform, professional-looking layers.
Brushing layers with syrup helps keep the cake incredibly moist, prevents dryness, and enhances the chocolate flavor throughout each slice.
Beat the butter until completely smooth before gradually adding sugar and cream, which prevents lumps and creates a silky, spreadable frosting.
Print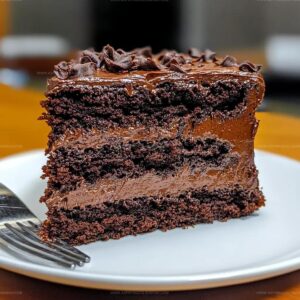
Death By Chocolate Cake Recipe
- Total Time: 1 hour 40 minutes
- Yield: 12 1x
Description
Indulgent chocolate lovers rejoice with this death by chocolate cake that promises pure bliss in every rich, velvety slice. Layers of moist chocolate cake, decadent ganache, and silky chocolate mousse create an irresistible dessert you’ll crave again and again.
Ingredients
Dry Ingredients:
- 2 cups all-purpose flour (260g / 9.2 oz)
- 2 cups granulated sugar (400g / 14.1 oz)
- 3/4 cup dark cocoa powder (75g / 2.6 oz)
- 1 cup dark cocoa powder (100g / 3.5 oz)
- 2 tsp baking powder (8g / 0.3 oz)
- 1 1/2 tsp baking soda (9g / 0.3 oz)
- 1 tsp fine salt (6g / 0.2 oz)
- 1/2 tsp fine salt (3g / 0.1 oz)
- 5 cups powdered sugar (625g / 22 oz)
Liquid and Soft Ingredients:
- 1/2 cup water (120g / 4.2 oz)
- 1 cup warm water (240g / 8.5 oz)
- 1 cup sour cream, room temp (255g / 9 oz)
- 1/2 cup vegetable oil (110g / 3.9 oz)
- 2 large eggs, room temp (112g / 4 oz)
- 2 cups unsalted butter, room temp (434g / 15.3 oz)
- 3/4 cup heavy cream (180g / 6.3 oz)
Flavor and Optional Ingredients:
- 1 tbsp dark cocoa powder (6g / 0.2 oz)
- 2 tsp vanilla extract (8g / 0.3
Instructions
- Craft the simple syrup by simmering water and sugar until dissolved, then whisk in cocoa powder thoroughly until smooth and glossy.
- Allow the simple syrup to cool completely to room temperature, which helps develop deeper flavor complexity.
- Preheat the oven to 350°F and meticulously prepare three 8-inch cake pans with parchment paper and light butter coating.
- Sift together all dry ingredients in a large mixing bowl, ensuring no lumps remain and ingredients are uniformly combined.
- In a separate bowl, blend wet ingredients until they create a smooth, cohesive mixture with consistent texture.
- Gently fold wet and dry ingredients together, mixing just until incorporated to maintain the cake’s delicate structure.
- Evenly distribute batter among prepared pans, spreading smoothly, and bake for 23-26 minutes until a toothpick emerges clean.
- Remove cakes from oven and let rest for 15 minutes, then carefully level layers using a serrated knife for even surface.
- Prepare buttercream by beating butter until creamy, then gradually incorporate cocoa, vanilla, salt, powdered sugar, and cream until luxuriously smooth.
- Melt chocolate and fold into buttercream, creating a rich, glossy frosting with intense chocolate flavor.
- Delicately brush each cake layer with prepared simple syrup to enhance moisture and depth of taste.
- Carefully stack layers, spreading buttercream between each, creating a stable and delectable tower of chocolate decadence.
- Generously coat entire cake with remaining buttercream, ensuring smooth and even coverage.
- Artfully press chocolate chips around cake sides for textural contrast and visual appeal.
- Finish by piping elegant decorative elements on top, transforming the cake into a stunning chocolate masterpiece.
Notes
- Use room temperature ingredients for smoother mixing and more even baking, ensuring a tender chocolate cake texture.
- Sift dry ingredients to prevent lumps and create a lighter, more delicate crumb that melts in your mouth.
- Brush layers with simple syrup to lock in moisture and add an extra layer of rich chocolate flavor, keeping the cake incredibly moist.
- For gluten-free option, substitute all-purpose flour with a 1:1 gluten-free baking blend, maintaining the cake’s decadent chocolate essence.
- Prep Time: 1 hour 15 minutes
- Cook Time: 25 minutes
- Category: Desserts
- Method: Baking
- Cuisine: American
Nutrition
- Serving Size: 12
- Calories: 658
- Sugar: 54g
- Sodium: 339mg
- Fat: 36g
- Saturated Fat: 20g
- Unsaturated Fat: 16g
- Trans Fat: 0g
- Carbohydrates: 73g
- Fiber: 3g
- Protein: 6g
- Cholesterol: 57mg
Nathaniel Brooks
Founder & Recipe Developer
Expertise
Farm-to-table cuisine, Seasonal recipe development, Culinary storytelling
Education
Ivy Tech Community College – Indianapolis, IN
Culinary Arts / Hospitality Administration & Events
Focused on hands-on training in classical and modern culinary techniques.
Nathaniel’s story starts in the foothills of the Appalachian Mountains, where farm stands, backyard gardens, and old family recipes shaped his love for real food. After graduating from Ivy Tech Community College in Indianapolis, he spent years working in farm-to-table kitchens, learning how to turn local, seasonal ingredients into something memorable.
Today, Nathaniel pours that same spirit into every single recipe on Aspiring Culinarian – recipes that feel real, comforting, and connected to the land. When he’s not in the kitchen, you’ll find him foraging wild herbs, chasing sunsets with his camera, or writing about the flavors that shaped his roots.