The Best Cookie Monster Cheesecake Recipe You’ll Ever Try
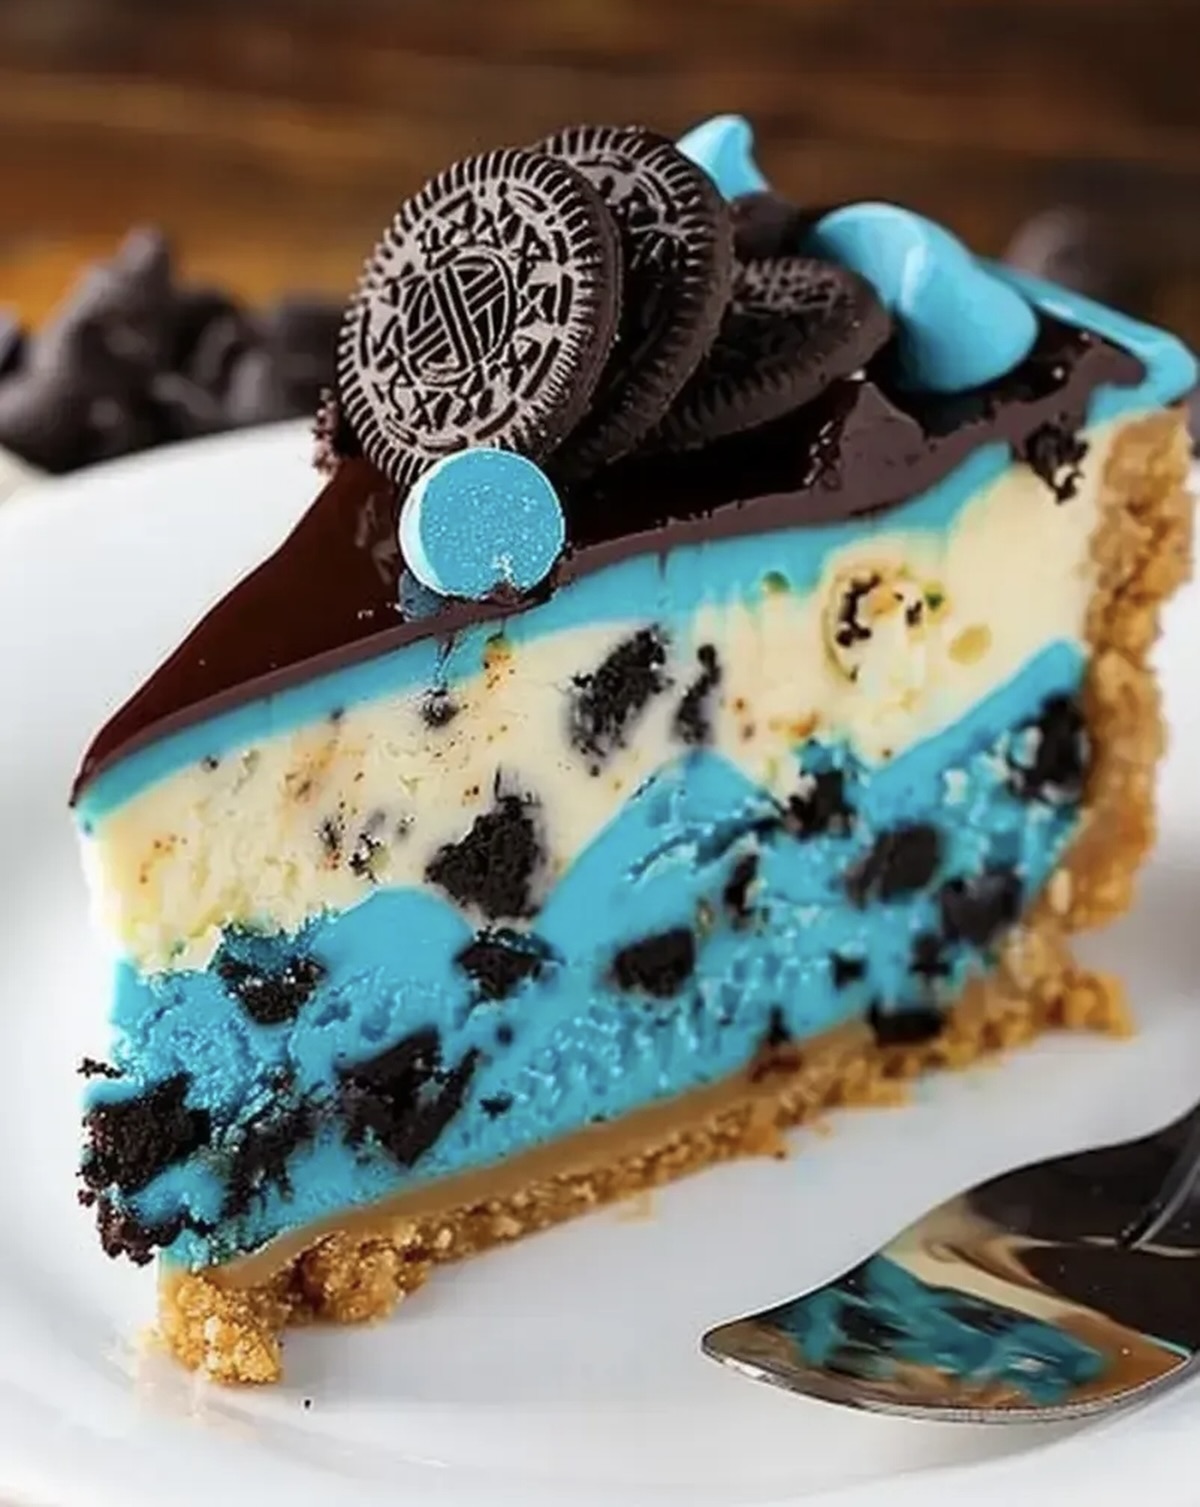
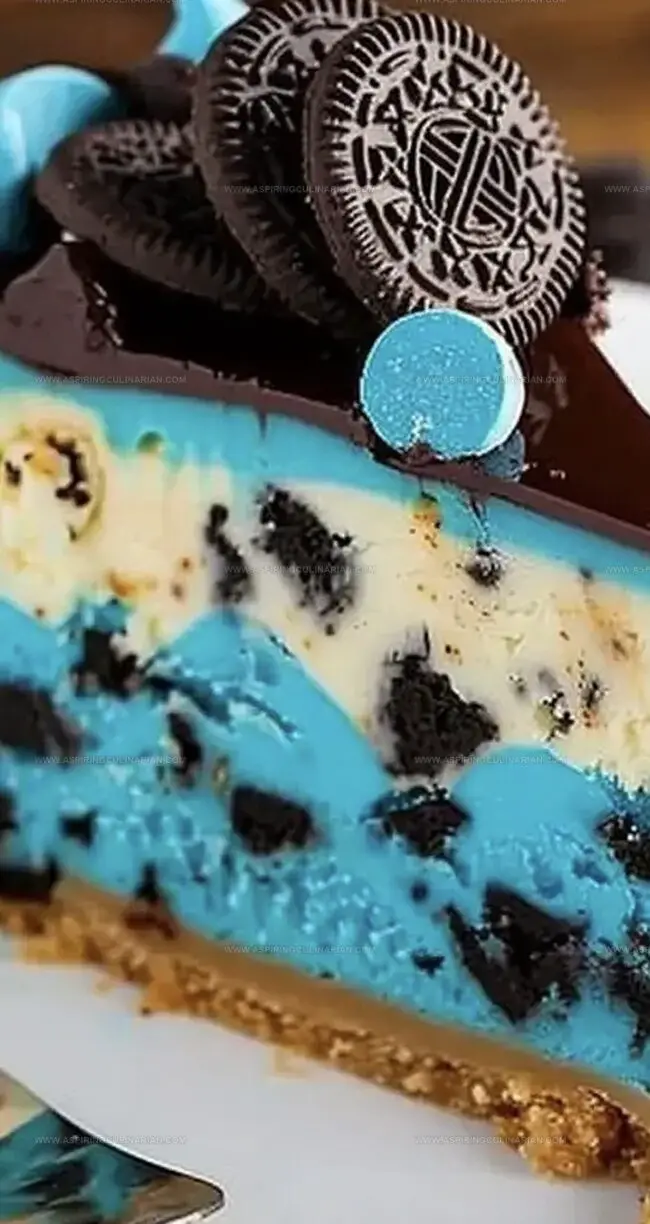
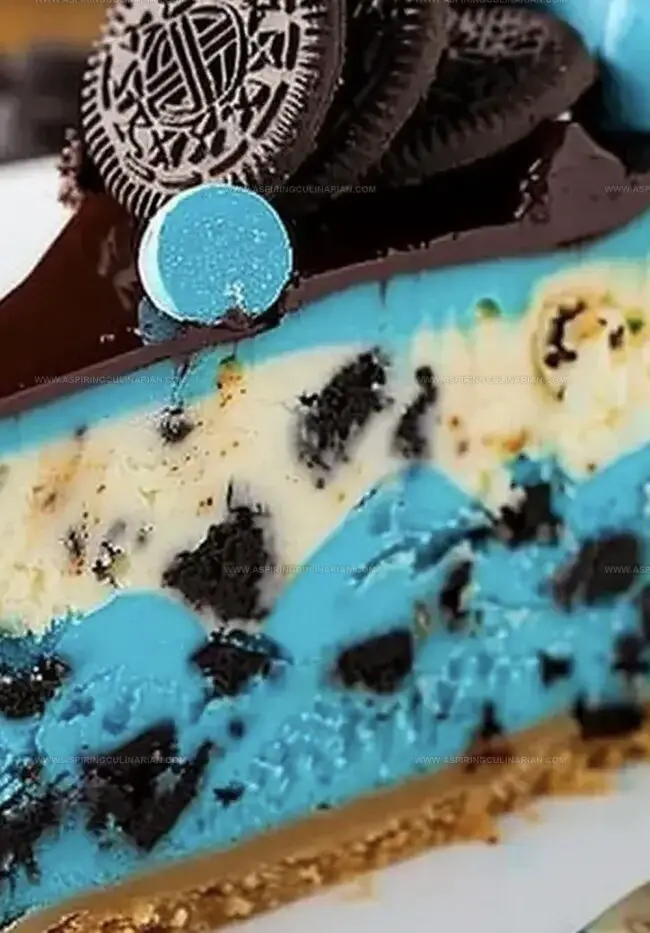
Blue and whimsical, this cookie monster cheesecake recipe brings childhood nostalgia to your dessert table.
Bursting with vibrant colors and playful charm, the treat captures everyone’s imagination.
Crumbly cookies and creamy cheesecake blend into a delightful masterpiece that sparks joy.
Layers of rich, smooth filling create a dessert that looks almost too adorable to eat.
Each slice promises a whimsical journey of sweet flavors and memorable moments.
Bakers of all skill levels can recreate this magical dessert with simple ingredients and a dash of creativity.
Prepare to delight both young and old with this showstopping cookie monster cheesecake that turns any gathering into a celebration.
What Makes Cookie Monster Cheesecake So Fun
All the Ingredients for Cookie Monster Cheesecake
Crust Ingredients:Cheesecake Filling Ingredients:Ganache Topping Ingredients:Tools for Baking a Cookie Monster Cheesecake
Step-by-Step for Delicious Cookie Monster Cheesecake
Step 1: Warm Up The Oven
Crank the oven to a toasty 350F (175C) and get ready for a baking adventure.
Step 2: Create The Buttery Base
Melt the butter in a saucepan over medium heat.
Sprinkle in salt and brown sugar, stirring until they become best friends.
Step 3: Blend Liquid Magic
Remove from heat and introduce the egg and vanilla extract, whisking them into a silky smooth mixture.
Step 4: Welcome The Flour Family
Gently fold in the flour until just combined, then lovingly mix in the chocolate chips for extra yumminess.
Step 5: Spread The Love
Evenly spread the batter into a prepared baking pan, making sure every corner gets some attention.
Step 6: Bake And Breathe
Bake for 15-20 minutes until a toothpick comes out clean.
Let the crust cool completely while you dream about the deliciousness to come.
Step 7: Cream Cheese Clouds
In a large bowl, beat the cream cheese until it’s smooth as silk.
Step 8: Dry Ingredient Dance
Sprinkle in cornstarch, granulated sugar, and a pinch of salt, mixing until perfectly combined.
Step 9: Color And Cream
Slowly add whipping cream, blue food coloring, and vanilla extract, blending until the mixture looks like a Cookie Monster dream.
Step 10: Egg-cellent Addition
Gently beat in the eggs one at a time, ensuring each is fully incorporated before the next joins the party.
Step 11: Oreo Avalanche
Fold in the crushed Oreo cookies with a gentle touch.
Step 12: Layer The Deliciousness
Pour the cheesecake mixture over the cooled blondie base, creating a dreamy landscape of flavor.
Step 13: Water Bath Technique
Carefully place the baking pan in a larger pan filled with hot water for a perfect bake.
Step 14: Slow And Steady Baking
Bake at 300F (150C) for 45-55 minutes until the cheesecake is set but still has a slight wiggle in the center.
Step 15: Oven Cool Down
Turn off the oven and let the cheesecake rest inside for one hour, like a sleeping beauty.
Step 16: Chill Time
Remove from the oven and refrigerate overnight, allowing flavors to mingle and develop.
Step 17: Ganache Preparation
Combine ingredients in a microwave-safe bowl.
Step 18: Melt And Mix
Microwave in 30-second intervals, stirring between each, until smooth and completely melted.
Step 19: Ganache Glory
Spread the ganache evenly over the chilled cheesecake, creating a glossy chocolate blanket.
Step 20: Final Flourish
Sprinkle additional crushed cookies on top for the ultimate Cookie Monster masterpiece.
Tips for a Colorful, Creamy Cheesecake
Fun Variations for Cookie Monster Cheesecake
Serving Cookie Monster Cheesecake at Parties
How to Store Leftover Cookie Monster Cheesecake
FAQs
The blue food coloring mixed into the cheesecake batter creates the signature bright blue color associated with Cookie Monster, while the crushed Oreo cookies represent his love for cookies.
The water bath helps create a gentle, even heat that prevents the cheesecake from cracking and ensures a smooth, creamy texture by keeping the moisture consistent during baking.
Yes, this recipe is perfect for advance preparation. You’ll need to refrigerate the cheesecake overnight, which actually helps develop richer flavors and allows the texture to set perfectly.
Print
Delicious Cookie Monster Cheesecake Recipe
- Total Time: 1 hour 45 minutes
- Yield: 8 1x
Description
Cookie monster cheesecake blends playful blue hues with creamy New York-style indulgence. Chocolate chip cookies and vibrant blue frosting create a whimsical dessert that delights both children and adults.
Ingredients
Main Ingredients:
- 16 ounces (454 grams) cream cheese
- 3 eggs
- 15 regular oreo cookies, crushed
- 3/4 cup (128 grams) semisweet chocolate chips
- 1/2 cup (113 grams) unsalted butter
Dry Ingredients:
- 1/2 cup (63 grams) all-purpose flour
- 1/3 cup (67 grams) brown sugar
- 1/3 cup (67 grams) granulated sugar
- 2 teaspoons cornstarch
- 1/2 teaspoon salt
- 1/2 cup (85 grams) semisweet mini chocolate chips
Liquid and Flavoring Ingredients:
- 1/2 cup (120 milliliters) whipping cream
- 1/2 cup (120 milliliters) heavy whipping cream
- 1 teaspoon vanilla extract
- 1 egg
- Blue gel food coloring
- Pinch of salt
- Pinch of salt
Instructions
- Preheat the oven to 350°F (175°C), preparing a baking pan with parchment paper for the blondie base.
- Melt butter in a saucepan over medium heat, incorporating brown sugar and salt until well combined.
- Remove from heat and whisk in egg and vanilla extract until smooth and integrated.
- Gently fold in flour, ensuring minimal mixing, then carefully incorporate chocolate chips throughout the batter.
- Spread the mixture evenly into the prepared pan, creating a uniform layer for the blondie foundation.
- Bake for 15-20 minutes until a toothpick comes out clean, then allow the crust to cool completely at room temperature.
- Using an electric mixer, cream the cream cheese until perfectly smooth and free of lumps.
- Gradually blend cornstarch, granulated sugar, and salt into the cream cheese mixture.
- Slowly introduce whipping cream, blue food coloring, and vanilla extract, mixing until achieving a consistent blue hue.
- Incorporate eggs individually, thoroughly mixing after each addition to maintain a silky texture.
- Delicately fold crushed Oreo cookies into the cheesecake batter, distributing evenly.
- Carefully pour the blue cheesecake mixture over the cooled blondie base.
- Create a water bath by placing the cheesecake pan inside a larger pan filled with hot water.
- Reduce oven temperature to 300°F (150°C) and bake for 45-55 minutes until the center remains slightly wobbly.
- Turn off the oven, leaving the cheesecake inside to cool gradually for one hour.
- Transfer to the refrigerator and chill overnight to set completely.
- Prepare ganache by combining chocolate chips, heavy whipping cream, and a pinch of salt in a microwave-safe bowl.
- Microwave in short intervals, stirring between each, until the mixture becomes completely smooth and glossy.
- Once chilled, generously spread the ganache across the entire cheesecake surface.
- Optional: Garnish with additional crushed Oreo cookies for extra visual appeal and texture.
Notes
- Prevent Crust Crumbling: Use room temperature butter for easier mixing and a more cohesive blondie base that holds together perfectly.
- Ensure Smooth Cheesecake: Always beat cream cheese at room temperature to avoid lumps and create a silky-smooth texture.
- Avoid Cracking: The water bath technique helps distribute heat evenly and prevents the cheesecake from developing unsightly cracks during baking.
- Customize Dietary Needs: Swap regular Oreos for gluten-free cookies and use lactose-free cream cheese to make this dessert accessible for different dietary restrictions.
- Prep Time: 30 minutes
- Cook Time: 1 hour 15 minutes
- Category: Desserts
- Method: Baking
- Cuisine: American
Nutrition
- Serving Size: 8
- Calories: 450
- Sugar: 29 g
- Sodium: 300 mg
- Fat: 30 g
- Saturated Fat: 18 g
- Unsaturated Fat: 8 g
- Trans Fat: 0 g
- Carbohydrates: 40 g
- Fiber: 1 g
- Protein: 6 g
- Cholesterol: 90 mg
Lena Martinez
Contributing Writer & Culinary Educator
Expertise
Southwestern and Latin American cuisines, Vegetarian and plant-based recipe development, Culinary education and community outreach
Education
Santa Fe Community College, Santa Fe, NM
Certificate in Culinary Arts
Emphasized Southwestern cuisine and sustainable cooking practices
Lena grew up surrounded by the colors, spices, and traditions of the Southwest – flavors that sparked her love for bold, honest cooking. After earning her Culinary Arts certificate at Santa Fe Community College, she made it her mission to teach home cooks how to create flavorful, plant-powered meals without the fuss.
Her recipes are packed with vibrant ingredients, simple steps, and the kind of heart that turns a regular meal into something you’ll want to share. Outside the kitchen, Lena spends her time wandering farmers’ markets, trading family recipes, and helping young chefs find their voice through food.