
Playful Easter Bunny Chick Cupcakes Recipe: Sweet Springtime Joy
These adorable Easter bunny chick cupcakes bring whimsy and delight to any spring celebration.
Soft vanilla cupcakes decorated with playful marshmallow and candy accents create an instant smile.
Pastel colors and cute animal designs make these treats perfect for children’s parties or Easter gatherings.
Bakers of all skill levels can craft these charming confections with simple ingredients and basic decorating techniques.
Small details like marshmallow ears and candy beak transform ordinary cupcakes into delightful edible characters.
Surprise your loved ones with these cheerful, sweet creations that capture the joy of the season.
Prepare to melt hearts and spark joy with these delightful Easter treats.
Why Easter Bunny Chick Cupcakes Make People Smile
Everything Needed For Easter Bunny Chick Cupcakes
Cake Base:Frosting:Decoration Components:Facial Details:Additional Tools:Steps For Baking Easter Bunny Chick Cupcakes Together
Step 1: Bake Vanilla Cupcakes
Whip up a batch of delightful vanilla cupcakes using your favorite recipe or boxed mix.
Let the cupcakes cool completely before diving into the decorating adventure.
Step 2: Whip Up Frosting
Prepare homemade vanilla frosting or grab a store-bought version.
Divide the frosting and transform half into a sunny yellow shade using food coloring.
Step 3: Create Bunny Base
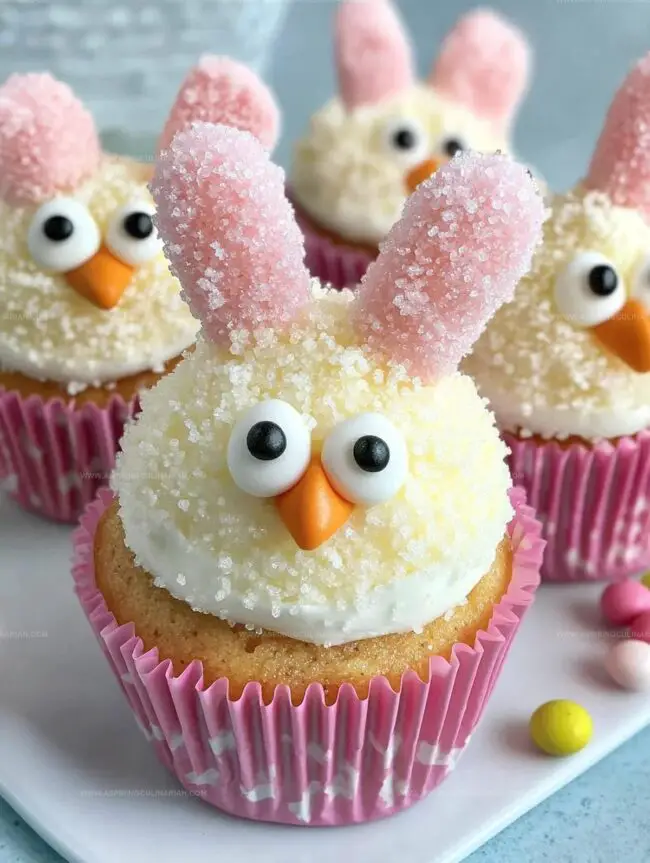
Generously spread white frosting on each cupcake, creating a smooth, rounded surface that will become the adorable bunny face.
Step 4: Craft Bunny Ears
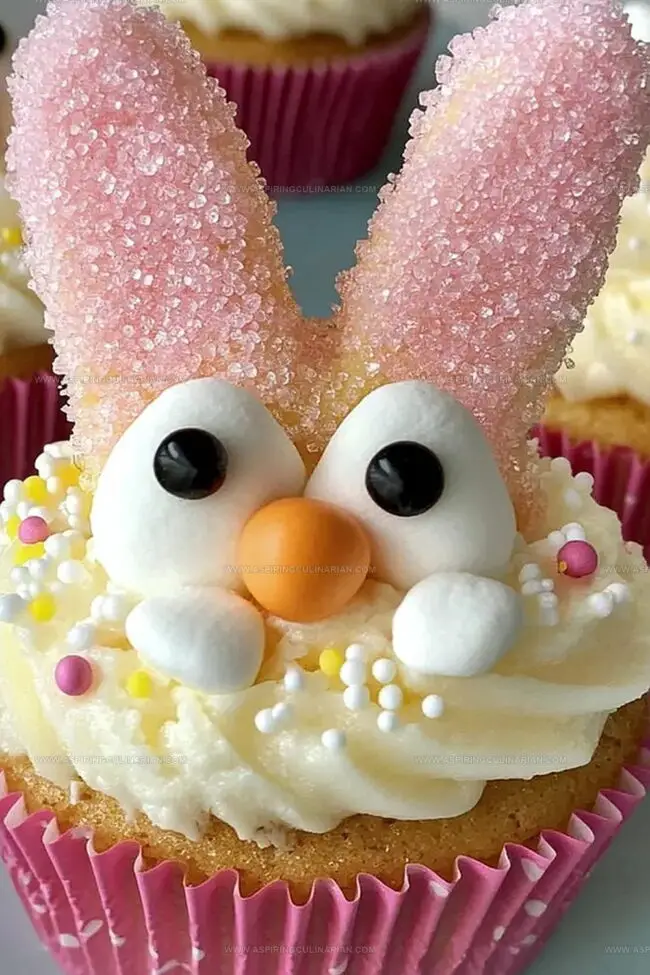
Transform marshmallows into cute bunny ears:Cut marshmallows diagonally and dip the cut side into pink sugar.
Spray scissors with cooking spray to prevent sticking.
Step 5: Position Bunny Ears
Gently insert the sugar-coated marshmallow ears into the frosting, positioning them with pink sides facing inward.
Step 6: Add Bunny Fur
Completely cover the frosted surface with white sprinkles, creating a fluffy fur-like texture.
Step 7: Design Bunny Face
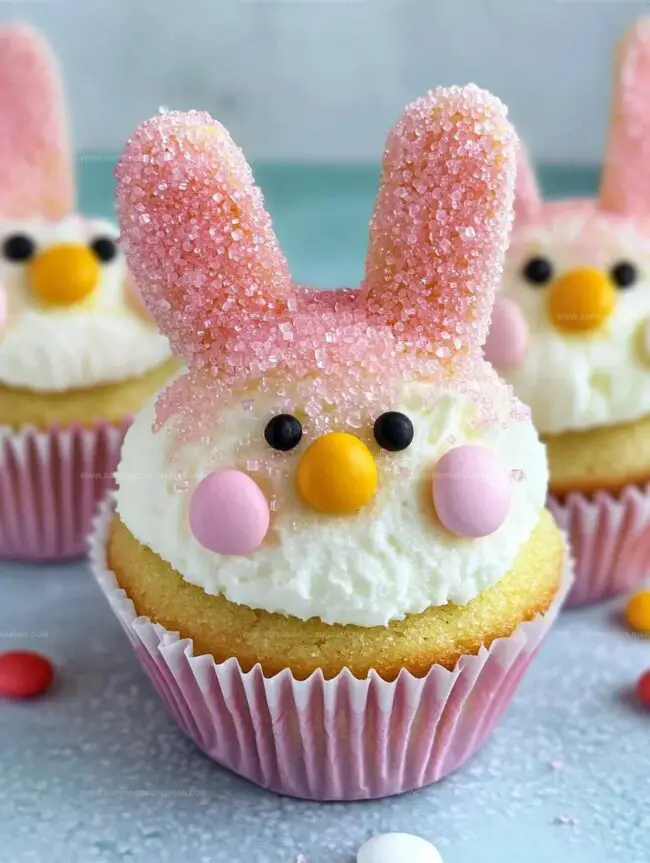
Bring the bunny to life with charming details:Step 8: Pipe Chick Frosting
Use a large plain piping tip to create a spiral of yellow frosting on each cupcake.
Step 9: Create Chick Feathers
Give your chick cupcakes a feathery finish:Cover the frosting with sprinkles and dust with sanding sugar for a sparkling effect.
Step 10: Complete Chick Features
Add adorable chick details:Step 11: Display and Enjoy
Showcase your festive Easter cupcakes on a beautiful platter.
Store in an airtight container if not serving immediately.
Easter Bunny Chick Cupcakes Top Tips For Kids
Get Creative With Easter Bunny Chick Cupcakes Flavors
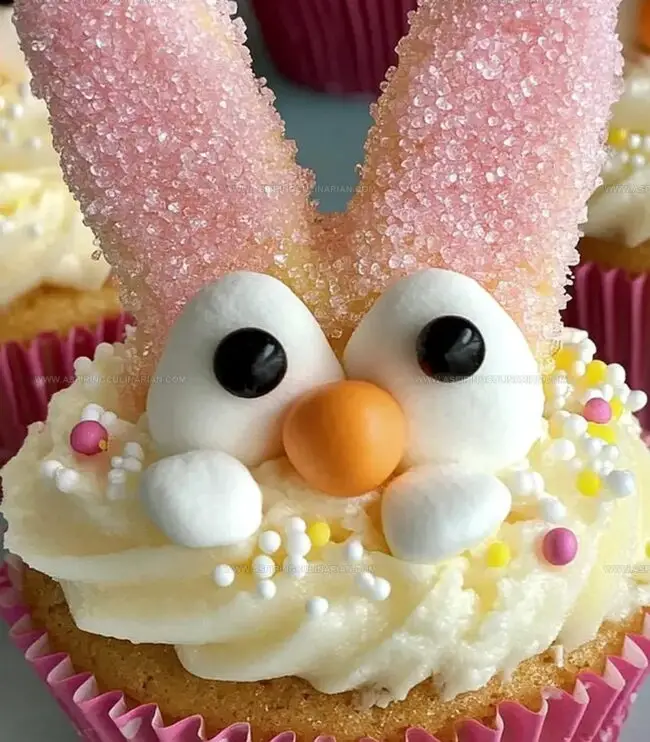
Plate Easter Bunny Chick Cupcakes For Spring Fun
How To Store Easter Bunny Chick Cupcakes Freshly
FAQs
You’ll need piping bags, large plain piping tip, scissors, decorator icing, and small kitchen tools like food coloring and cooking spray.
Yes, you can substitute candies like jelly beans or M&Ms based on availability and preference. Just choose colors that match the bunny or chick design.
These cupcakes are beginner-friendly and require basic decorating skills. The process is straightforward and doesn’t demand professional pastry experience.
No special skills are required. Following the step-by-step instructions and having basic patience will help you create adorable Easter cupcakes successfully.
Print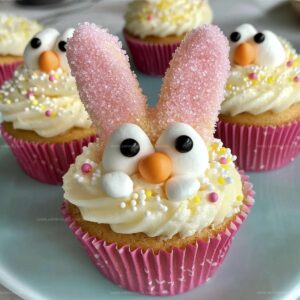
Easter Bunny Chick Cupcakes Recipe
- Total Time: 1 hour 15 minutes
- Yield: 12 1x
Description
Delightful Easter Bunny Chick Cupcakes bring springtime whimsy to dessert tables with adorable frosted characters. Pastel colors and playful decorations make these treats perfect for family celebrations, ensuring smiles from kids and adults alike.
Ingredients
Main Ingredients:
- 1 recipe vanilla cupcakes
- 1 recipe fluffy vanilla frosting
Decorative Ingredients:
- 1 yellow food coloring
- 1 pink colored sanding sugar
- 1 black decorator icing
Embellishments:
- 1 large marshmallows
- 1 mini marshmallows
- 1 yellow sprinkles
- 1 white sprinkles
- 1 pink jelly beans
- 1 orange colored gum
- 1 orange M&Ms
Instructions
- Prepare vanilla cupcakes following your preferred recipe or package instructions. Cool completely at room temperature for approximately 30 minutes.
- Prepare vanilla frosting using a homemade recipe or store-bought option. Divide frosting and tint half yellow using food coloring for chick cupcakes.
- For bunny cupcakes, generously spread white frosting over each cupcake, creating a smooth, rounded surface that resembles a bunny face.
- Transform marshmallows into bunny ears by cutting diagonally. Dip cut sides in pink sanding sugar, ensuring even coating. Apply cooking spray on scissors to prevent sticking.
- Position marshmallow ears into frosting at the cupcake’s top, angling pink sides inward to create a realistic ear shape.
- Coat entire frosted surface with white sprinkles, generating a fluffy fur-like texture for the bunny.
- Enhance the bunny face by placing halved mini marshmallows as cheeks. Position a pink jelly bean for the nose and use black decorator icing to create small dot eyes.
- For chick cupcakes, utilize a large plain piping tip to create a spiral pattern of yellow-tinted frosting on each cupcake.
- Simulate feather texture by thoroughly covering yellow frosting with yellow sprinkles. Dust lightly with yellow sanding sugar for additional shimmer.
- Complete chick design by positioning an orange gum piece or M&M as the beak. Add two small black icing dots above for eyes.
- Arrange cupcakes on a decorative platter. Store in an airtight container at room temperature until serving time.
Notes
- Choose high-quality, fresh ingredients for the most delightful flavor and texture in your Easter cupcakes.
- Ensure cupcakes are completely cool before decorating to prevent frosting from melting or sliding off.
- Use room temperature ingredients for smoother frosting and easier mixing.
- Try alternative decorating tools like toothpicks or small offset spatulas for precise detailing.
- Consider gluten-free cake mix or dairy-free frosting for guests with dietary restrictions.
- Keep extra marshmallows and sprinkles on hand for backup decorations or quick fixes.
- Refrigerate decorated cupcakes for 15 minutes to help set the frosting and maintain intricate designs.
- Practice piping techniques on a separate surface before decorating the actual cupcakes for more confidence.
- Prep Time: 45 minutes
- Cook Time: 30 minutes
- Category: Desserts, Snacks
- Method: Baking
- Cuisine: American
Nutrition
- Serving Size: 12
- Calories: 250
- Sugar: 20 g
- Sodium: 150 mg
- Fat: 10 g
- Saturated Fat: 3 g
- Unsaturated Fat: 5 g
- Trans Fat: 0 g
- Carbohydrates: 35 g
- Fiber: 1 g
- Protein: 2 g
- Cholesterol: 30 mg
Lena Martinez
Contributing Writer & Culinary Educator
Expertise
Southwestern and Latin American cuisines, Vegetarian and plant-based recipe development, Culinary education and community outreach
Education
Santa Fe Community College, Santa Fe, NM
Certificate in Culinary Arts
Emphasized Southwestern cuisine and sustainable cooking practices
Lena grew up surrounded by the colors, spices, and traditions of the Southwest – flavors that sparked her love for bold, honest cooking. After earning her Culinary Arts certificate at Santa Fe Community College, she made it her mission to teach home cooks how to create flavorful, plant-powered meals without the fuss.
Her recipes are packed with vibrant ingredients, simple steps, and the kind of heart that turns a regular meal into something you’ll want to share. Outside the kitchen, Lena spends her time wandering farmers’ markets, trading family recipes, and helping young chefs find their voice through food.