The Sweetest Easter Chocolate Chip Cookies Recipe Ever
Warm ovens and sweet memories blend perfectly with this Easter chocolate chip cookies recipe that transforms ordinary baking into a delightful celebration.
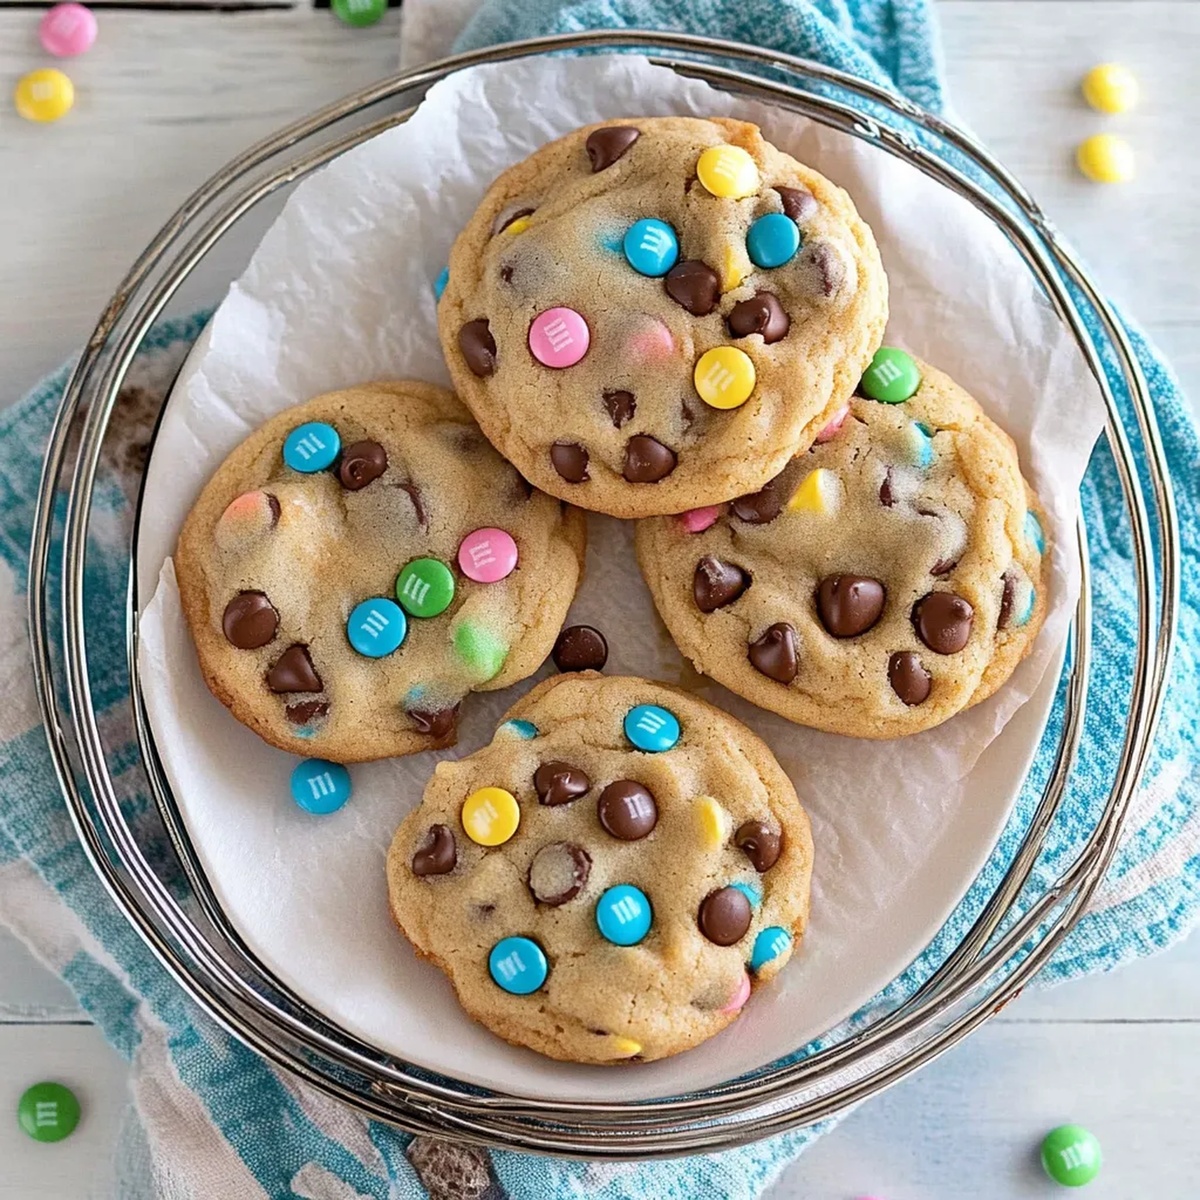
Pastel-colored chocolate chips dance through soft, buttery dough, creating a festive treat that sparks joy.
chocolate lovers will adore how these cookies capture the essence of spring’s cheerful spirit.
Each bite promises a delectable mix of classic comfort and seasonal charm.
Crisp edges and chewy centers make these cookies irresistibly tempting.
The simple ingredients come together effortlessly, making baking a breeze for everyone.
Gather your mixing bowl and let’s create a batch of happiness that will have everyone asking for seconds.
Easter Chocolate Chip Cookies Sweet Holiday Treat
All Ingredients For Easter Cookies Listed
Main Ingredients:Coloring and Flavoring:Binding and Leavening:How To Bake Easter Chocolate Chip Cookies
Step 1: Prepare Baking Station
Warm up your oven to 350F.
Line baking sheets with parchment paper or silicone mats to prevent sticking and ensure easy cookie removal.
Step 2: Create Dry Ingredient Blend
Grab a medium bowl and whisk together:Mix until ingredients are perfectly combined and set aside.
Step 3: Cream Butter and Sugars
In a large mixing bowl, use an electric mixer to blend:Beat until the mixture becomes light and fluffy, which takes about 2-3 minutes.
Step 4: Incorporate Wet Ingredients
Add eggs one at a time, beating thoroughly after each addition.
Stir in vanilla extract until fully mixed.
Step 5: Combine Wet and Dry Mixtures
Slowly add dry ingredients to wet ingredients, mixing on low speed.
Stop mixing as soon as ingredients are just combined to avoid tough cookies.
Step 6: Introduce Chocolate Chips
Fold chocolate chips into the dough, keeping some aside for cookie topping.
Step 7: Create Pastel Magic
Divide cookie dough into four equal portions.
Add pastel food coloring to each section:Gently mix colors until evenly distributed.
Step 8: Design Marbled Cookies
Take small pieces from each colored dough and press together without fully mixing.
This creates a beautiful marbled effect.
Roll into balls about 2 tablespoons in size.
Step 9: Arrange on Baking Sheet
Place cookie balls on prepared sheets, leaving 2 inches between each.
Gently flatten with your palm.
Sprinkle reserved chocolate chips on top.
Step 10: Bake to Perfection
Slide cookies into the oven and bake for 10-12 minutes.
Look for golden edges and slightly soft centers.
Step 11: Cool Down
Let cookies rest on baking sheets for 5 minutes.
Transfer to wire racks to cool completely.
Step 12: Enjoy the Festive Treat
Serve these colorful Easter cookies with a refreshing glass of milk.
Store leftovers in an airtight container at room temperature.
Baking Tips For Chocolate Chip Easter Cookies
Easter Cookie Mix-Ins For Fun Flavor

Plate Easter Chocolate Chip Cookies For Parties
Chocolate Chip Cookie Storage Tricks Shared
FAQs
Gently press small pieces of differently colored doughs together without fully mixing them. The key is to lightly combine colors so they create a swirled, marbled pattern without completely blending.
Yes, you can use natural food coloring made from plant-based sources like beet juice, turmeric, or spirulina. These will provide softer, more muted pastel tones compared to artificial food coloring.
Reserving chocolate chips allows you to strategically place them on top of each cookie before baking. This creates a more visually appealing cookie with chocolate chips visible on the surface.
Print
Easter Chocolate Chip Cookies Recipe
- Total Time: 32 minutes
- Yield: 24 1x
Description
Sweet Easter celebrations come alive with heavenly Easter Chocolate Chip Cookies, blending festive charm and classic comfort. Pastel-hued chocolate morsels nestled in buttery dough create an irresistible treat you’ll want to share with loved ones.
Ingredients
Main Ingredients:
- 2 1/2 cups all-purpose flour
- 12 ounces (340 grams) semi-sweet chocolate chips
- 1 cup Easter M&Ms
Sweeteners and Binding Agents:
- 1 cup brown sugar
- 1/2 cup granulated sugar
- 1 egg
- 3/4 cup (170 grams) unsalted butter, room temperature
- 1 tablespoon vanilla extract
Leavening and Seasoning Ingredients:
- 2 teaspoons cornstarch
- 1 teaspoon baking soda
- 1/2 teaspoon salt
Instructions
- Prepare a baking sheet by lining it with parchment paper, ensuring a non-stick surface for perfect cookie placement.
- In a spacious mixing bowl, whip room temperature butter with brown and granulated sugars until the mixture becomes airy and pale, creating a smooth foundation for the cookies.
- Incorporate the egg and vanilla extract into the butter-sugar blend, stirring until the ingredients meld seamlessly and develop a uniform consistency.
- In a separate bowl, carefully sift together flour, cornstarch, baking soda, and salt, creating a light and even dry ingredient mixture.
- Gently fold the dry ingredients into the wet mixture, stirring minimally to prevent overmixing and maintain a tender cookie texture.
- Delicately integrate chocolate chips and M&Ms throughout the dough, ensuring an even distribution of colorful Easter-themed morsels.
- Using a cookie scoop, form uniform dough balls and arrange them on the prepared baking sheet, optionally pressing additional M&Ms onto the surface for extra decoration.
- Chill the cookie dough in the freezer for a minimum of one hour, which helps prevent spreading and intensifies flavor development.
- Preheat the oven to 350°F (175°C), allowing it to reach the optimal temperature for even baking.
- Bake the cookies for 10-12 minutes, looking for a slightly underdone appearance that promises a soft, chewy center.
- Immediately after removing from the oven, embellish with extra candies or chocolate chips while the cookies remain warm and malleable.
- Allow cookies to rest on the baking sheet for a few minutes before transferring to a cooling rack, helping them set and maintain structural integrity.
- Store the cooled cookies in an airtight container, preserving their freshness for up to one week.
Notes
- Chill Dough for Maximum Flavor Freezing the cookie dough helps develop deeper, richer flavors and prevents excessive spreading during baking.
- Customize Chocolate Mix Experiment with different chocolate chip and M&M color combinations to match seasonal themes or personal preferences.
- Room Temperature Ingredients Ensure butter and egg are at room temperature for smoother mixing and better cookie texture.
- Make Ahead Friendly Prepare cookie dough balls in advance and freeze for spontaneous fresh-baked treats anytime, perfect for busy schedules.
- Prep Time: 20 minutes
- Cook Time: 12 minutes
- Category: Desserts, Snacks
- Method: Baking
- Cuisine: American
Nutrition
- Serving Size: 24
- Calories: 190
- Sugar: 12 g
- Sodium: 100 mg
- Fat: 8 g
- Saturated Fat: 5 g
- Unsaturated Fat: 3 g
- Trans Fat: 0 g
- Carbohydrates: 27 g
- Fiber: 1 g
- Protein: 2 g
- Cholesterol: 15 mg
Lena Martinez
Contributing Writer & Culinary Educator
Expertise
Southwestern and Latin American cuisines, Vegetarian and plant-based recipe development, Culinary education and community outreach
Education
Santa Fe Community College, Santa Fe, NM
Certificate in Culinary Arts
Emphasized Southwestern cuisine and sustainable cooking practices
Lena grew up surrounded by the colors, spices, and traditions of the Southwest – flavors that sparked her love for bold, honest cooking. After earning her Culinary Arts certificate at Santa Fe Community College, she made it her mission to teach home cooks how to create flavorful, plant-powered meals without the fuss.
Her recipes are packed with vibrant ingredients, simple steps, and the kind of heart that turns a regular meal into something you’ll want to share. Outside the kitchen, Lena spends her time wandering farmers’ markets, trading family recipes, and helping young chefs find their voice through food.