
Easter Dirt Cups Recipe: Adorably Sweet Spring Treats
Dessert lovers are about to embark on a delightful adventure with this Easter dirt cups recipe that brings childhood nostalgia and springtime cheer to the table.
Creamy pudding layers blend perfectly with crushed chocolate cookies, creating a whimsical treat that captures the essence of Easter celebrations.
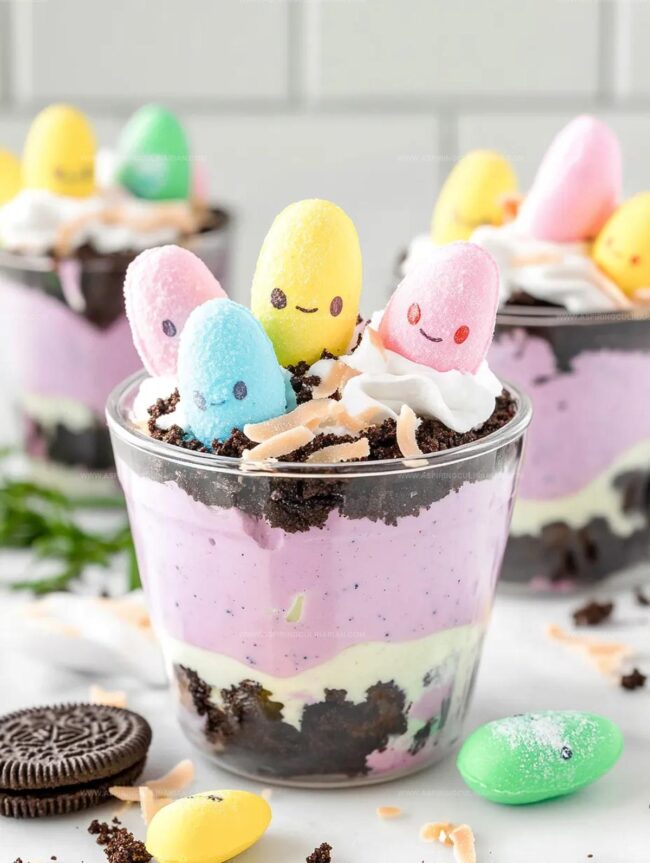
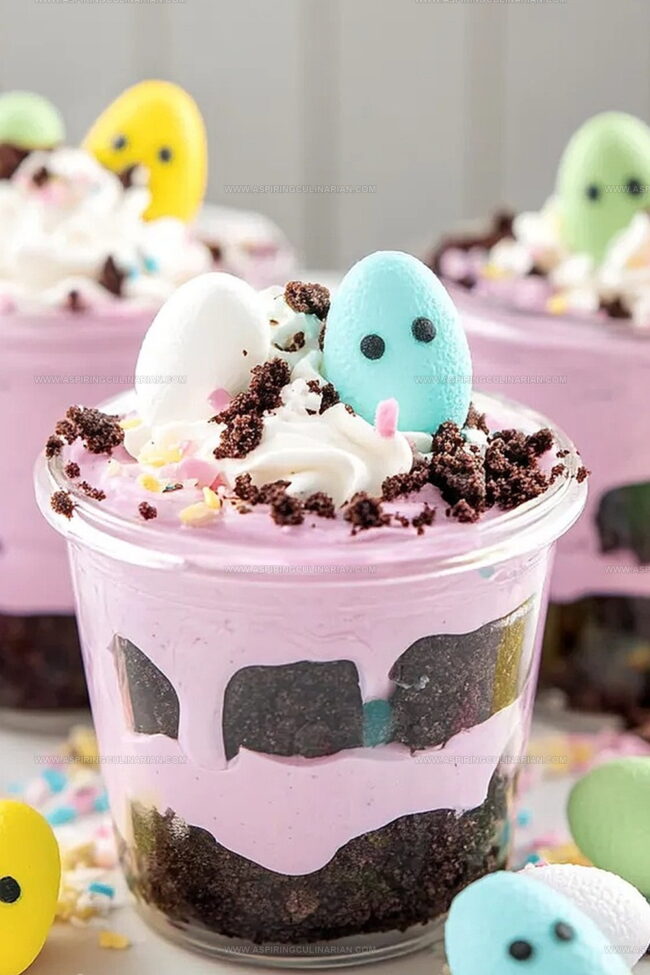
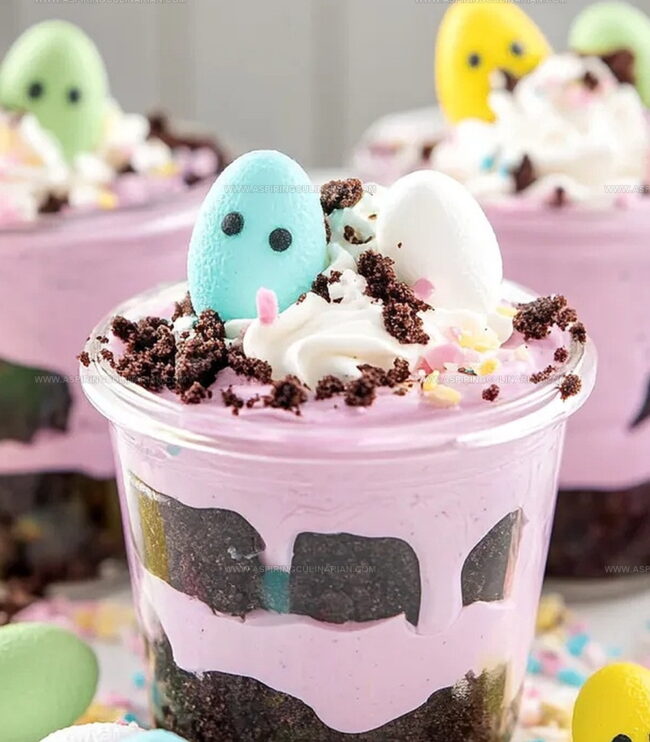
Chocolate crumbs simulate rich, dark soil while adorable candy decorations dance across the surface.
Each spoonful promises a playful journey through sweet textures and delectable flavors.
Pastel-colored candies and chocolate bunnies transform this simple dessert into a festive masterpiece.
Kids and adults alike will adore the magical combination of chocolate and creativity.
Gather your ingredients and prepare to delight in this charming Easter-themed dessert that’s sure to become a seasonal favorite.
Easter Dirt Cups Make Every Party More Playful

Easter Dirt Cups Ingredients List For Sweet Success
Main Ingredients:
Pudding Base:Cookie and Decoration Components:Coloring and Flavoring:Stepwise Guide For Crafting Easter Dirt Cups At Home
Step 1: Whip Up Creamy Pudding
In a medium bowl, combine vanilla instant pudding mix and cold milk.
Whisk energetically for two minutes until smooth and well blended.
Allow the mixture to rest and slightly thicken.
Step 2: Create Pastel Magic
Divide the pudding into two separate bowls.
Transform the pudding with vibrant colors:Stir each bowl until the colors are rich and even.
Step 3: Fold In Fluffy Clouds
Gently incorporate thawed Cool Whip into each colored pudding bowl.
Blend carefully to maintain a light, airy texture that looks like soft clouds.
Step 4: Build the First Layer
Craft the base of your dessert in mason jars or serving cups:Sprinkle a tablespoon of cookie crumbs at the bottom of each container.
Top with a layer of colorful pudding.
Step 5: Layer Like a Pro
Continue building your delightful dessert:Finish with a final layer of cookie crumbs on top.
Step 6: Chill and Set
Refrigerate the dirt cups for at least one hour.
This allows flavors to mingle and the dessert to become perfectly set.
Step 7: Craft Grassy Coconut
Prepare the festive topping:Place coconut in a container with a tight lid.
Add food coloring and water.
Shake vigorously until the coconut transforms into vibrant green “grass”.
Step 8: Decorate with Easter Cheer
Final touch just before serving:Create a whimsical Easter scene that will delight guests of all ages.
Easter Dirt Cups Pro Tricks For Fluffy Layers
Easter Dirt Cups Flavor Mix-Ups To Explore
Presenting Easter Dirt Cups For Maximum Smiles
Easter Dirt Cups Storage For Picnic Or Party
FAQs
Vanilla instant pudding mix, cold milk, Cool Whip, Oreo cookies, food coloring (purple and pink), shredded coconut, candy eggs, and Peeps are the main ingredients for this festive dessert.
Yes, you can prepare Easter Dirt Cups a day in advance. Keep them refrigerated and add the coconut grass and decorative candies just before serving to maintain their fresh appearance.
Use gel food coloring for more vibrant and concentrated colors. Add a few drops at a time and stir thoroughly until you reach the desired pastel shade of pink or purple.
Absolutely! This recipe is kid-friendly.
Print
Easter Dirt Cups Recipe
- Total Time: 1 hour 15 minutes
- Yield: 4 1x
Description
Springtime magic comes alive with Easter Dirt Cups, a playful dessert blending chocolate pudding, crushed cookies, and festive pastel candy decorations. Cute bunny peeps and chocolate eggs crown this whimsical treat that delights children and adults alike.
Ingredients
Easter Eggs and Main Ingredients:
- 1 package (3.9 ounces/110 grams) vanilla instant pudding mix
- 2 cups (480 milliliters) cold milk
- 1 package Oreo cookies
Decorative Ingredients:
- 1 container (8 ounces/226 grams) Cool Whip, thawed
- Shredded coconut
- Candy eggs (like mini egg candies)
- Peeps marshmallow chicks or bunnies
Coloring Ingredients:
- Food coloring (suggested: purple and pink)
- Food coloring for coconut
Instructions
- Whisk vanilla instant pudding mix with cold milk for 2 minutes, allowing the mixture to set for 5 minutes until slightly thickened.
- Separate pudding into two bowls, then tint one bowl purple and the other pink using food coloring, stirring until colors are uniform and pastel.
- Fold thawed Cool Whip into each colored pudding gently, creating a light, airy mousse-like consistency.
- Create a base layer in mason jars by sprinkling crushed Oreo cookies, then top with a layer of colored pudding.
- Continue building layers, alternating between crushed cookies and different colored pudding mixtures, ensuring each layer is evenly distributed.
- Refrigerate assembled desserts for 1 hour, allowing flavors to meld and texture to stabilize.
- Prepare green “grass” by placing shredded coconut in a sealed container, adding green food coloring and water, then shaking until coconut is evenly colored.
- Finish desserts immediately before serving by generously sprinkling green coconut on top and decorating with candy eggs and Peeps to create a festive Easter-themed presentation.
Notes
- Create vibrant colors by using gel food coloring for more intense, rich pastel shades that won’t water down the pudding mixture.
- Try different cookie bases like graham crackers or chocolate cookies to customize the texture and flavor profile of your dirt cups.
- Chill the serving glasses beforehand to help layers set more quickly and maintain crisp, defined color separation during assembly.
- Make these dirt cups ahead of time and store in the refrigerator for up to 2 days, adding decorative toppings just before serving to keep them fresh and visually appealing.
- Prep Time: 15 minutes
- Cook Time: 1 hour
- Category: Desserts, Snacks
- Method: None
- Cuisine: American
Nutrition
- Serving Size: 4
- Calories: 250
- Sugar: 22 g
- Sodium: 150 mg
- Fat: 10 g
- Saturated Fat: 5 g
- Unsaturated Fat: 3 g
- Trans Fat: 0 g
- Carbohydrates: 36 g
- Fiber: 1 g
- Protein: 3 g
- Cholesterol: 15 mg
Lena Martinez
Contributing Writer & Culinary Educator
Expertise
Southwestern and Latin American cuisines, Vegetarian and plant-based recipe development, Culinary education and community outreach
Education
Santa Fe Community College, Santa Fe, NM
Certificate in Culinary Arts
Emphasized Southwestern cuisine and sustainable cooking practices
Lena grew up surrounded by the colors, spices, and traditions of the Southwest – flavors that sparked her love for bold, honest cooking. After earning her Culinary Arts certificate at Santa Fe Community College, she made it her mission to teach home cooks how to create flavorful, plant-powered meals without the fuss.
Her recipes are packed with vibrant ingredients, simple steps, and the kind of heart that turns a regular meal into something you’ll want to share. Outside the kitchen, Lena spends her time wandering farmers’ markets, trading family recipes, and helping young chefs find their voice through food.