
Adorable Easter Rice Krispie Nests Recipe for Sweet Spring Fun
Spring arrives with a burst of sweetness, and these delightful Easter rice krispie nests will instantly brighten your table.
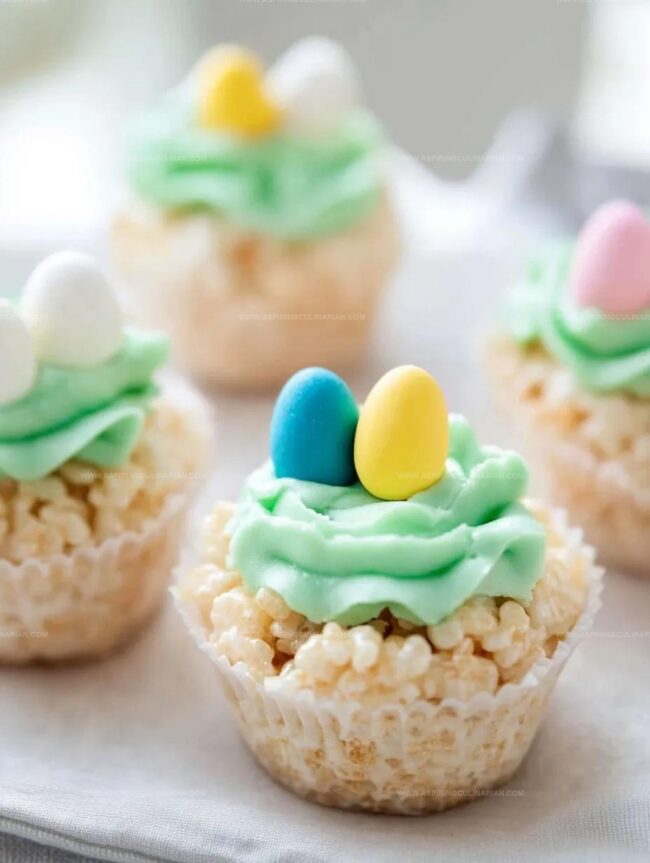
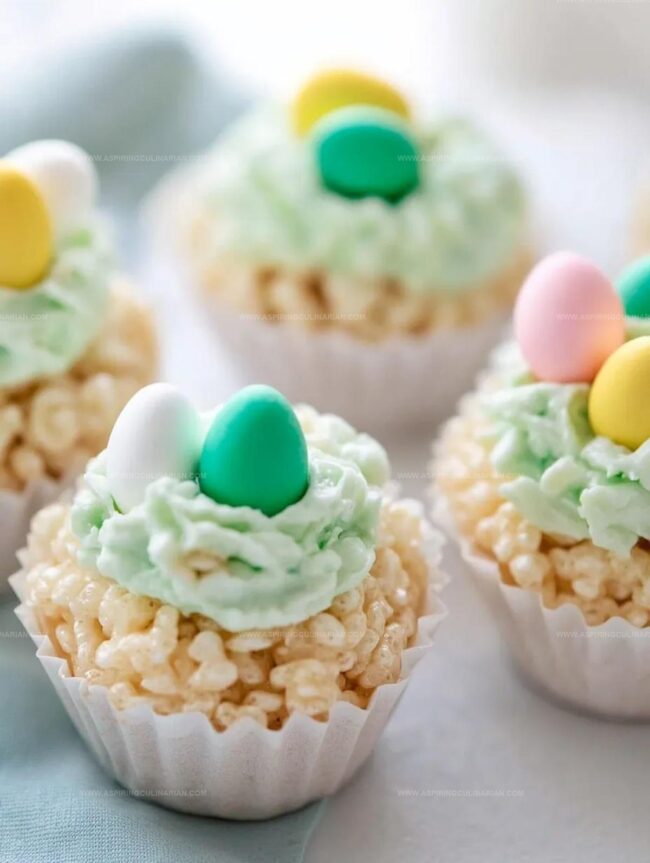
Pastel-colored candies nestle perfectly into the marshmallow-coated treats, creating an adorable seasonal dessert.
Soft, chewy, and wonderfully crunchy, these nests capture the playful spirit of Easter celebrations.
Each bite brings a nostalgic wave of childhood memories and pure joy.
Children and adults alike will adore these charming little confections.
Light, airy, and decorated with colorful candy eggs, these rice krispie nests promise to be the star of your holiday spread.
Gather your little helpers and make some delicious magic together.
Easter Rice Krispie Treats Delight All Ages Instantly
Everything Needed For Easter Rice Krispie Treats Fun
Base Ingredients:Frosting Ingredients:Decoration Ingredients:Steps To Make Easter Rice Krispie Treats Right
Step 1: Prepare the Cupcake Pans
Grab your cupcake pan and coat every single surface with cooking spray or butter.
Make sure no spot is left untouched to prevent sticking.
Step 2: Melt Marshmallow Magic
Toss marshmallows and butter into a microwave-safe bowl.
Zap them in the microwave for about 2 minutes, watching carefully to prevent overflow.
Stir until the mixture becomes a smooth, gooey paradise.
Step 3: Combine Cereal and Marshmallow
Pour Rice Krispies into the melted marshmallow mixture.
Stir with enthusiasm until every single cereal piece is completely coated with marshmallow goodness.
Step 4: Create Nest Shapes
While the mixture is still warm and pliable, spoon it into the greased cupcake pans.
Use wax paper to press down the center, creating adorable nest-like shapes.
Let these little treasures set for at least 30 minutes.
Step 5: Whip Up Grass-Like Buttercream
In a mixing bowl, combine:Beat the mixture until it becomes smooth and creamy.
Adjust the green color to your liking, creating the perfect grassy effect.
Step 6: Decorate the Nests
Gently remove the Rice Krispie nests from the pan.
Pipe the green buttercream onto each nest, making it look like lush spring grass.
Sprinkle colorful Easter egg candies on top for a festive touch.
Step 7: Serve and Celebrate
Let the frosting set for a few minutes.
Serve these delightful Easter treats and watch everyone’s eyes light up with joy!
Easter Rice Krispie Treats Secrets For Extra Cheer
Easter Rice Krispie Treats Add-Ins Worth Trying
Fun Ways To Plate Easter Rice Krispie Treats
Store Easter Rice Krispie Treats To Stay Crisp
FAQs
Keep a close eye on the marshmallows and microwave in 30-second intervals, stirring between each interval to ensure even melting and prevent burning.
Absolutely! You can choose any color that suits your Easter theme or personal preference. Adjust the food coloring drops to achieve your desired shade of green or another color.
Chocolate mini eggs, pastel-colored candy-coated eggs, or small jelly beans are perfect for creating a festive Easter look on top of the Rice Krispie nests.
Print
Easter Rice Krispie Nests Recipe
- Total Time: 50 minutes
- Yield: 12 1x
Description
Springtime sparkles with these charming Easter Rice Krispie Nests, nestled with pastel candy eggs and marshmallow magic. Sweet treats emerge as playful centerpieces that welcome spring celebrations with delightful crunch and whimsical charm.
Ingredients
Main Ingredients:
- 7 cups Rice Krispies cereal
- 16 ounces (453 grams) marshmallows
- 1/2 cup (113 grams) unsalted butter
Frosting Ingredients:
- 3–4 cups powdered sugar
- 1/4 cup (60 milliliters) milk
- 1 teaspoon vanilla extract
- Green food coloring
Decoration Ingredients:
- Easter egg candies (mini chocolate eggs or jelly beans)
Instructions
- Prepare cupcake pans by generously coating with butter or cooking spray, ensuring complete coverage to prevent sticking.
- Combine marshmallows and butter in a microwave-safe bowl. Heat for 2 minutes, monitoring carefully to prevent overflow. Stir until marshmallows are completely smooth and integrated.
- Fold Rice Krispies cereal into the melted marshmallow mixture, stirring thoroughly to ensure every piece is evenly coated.
- While mixture remains warm, transfer into prepared cupcake pans. Use wax paper to gently press centers, creating nest-like indentations. Allow to solidify for 30 minutes at room temperature.
- Create buttercream by whisking butter, milk, vanilla extract, and initial portion of powdered sugar until silky. Gradually incorporate remaining sugar and green food coloring, beating until achieving desired texture and vibrant green hue.
- Carefully extract Rice Krispie nests from pans. Pipe green buttercream in delicate, grass-like patterns within each nest’s center. Strategically place pastel Easter egg candies on top for festive decoration.
- Let frosting set for several minutes before serving. Present these whimsical Easter-themed treats to delighted guests.
Notes
- Use unsalted butter for better control of sweetness and precise flavor balance in the Rice Krispie mixture.
- Microwave marshmallows in short 30-second intervals to prevent burning and ensure smooth, even melting.
- Swap regular Rice Krispies with gluten-free rice cereal to accommodate dietary restrictions without compromising taste.
- Try different buttercream colors to match seasonal themes or personal preferences, making these treats versatile for various celebrations.
- Prep Time: 20 minutes
- Cook Time: 30 minutes
- Category: Snacks, Desserts
- Method: Baking
- Cuisine: American
Nutrition
- Serving Size: 12
- Calories: 230
- Sugar: 18 g
- Sodium: 60 mg
- Fat: 9 g
- Saturated Fat: 5 g
- Unsaturated Fat: 4 g
- Trans Fat: 0 g
- Carbohydrates: 36 g
- Fiber: 0 g
- Protein: 1 g
- Cholesterol: 20 mg
Lena Martinez
Contributing Writer & Culinary Educator
Expertise
Southwestern and Latin American cuisines, Vegetarian and plant-based recipe development, Culinary education and community outreach
Education
Santa Fe Community College, Santa Fe, NM
Certificate in Culinary Arts
Emphasized Southwestern cuisine and sustainable cooking practices
Lena grew up surrounded by the colors, spices, and traditions of the Southwest – flavors that sparked her love for bold, honest cooking. After earning her Culinary Arts certificate at Santa Fe Community College, she made it her mission to teach home cooks how to create flavorful, plant-powered meals without the fuss.
Her recipes are packed with vibrant ingredients, simple steps, and the kind of heart that turns a regular meal into something you’ll want to share. Outside the kitchen, Lena spends her time wandering farmers’ markets, trading family recipes, and helping young chefs find their voice through food.