
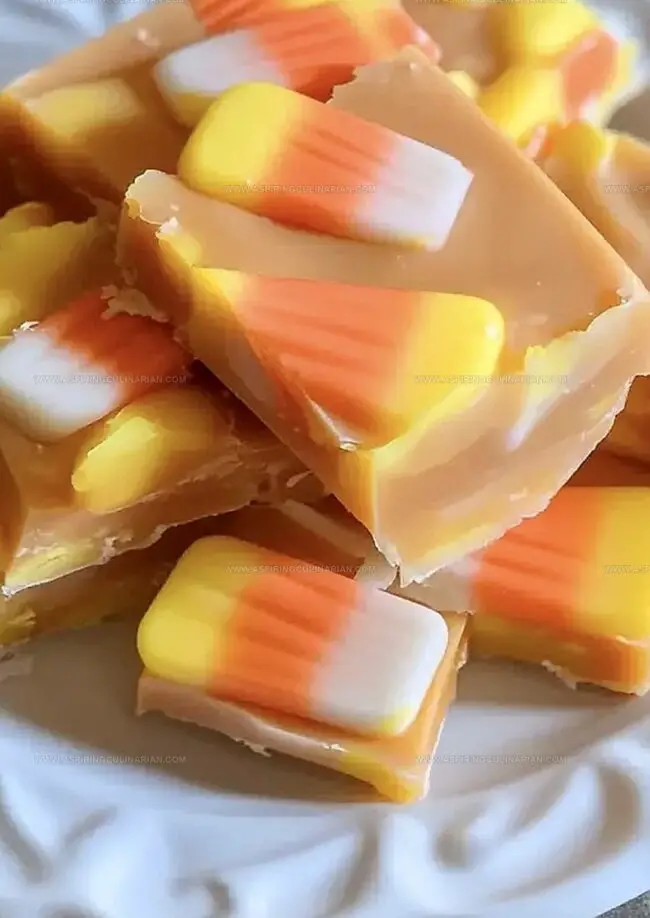
Quick & Colorful: Easy Candy Corn Fudge Recipe for Fall Fun
Sweet moments of nostalgia dance through my kitchen whenever candy corn fudge emerges from the refrigerator.
Halloween memories spark childhood excitement around this simple treat.
Creamy white chocolate melts into smooth ribbons of golden delight.
Pastel layers blend like autumn’s soft palette, capturing seasonal magic.
Kids absolutely adore watching sugar crystallize into festive squares.
Crafting these delectable bites requires minimal effort and maximum enjoyment.
One bite transports you straight into a whimsical celebration of fall’s sweetest traditions.
Easy Candy Corn Fudge: Sweet Fall Magic
What You’ll Need for Candy Corn Fudge
Core Ingredients:Flavor Enhancers:Candy Corn Mix-Ins:Preparation Accessories:How to Whip Up Candy Corn Fudge
Step 1: Prepare the Baking Canvas
Line a 9-inch square baking pan with aluminum foil, making sure it drapes over the edges.
Give the foil a quick spray of non-stick cooking spray to ensure easy removal later.
Step 2: Create the Creamy Base
Grab a microwave-safe bowl and combine:Zap the mixture in the microwave for 1 minute, then give it a good stir.
Continue heating in 30-second bursts, stirring between each interval, until the ingredients transform into a silky smooth mixture.
Step 3: Boost the Flavor Profile
Pull the bowl out of the microwave and introduce vanilla extract to the melted mixture.
Bring the fudge to life with yellow and orange food coloring, mixing until the hue is perfectly blended.
Step 4: Fold in Candy Corn Crunch
Gently fold in a generous cup of candy corn, distributing the sweet morsels throughout the fudge.
Pour the entire mixture into the prepared pan, using a spatula to create an even, tempting surface.
Step 5: Add the Finishing Touch
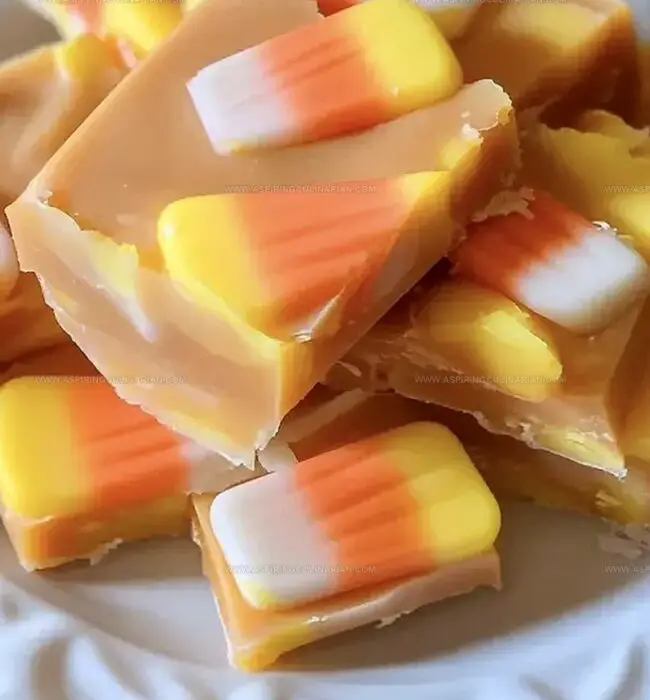
Sprinkle the remaining candy corn across the top of the fudge, creating a festive and inviting appearance.
Step 6: Set and Slice
Tuck the fudge into the refrigerator, covering it carefully.
Let it chill for at least 4 hours or until it sets completely.
Once firm, lift the fudge out of the pan using the foil edges and slice into mouth-watering squares ready to delight your taste buds.
Top Tricks for Creamy Fudge Squares
Candy Corn Fudge Remix Ideas
Fun Ways to Serve Candy Corn Fudge
Candy Corn Fudge Storage Know-How
FAQs
Use high-quality white baking chips and balance the sweetness by adding a pinch of salt to the mixture. The salt helps cut through the intense sweetness of the candy corn and condensed milk.
Yes, you can use a double boiler method. Place ingredients in a heat-safe bowl over simmering water, stirring constantly until melted and smooth. Stir slowly to prevent burning and ensure even melting.
Ensure you refrigerate the fudge for the full 4 hours. If it’s still soft, leave it in the refrigerator longer. The condensed milk and butter need sufficient cooling time to firm up and create the right fudge consistency.
Print
Easy Candy Corn Fudge Recipe
- Total Time: 4 hours 15 minutes (including 4 hours chilling)
- Yield: 12 1x
Description
Sweet candy corn magic brings Halloween spirit to dessert tables with creamy white chocolate fudge. Quick seasonal treats delight guests and create festive memories you’ll cherish during autumn celebrations.
Ingredients
Main Ingredients:
- 3 cups white baking chips
- 1 1/2 cups candy corn
- 14 ounces (397 grams) sweetened condensed milk
Supporting Ingredients:
- 1/4 cup (57 grams) butter
- 1/2 teaspoon vanilla extract
Coloring Ingredients:
- 3–5 drops yellow food coloring
- 1–2 drops orange food coloring
Instructions
- Prepare the baking vessel by lining a 9-inch square pan with aluminum foil, ensuring overhang on edges. Generously coat the foil with non-stick cooking spray to prevent sticking.
- Create the fudge base by combining white baking chips, sweetened condensed milk, and butter in a microwave-safe bowl. Heat for 1 minute, then stir thoroughly. Continue microwaving in 30-second increments, stirring between each interval, until the mixture melts completely and achieves a silky smooth consistency.
- Enhance the flavor profile by incorporating vanilla extract into the melted mixture. Introduce yellow and orange food coloring, stirring carefully to distribute the hues evenly throughout the fudge.
- Fold most of the candy corn into the warm mixture, reserving a small portion for topping. Transfer the vibrant fudge mixture into the prepared pan, using a spatula to create an even surface.
- Artfully scatter the remaining candy corn pieces across the top of the fudge, creating a decorative finish.
- Chill the fudge in the refrigerator for a minimum of 4 hours, allowing it to set completely. Once firm, use the foil edges to lift the fudge from the pan and slice into bite-sized squares for serving.
Notes
- Candy corn lovers can customize this fudge by adjusting the amount of candy corn for more or less crunch.
- Use gel food coloring for vibrant, even color distribution without watering down the fudge mixture.
- Prevent sticky candy corn by lightly coating pieces in powdered sugar before adding to the fudge.
- Store fudge in an airtight container in the refrigerator for up to one week to maintain freshness and texture.
- Prep Time: 15 minutes
- Cook Time: 0 minutes
- Category: Desserts, Snacks
- Method: Baking
- Cuisine: American
Nutrition
- Serving Size: 12
- Calories: 180
- Sugar: 20 g
- Sodium: 30 mg
- Fat: 9 g
- Saturated Fat: 6 g
- Unsaturated Fat: 3 g
- Trans Fat: 0.1 g
- Carbohydrates: 25 g
- Fiber: 0.5 g
- Protein: 1 g
- Cholesterol: 15 mg
Nathaniel Brooks
Founder & Recipe Developer
Expertise
Farm-to-table cuisine, Seasonal recipe development, Culinary storytelling
Education
Ivy Tech Community College – Indianapolis, IN
Culinary Arts / Hospitality Administration & Events
Focused on hands-on training in classical and modern culinary techniques.
Nathaniel’s story starts in the foothills of the Appalachian Mountains, where farm stands, backyard gardens, and old family recipes shaped his love for real food. After graduating from Ivy Tech Community College in Indianapolis, he spent years working in farm-to-table kitchens, learning how to turn local, seasonal ingredients into something memorable.
Today, Nathaniel pours that same spirit into every single recipe on Aspiring Culinarian – recipes that feel real, comforting, and connected to the land. When he’s not in the kitchen, you’ll find him foraging wild herbs, chasing sunsets with his camera, or writing about the flavors that shaped his roots.