
The Best Easy Crockpot Candy Recipe for Sweet Success
Sweet treats emerge from the simplest ingredients in this mouthwatering crockpot candy recipe that will delight every chocolate lover.
Melted chocolate and smooth nuts combine effortlessly with minimal prep work.
The slow cooker works its magic, creating a decadent confection that requires zero culinary expertise.
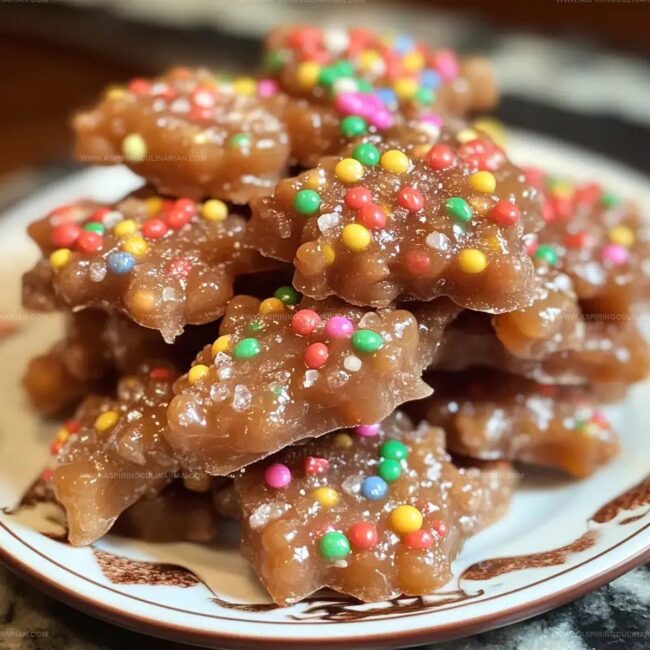
Clusters of rich chocolate and crunchy nuts blend into an irresistible homemade candy.
No complicated techniques stand between you and these addictive sweets.
With just a few pantry staples, anyone can craft these delectable morsels in their kitchen.
These candy clusters promise to become your new favorite no-fuss dessert.
Why Easy Chocolate Peanut Candy Is So Addictive
Chocolate Peanut Candy – Ingredients List
Base Ingredients:Coating Ingredients:Preparation Ingredients:Steps to Make Chocolate Peanut Candy Easily
Step 1: Prepare Crockpot Base
Layer whole peanuts evenly across the bottom of your crockpot, creating a uniform foundation for your delightful chocolate treat.
Step 2: Create Creamy Layer
Scatter chopped almond bark generously over the peanut base, ensuring complete coverage.
Step 3: Add Chocolate Topping
Sprinkle chocolate chips across the almond bark layer to create a rich, indulgent mix.
Step 4: Begin Slow Melting Process
Set crockpot to low heat and allow ingredients to melt slowly for approximately 1 hour, resisting the urge to stir immediately.
Step 5: Blend Melted Ingredients
After initial melting, gently stir the ingredients to combine the peanuts, almond bark, and chocolate chips into a smooth, glossy mixture.
Step 6: Complete Melting Cycle
Continue cooking for an additional 30 minutes, stirring periodically until the mixture becomes completely smooth and well-integrated.
Step 7: Prepare Cooling Surfaces
Line baking sheets with parchment paper, creating a clean, non-stick surface for candy formation.
Step 8: Form Candy Drops
Using a spoon, carefully drop small dollops of the melted mixture onto the prepared parchment paper, maintaining space between each candy.
Step 9: Add Decorative Touch
Immediately sprinkle colorful toppings over the fresh candy drops before the chocolate begins to set.
Step 10: Solidify Candies
Place baking sheets in the refrigerator and chill for one hour, allowing the candies to firm up completely.
Tips for Chocolate Peanut Candy Perfection
Candy Variations for Peanut Lovers
Serving Chocolate Peanut Candy
Storing Chocolate Peanut Candy for Snacking
FAQs
Yes, you can substitute peanuts with almonds, pecans, or cashews for variety.
No, any chocolate chips work well, but milk or semi-sweet chocolate are recommended for best flavor.
You can use a double boiler or microwave method, but crockpot ensures even melting and prevents burning.
Store in an airtight container at room temperature for up to 2 weeks, or refrigerate for longer shelf life.
Print
Easy Crockpot Candy Recipe
- Total Time: 1 hour 45 minutes
- Yield: 24 1x
Description
Homemade crockpot candy brings chocolate lovers pure joy with minimal kitchen effort. Sweet clusters of chocolate, peanuts, and smooth melted almond bark create an irresistible treat that delivers instant happiness in every delightful bite.
Ingredients
Primary Ingredients:
- 2 jars (16 ounces/454 grams) roasted, salted peanuts
- 1 package (24 ounces/680 grams) almond bark, broken or chopped
- 1 bag (24 ounces/680 grams) semi-sweet chocolate chips
Garnish:
- Sprinkles (optional)
Instructions
- Arrange peanuts in an even layer at the bottom of the crockpot, creating a uniform base for the candy.
- Distribute chopped almond bark evenly over the peanut layer, ensuring complete coverage.
- Sprinkle chocolate chips as the final layer, covering the almond bark completely.
- Set crockpot to low temperature and cook for 1 hour without stirring, allowing ingredients to melt gradually.
- After 1 hour, gently stir the mixture to combine melted ingredients into a smooth, consistent texture.
- Continue cooking for an additional 30 minutes, stirring periodically to prevent burning and ensure even melting.
- Prepare baking sheets by lining them with wax or parchment paper for easy candy removal.
- Using a spoon, carefully drop small portions of the melted candy mixture onto the prepared sheets, maintaining approximately 1-inch spacing between each dollop.
- Immediately garnish each candy portion with sprinkles while the mixture remains soft and malleable.
- Transfer the baking sheets to the refrigerator and chill for 1 hour until the candies are completely set and firm.
Notes
- Select roasted peanuts for deeper, richer flavor profile and extra crunchiness.
- Use high-quality chocolate chips to enhance overall candy taste and smoothness.
- Ensure wax paper is completely flat to prevent uneven candy shapes when dropping.
- Try different nut varieties like almonds or cashews for unique texture variations.
- Prep Time: 15 minutes
- Cook Time: 1 hour 30 minutes
- Category: Desserts, Snacks
- Method: Slow Cooking
- Cuisine: American
Nutrition
- Serving Size: 24
- Calories: 310
- Sugar: 26 g
- Sodium: 200 mg
- Fat: 18 g
- Saturated Fat: 8 g
- Unsaturated Fat: 10 g
- Trans Fat: 0 g
- Carbohydrates: 30 g
- Fiber: 2 g
- Protein: 6 g
- Cholesterol: 0 mg
Nathaniel Brooks
Founder & Recipe Developer
Expertise
Farm-to-table cuisine, Seasonal recipe development, Culinary storytelling
Education
Ivy Tech Community College – Indianapolis, IN
Culinary Arts / Hospitality Administration & Events
Focused on hands-on training in classical and modern culinary techniques.
Nathaniel’s story starts in the foothills of the Appalachian Mountains, where farm stands, backyard gardens, and old family recipes shaped his love for real food. After graduating from Ivy Tech Community College in Indianapolis, he spent years working in farm-to-table kitchens, learning how to turn local, seasonal ingredients into something memorable.
Today, Nathaniel pours that same spirit into every single recipe on Aspiring Culinarian – recipes that feel real, comforting, and connected to the land. When he’s not in the kitchen, you’ll find him foraging wild herbs, chasing sunsets with his camera, or writing about the flavors that shaped his roots.