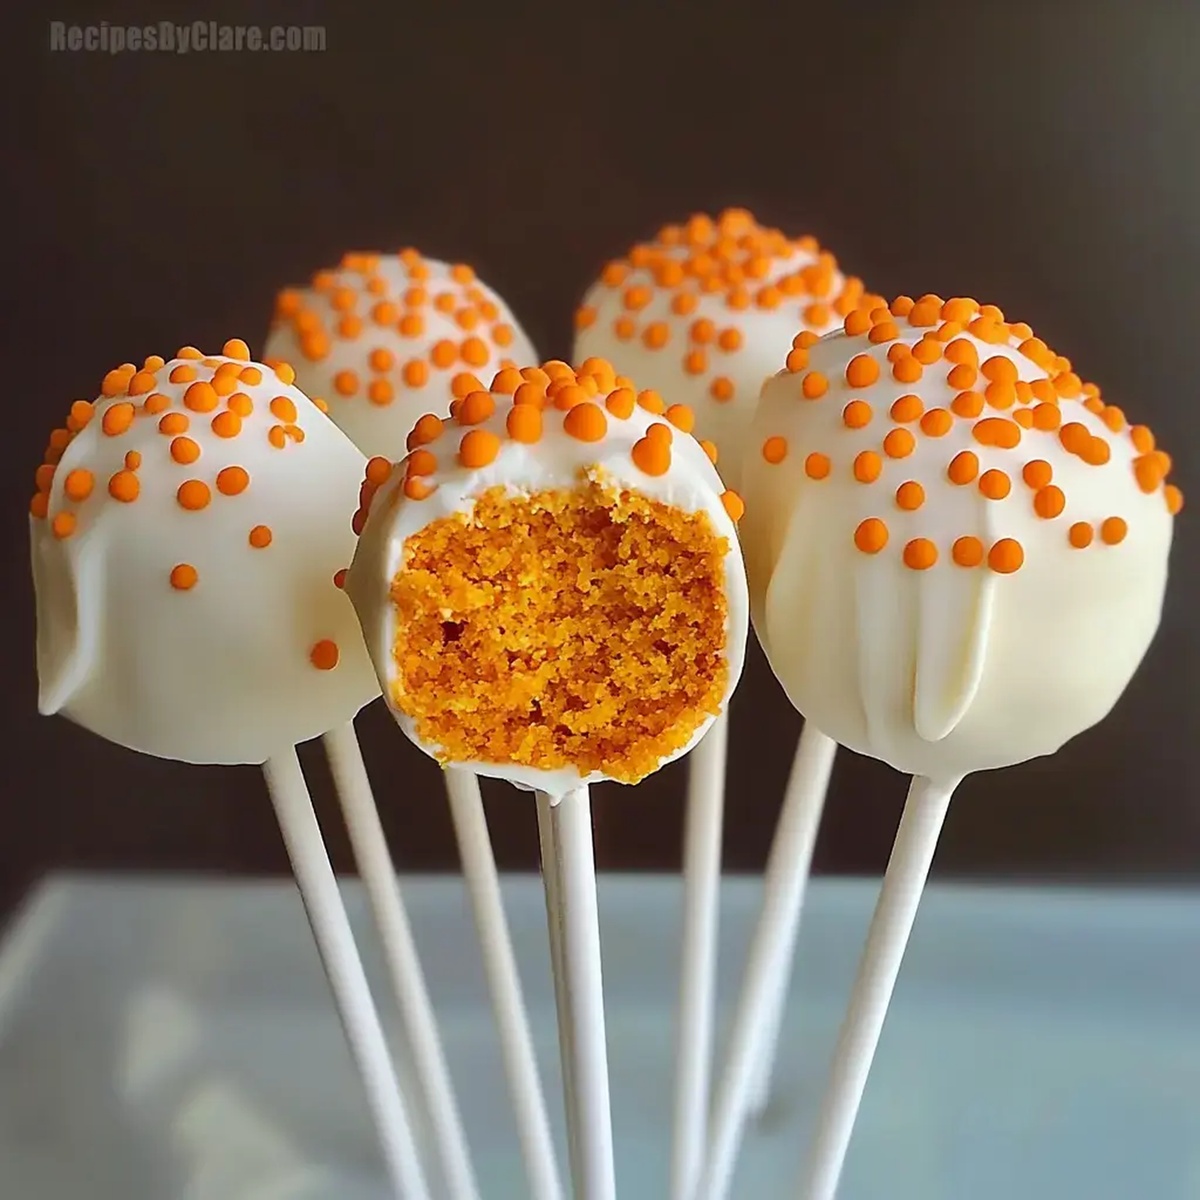
Easy Pumpkin Cake Pops Recipe: Sweet Fall Treats on a Stick
Whipping up delightful pumpkin cake pops can turn an ordinary afternoon into a sweet celebration of autumn’s magic.
Crisp leaves and cozy sweaters inspire these adorable bite-sized treats that dance with seasonal flavors.
Small gatherings deserve something special, and these charming desserts bring instant smiles to everyone.
Crafted with simple ingredients, they promise minimal effort and maximum deliciousness.
Each pop combines rich pumpkin essence with creamy frosting and a delicate chocolate coating.
Sprinkled with cinnamon or decorated with festive designs, you’ll create edible art that captures fall’s warmth.
Prepare to wow friends with these irresistible little morsels of pure happiness.
Easy Pumpkin Cake Pops Fun Factor
Pumpkin Cake Pops Ingredient List
Cake Base:Coating and Decoration:Baking and Preparation Accessories:Pumpkin Cake Pops Making Guide
Step 1: Bake Pumpkin Cake
Whip up a delicious pumpkin cake using your favorite box mix.
Follow the package directions carefully, ensuring a moist and fluffy base.
Once baked, let the cake cool down completely on a wire rack, allowing it to reach room temperature.
Step 2: Transform Cake Into Crumbs
Grab your cooled cake and break it down into ultra-fine crumbs using your hands or a food processor.
You want a soft, sandy texture that will help bind the cake pops together perfectly.
Step 3: Create Cake Pop Mixture
Mix the cake crumbs with cream cheese frosting.
Blend until the mixture becomes a smooth, moldable dough that holds its shape when pressed together.
The consistency should be similar to play-dough.
Step 4: Shape Cake Balls
Roll the mixture into small, uniform balls using your palms.
Place each ball on a parchment-lined baking sheet, ensuring they’re evenly sized for consistent cake pops.
Step 5: Prepare For Dipping
Insert a lollipop stick into the center of each cake ball.
Carefully place the baking sheet in the freezer for about 20 minutes to firm up the balls and help them stay stable during coating.
Step 6: Melt Candy Coating
Warm orange candy melts in the microwave, stirring occasionally to ensure a smooth, glossy consistency.
Be careful not to overheat, as this can cause the coating to become lumpy.
Step 7: Coat Cake Pops
Dip each chilled cake ball into the melted orange coating.
Gently tap the stick to remove excess candy, creating a smooth, even layer that completely covers the cake ball.
Step 8: Add Finishing Touches
Sprinkle green candy or sprinkles on top to create a cute pumpkin stem effect.
Allow the cake pops to set at room temperature until the coating hardens completely.
Pumpkin Cake Pops Handy Tips
Pumpkin Cake Pops Decorating Ideas
Serving Pumpkin Cake Pops
Pumpkin Cake Pops Storage Tips
FAQs
Cake pops are bite-sized desserts made by mixing crumbled cake with frosting, forming balls, and coating them in candy or chocolate.
Make sure the cake balls are chilled and firmly packed, and insert the stick halfway into the ball with a little melted candy as “glue” before fully dipping.
Yes, you can prepare cake pops 2-3 days in advance and store them in an airtight container in the refrigerator before serving.
Orange candy melts are perfect for pumpkin-themed cake pops, but you can also use white or other colors depending on your design preference.
Print
Easy Pumpkin Cake Pops Recipe
- Total Time: 1 hour 30 minutes
- Yield: 20 1x
Description
Sweet memories of autumn come alive with these delightful Pumpkin Cake Pops, combining rich seasonal flavors and playful bite-sized charm. Creamy pumpkin, warm spices, and chocolate coating create an irresistible treat that delights you with each delectable morsel.
Ingredients
Main Ingredients:
- 1 box pumpkin cake mix
- 1 cup cream cheese frosting
Coating and Decoration:
- 12 ounces (340 grams) orange candy melts
- Green sprinkles or candy
Tools:
- 1 bag of lollipop sticks
Instructions
- Craft the pumpkin cake following package guidelines, ensuring thorough cooling to room temperature on a wire rack.
- Transform the cooled cake into fine, uniform crumbs using your hands or a food processor, creating a consistent texture.
- Incorporate cream cheese frosting into the crumbs, kneading until the mixture resembles a cohesive, moldable dough that holds its shape.
- Meticulously shape the mixture into compact, uniform spheres approximately 1.5 inches in diameter, arranging them neatly on a parchment-lined baking sheet.
- Gently insert lollipop sticks into the center of each cake ball, then transfer the tray to the freezer for 15-20 minutes to solidify.
- Melt orange candy coating in a microwave-safe bowl, stirring every 30 seconds at 50% power until smooth and completely liquid, around 1-2 minutes.
- Carefully dip each chilled cake ball into the melted orange coating, rotating to ensure full coverage, then delicately tap off excess chocolate.
- Embellish the tops with green sprinkles or candy pieces to mimic pumpkin stems, then allow cake pops to set at room temperature until the coating hardens completely, approximately 15-20 minutes.
Notes
- Ensure cake is completely cool before crumbling to prevent moisture buildup and maintain the perfect texture for cake pops.
- Use room temperature cream cheese frosting for easier mixing and smoother consistency when forming cake balls.
- Chill cake balls thoroughly before dipping in candy melts to prevent crumbling and create a clean, professional coating.
- Try alternative decorations like crushed nuts, edible glitter, or colored sugar to personalize your pumpkin-themed cake pops.
- Prep Time: 30 minutes
- Cook Time: 1 hour
- Category: Desserts, Snacks
- Method: Baking
- Cuisine: American
Nutrition
- Serving Size: 20
- Calories: 210 kcal
- Sugar: 18 g
- Sodium: 150 mg
- Fat: 9 g
- Saturated Fat: 4 g
- Unsaturated Fat: 3 g
- Trans Fat: 0.1 g
- Carbohydrates: 30 g
- Fiber: 1 g
- Protein: 2 g
- Cholesterol: 20 mg
Nathaniel Brooks
Founder & Recipe Developer
Expertise
Farm-to-table cuisine, Seasonal recipe development, Culinary storytelling
Education
Ivy Tech Community College – Indianapolis, IN
Culinary Arts / Hospitality Administration & Events
Focused on hands-on training in classical and modern culinary techniques.
Nathaniel’s story starts in the foothills of the Appalachian Mountains, where farm stands, backyard gardens, and old family recipes shaped his love for real food. After graduating from Ivy Tech Community College in Indianapolis, he spent years working in farm-to-table kitchens, learning how to turn local, seasonal ingredients into something memorable.
Today, Nathaniel pours that same spirit into every single recipe on Aspiring Culinarian – recipes that feel real, comforting, and connected to the land. When he’s not in the kitchen, you’ll find him foraging wild herbs, chasing sunsets with his camera, or writing about the flavors that shaped his roots.