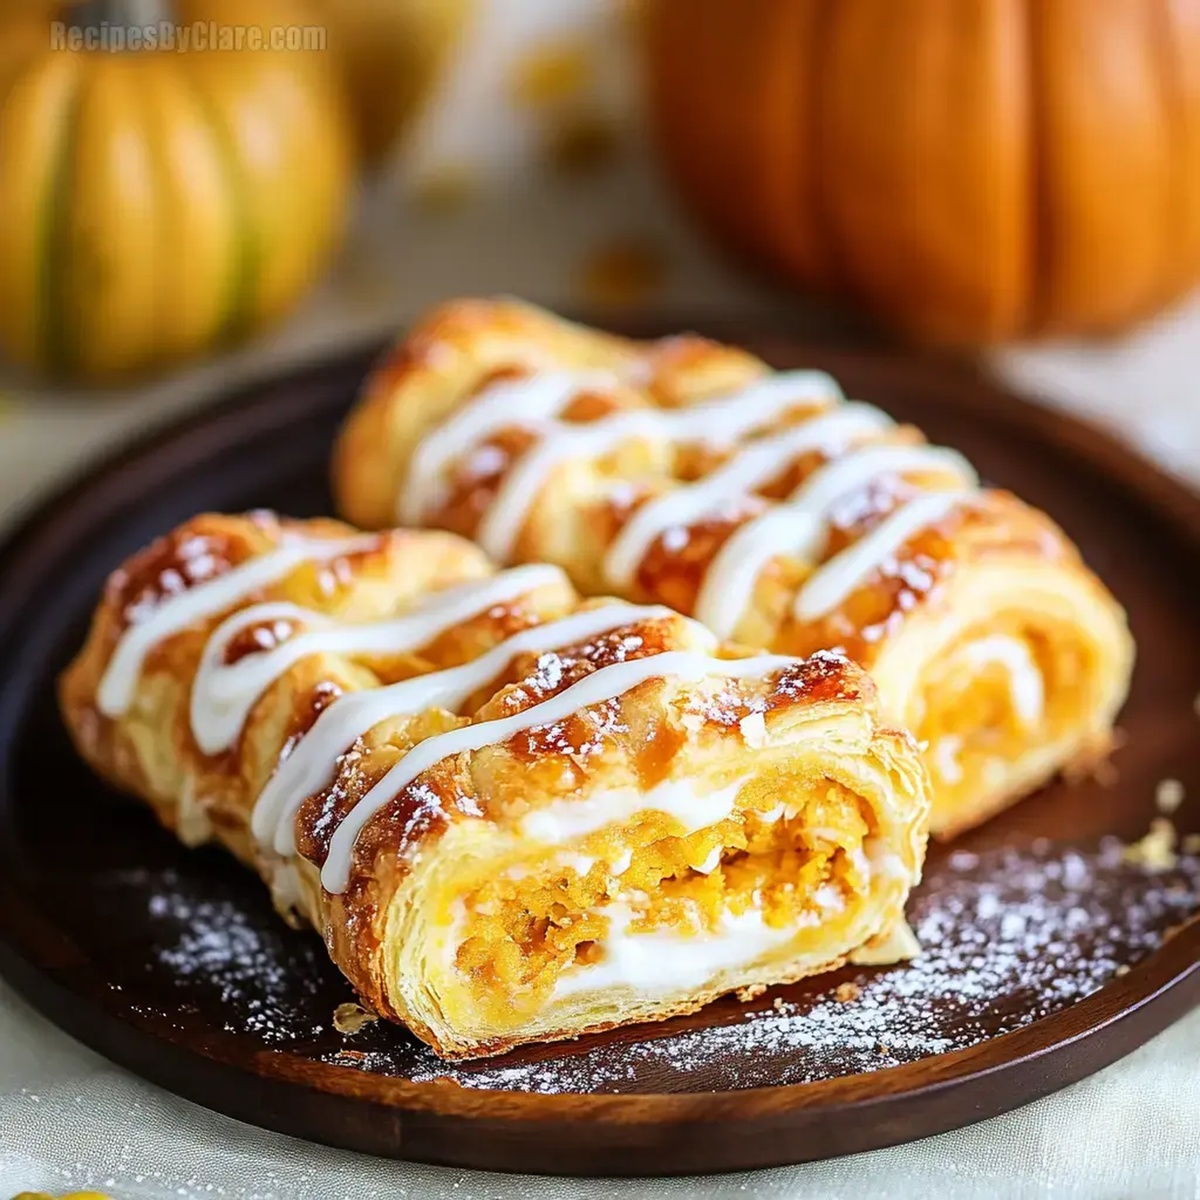
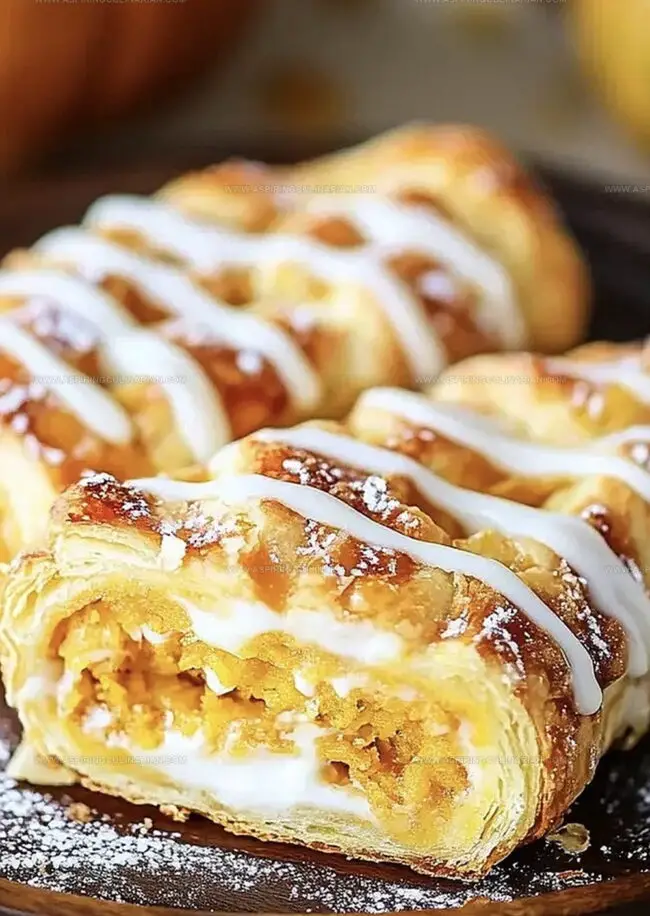
Heavenly Pumpkin Danish With Cream Cheese Recipe for Fall
Autumn’s golden light brings a delightful pumpkin danish that promises cozy comfort and irresistible flavor.
Warm spices dance through delicate pastry layers, creating a sensational morning treat.
Sweet cream cheese melts softly against tender pumpkin filling, inviting you to savor each delectable bite.
Flaky dough wraps around rich seasonal ingredients, promising a delicious experience.
Bakery-style elegance meets homemade charm in this simple yet impressive recipe.
Crafted with minimal effort, this danish delivers maximum satisfaction for weekend brunch or quiet morning moments.
You’ll want to grab a cup of coffee and enjoy every single crumb.
Easy Pumpkin Danish Recipe Perks
Easy Pumpkin Danish What You Need
Pastry Base:Filling Ingredients:Finishing Ingredients:Easy Pumpkin Danish Steps

Step 1: Warm Up The Oven
Preheat the oven to 400F (200C).
Grab a baking sheet and line it with parchment paper, creating a perfect non-stick surface for your delightful pastries.
Step 2: Create Pumpkin Magic
In a mixing bowl, combine the ingredients for the pumpkin filling:Whisk everything together until the mixture becomes silky smooth and fragrant.
Step 3: Whip Up Creamy Goodness
Grab another bowl and prepare the cream cheese filling by blending:Beat these ingredients until they transform into a luxuriously creamy mixture.
Step 4: Unleash The Pastry
Take your thawed puff pastry and roll it out.
Slice the pastry into equal squares, creating the perfect canvas for your danish.
Step 5: Fill With Deliciousness
Place a generous dollop of cream cheese mixture right in the center of each pastry square.
Follow this with a spoonful of the pumpkin mixture, creating a tantalizing flavor combination.
Step 6: Craft Beautiful Shapes
Gently fold the corners of each pastry square over the filling.
Pinch the edges to create a neat, elegant danish shape that looks as good as it tastes.
Step 7: Apply Golden Shine
Grab a pastry brush and coat the edges of your danish with beaten egg wash.
This will give your pastries a gorgeous golden-brown finish when baked.
Step 8: Bake To Perfection
Slide the baking sheet into the preheated oven.
Bake for 15-18 minutes, watching for a beautiful golden-brown color that signals they’re ready.
Step 9: Final Flourish
Once cooled slightly, dust the danish with a light sprinkle of powdered sugar.
This adds a touch of sweetness and makes them look professionally prepared.
Easy Pumpkin Danish Tips
Easy Pumpkin Danish Filling Ideas
Serving Easy Pumpkin Danish
Storing Easy Pumpkin Danish
FAQs
Not at all! Puff pastry is very forgiving. When it’s thawed, it’s easy to handle and creates flaky, delicious results even for beginner bakers.
Yes, you can prepare the pastries and refrigerate them unbaked for up to 2 hours before baking. This makes them perfect for preparing in advance for brunch or breakfast.
No problem! You can make your own by mixing ground cinnamon, nutmeg, ginger, and cloves in equal proportions. This will give you the same warm, autumn flavor.
Print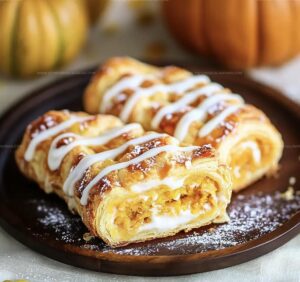
Easy Pumpkin Danish With Cream Cheese Recipe
- Total Time: 35 minutes
- Yield: 8 1x
Description
Danish pastry magic unfolds with this easy pumpkin danish, blending warm autumn spices and creamy cheese into a delightful breakfast treat. Flaky layers promise comfort and indulgence you’ll savor with each delectable bite.
Ingredients
Main Ingredients:
- 1 package puff pastry (thawed)
- 1/2 cup pumpkin puree
- 4 ounces (113 grams) cream cheese, softened
- 1 egg (beaten, for egg wash)
Sugars and Spices:
- 1/4 cup granulated sugar
- 1/4 cup powdered sugar
- 1 teaspoon pumpkin spice
- 1 teaspoon vanilla extract
- Powdered sugar (for dusting)
Instructions
- Warm the oven to 400F (200C) and prepare a baking sheet with parchment paper for optimal pastry performance.
- Craft the pumpkin filling by blending pumpkin puree, granulated sugar, and pumpkin spice into a silky, uniform mixture.
- Whip the cream cheese mixture to a luxurious consistency by combining softened cream cheese, powdered sugar, and vanilla extract until smooth and creamy.
- Unfold the thawed puff pastry and slice into precise squares, ensuring uniform size for consistent baking.
- Position a dollop of cream cheese mixture centrally on each pastry square, then crown with an equal portion of pumpkin filling.
- Elegantly fold the pastry corners toward the center, creating a delicate envelope that securely contains the luscious fillings.
- Gently brush the pastry edges with beaten egg wash, which will yield a gorgeous golden sheen during baking.
- Transfer the assembled danish to the prepared baking sheet and bake for 15-18 minutes, monitoring until the pastry transforms into a rich, amber-toned delicacy.
- Finish by dusting the warm pastries with a delicate snowfall of powdered sugar, enhancing both visual appeal and sweetness.
Notes
- Chill pastry dough before rolling to prevent sticking and ensure flaky texture.
- Use full-fat cream cheese for richer, smoother filling that holds its shape during baking.
- Seal pastry edges firmly to prevent filling from leaking during baking.
- Replace puff pastry with gluten-free alternative for dietary restrictions without compromising taste and texture.
- Prep Time: 20 minutes
- Cook Time: 15 minutes
- Category: Breakfast, Snacks, Desserts
- Method: Baking
- Cuisine: American
Nutrition
- Serving Size: 8
- Calories: 196 kcal
- Sugar: 13 g
- Sodium: 85 mg
- Fat: 11 g
- Saturated Fat: 5 g
- Unsaturated Fat: 4 g
- Trans Fat: 0.2 g
- Carbohydrates: 20 g
- Fiber: 1 g
- Protein: 3 g
- Cholesterol: 38 mg
Nathaniel Brooks
Founder & Recipe Developer
Expertise
Farm-to-table cuisine, Seasonal recipe development, Culinary storytelling
Education
Ivy Tech Community College – Indianapolis, IN
Culinary Arts / Hospitality Administration & Events
Focused on hands-on training in classical and modern culinary techniques.
Nathaniel’s story starts in the foothills of the Appalachian Mountains, where farm stands, backyard gardens, and old family recipes shaped his love for real food. After graduating from Ivy Tech Community College in Indianapolis, he spent years working in farm-to-table kitchens, learning how to turn local, seasonal ingredients into something memorable.
Today, Nathaniel pours that same spirit into every single recipe on Aspiring Culinarian – recipes that feel real, comforting, and connected to the land. When he’s not in the kitchen, you’ll find him foraging wild herbs, chasing sunsets with his camera, or writing about the flavors that shaped his roots.