Jolly Christmas Fudge Recipe: Homemade Holiday Magic
Crafting delectable Christmas fudge brings pure joy to holiday celebrations.
Sweet memories flood back with each creamy bite of this nostalgic treat.
Chocolate melts into silky perfection, creating a luxurious dessert that sparks festive cheer.
Minimal ingredients combine for maximum deliciousness in this simple recipe.
Grandmothers and baking enthusiasts have long cherished such classic confections.
Chocolate lovers will adore this melt-in-your-mouth sensation that promises to become a cherished tradition.
Take a delightful journey through flavor and create something magical today.
Festive Christmas Fudge Reasons to Add to Your Table
All Ingredients for Festive Christmas Fudge Creation
Base Ingredients:Coloring Ingredients:Finishing Ingredients:Stepwise Guide for Making Christmas Fudge
Step 1: Prepare Baking Surface
Line a square baking pan with parchment paper, ensuring extra hangs over the edges so you can easily lift out the finished fudge later.
Step 2: Create Smooth Chocolate Base
Grab a saucepan and combine white chocolate chips and sweetened condensed milk.
Gently heat the mixture, stirring constantly until everything melts into a silky smooth texture.
Once completely blended, remove from heat and stir in vanilla extract for extra richness.
Step 3: Add Festive Color
Divide the warm chocolate mixture into three separate bowls.
Transform each bowl with holiday colors:Step 4: Build Colorful Layers
Pour the vibrant layers into the prepared pan:Step 5: Create Magical Swirls
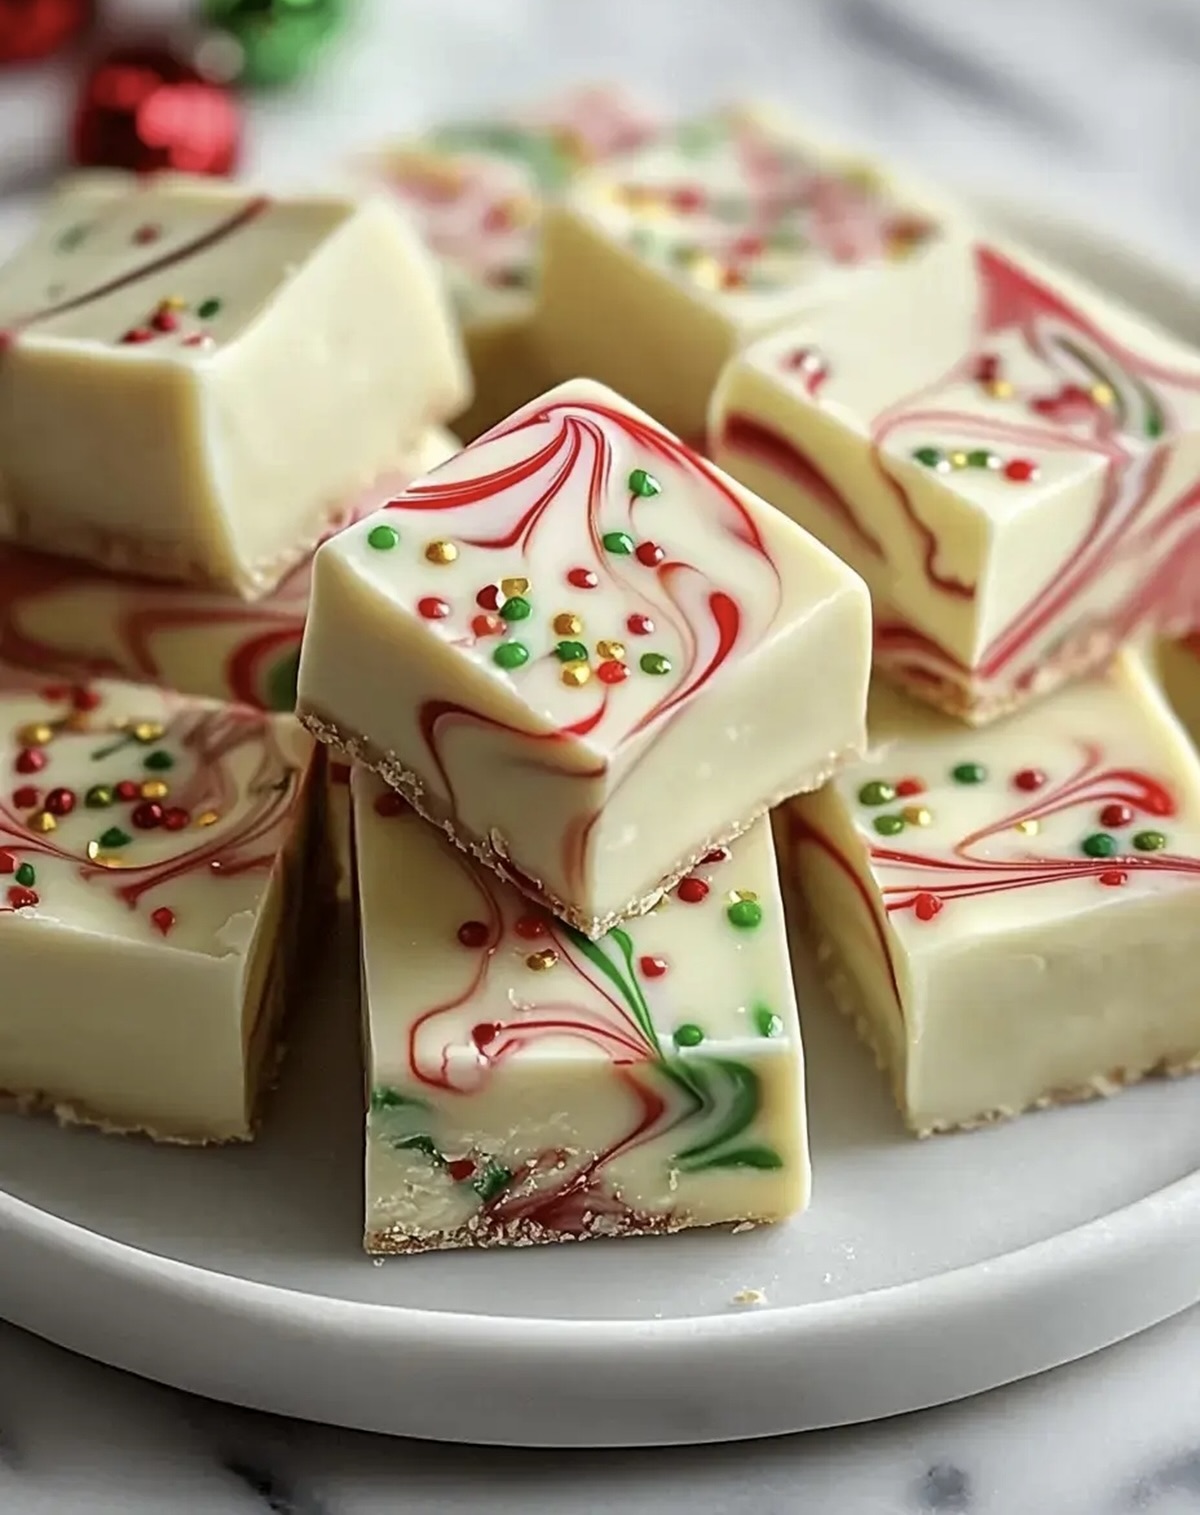
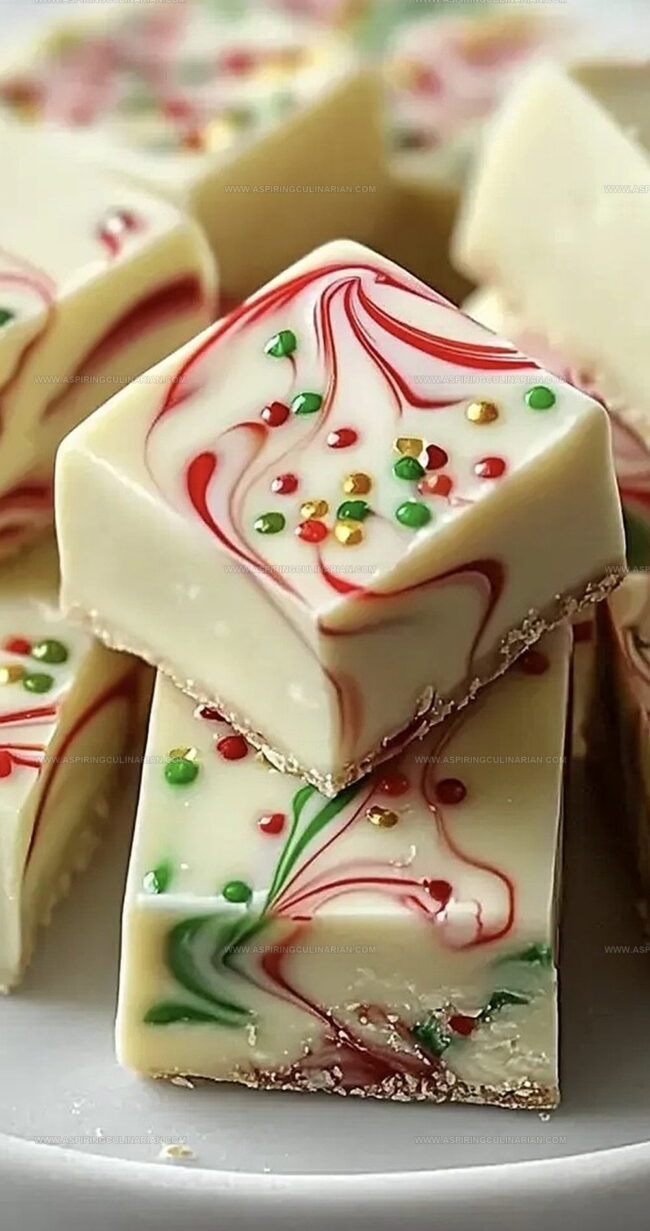
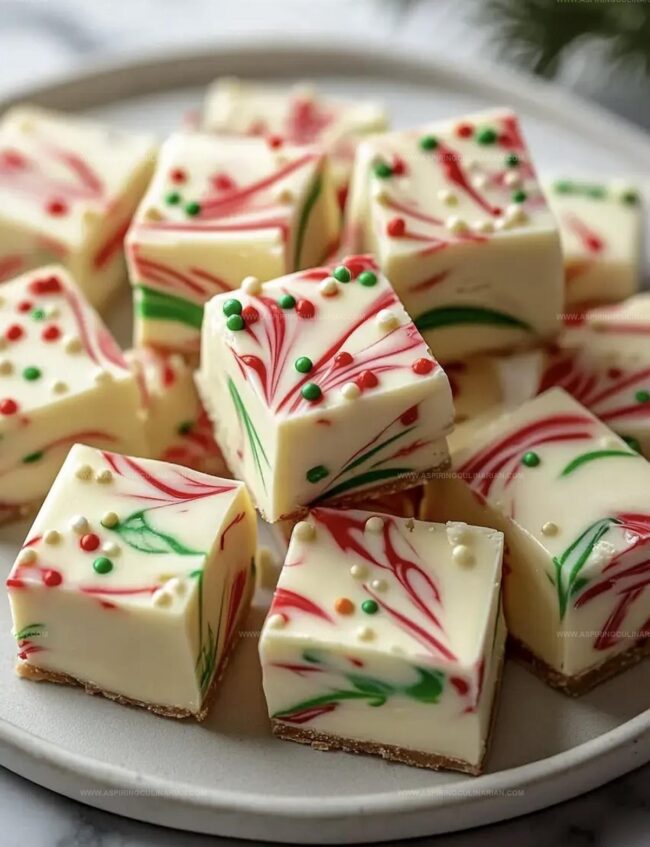
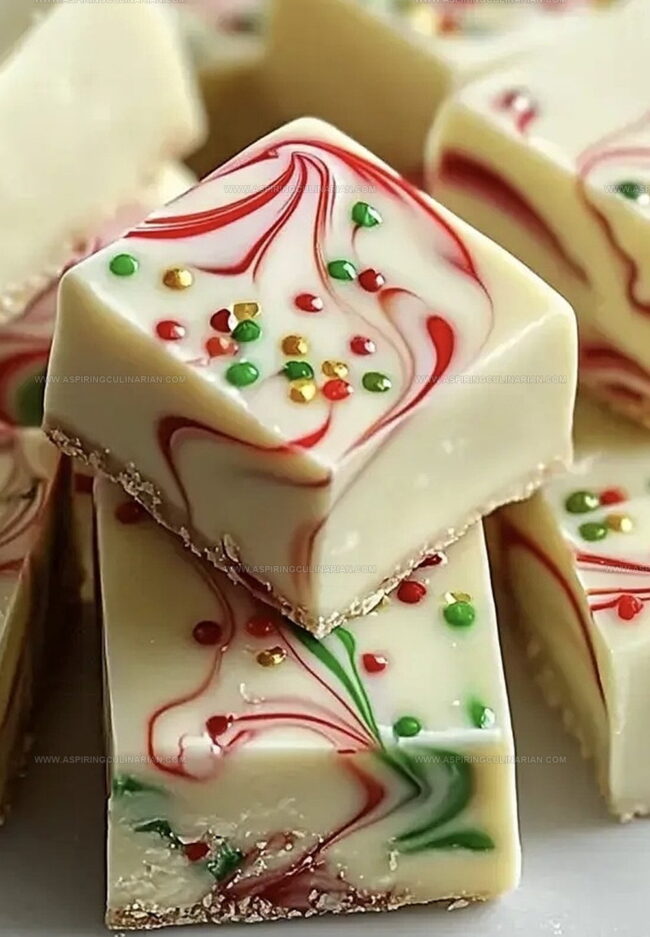
Take a knife and gently drag it through the layers, creating beautiful marbled patterns that look like Christmas magic.
Step 6: Sprinkle Holiday Cheer
Scatter festive holiday sprinkles across the top for extra sparkle and fun.
Step 7: Chill and Set
Place the pan in the refrigerator for at least 2 hours until the fudge becomes firm and solid.
Step 8: Serve and Enjoy
Lift the fudge out using the parchment paper edges, slice into bite-sized squares, and serve to delighted friends and family.
Pro Tips for a Perfect Fudge Texture
Fudge Recipe Twists for Holiday Cheer
Serving Christmas Fudge for Festive Gatherings
Best Practices for Storing Holiday Fudge
FAQs
Gently drag a knife through the layers in a zigzag pattern, moving slowly and carefully to create a beautiful marbled design without overmixing the colors.
Absolutely! You can experiment with food coloring to match any holiday theme or personal preference, like blue and white for winter or red and pink for Valentine’s Day.
Use high-quality white chocolate chips or bars with a high cocoa butter content for a smoother, creamier texture and richer flavor. Avoid white chocolate candy melts.
Print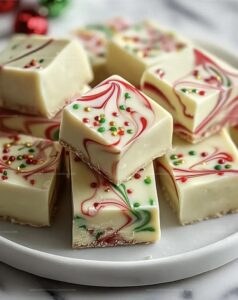
Festive Christmas Fudge Recipe
- Total Time: 2 hours 20 minutes
- Yield: 16 1x
Description
Delightful Christmas Fudge brings holiday cheer with its rich chocolate and peppermint swirls, promising a merry treat that melts in your mouth. Festive gatherings become magical when you share these irresistible squares of pure seasonal joy.
Ingredients
Main Ingredients:
- 3 cups white chocolate chips
- 1 can (14 ounces / 396 grams) sweetened condensed milk
Flavoring:
- 1/2 teaspoon vanilla extract
Decorative Elements:
- Red food coloring
- Green food coloring
- 1/4 cup holiday sprinkles (optional for decoration)
Instructions
- Prepare a festive canvas by lining an 8×8-inch baking dish with parchment paper, ensuring extra overhang for effortless removal.
- Create a silky chocolate base by gently melting white chocolate chips with sweetened condensed milk in a saucepan over low heat, stirring until completely smooth. Remove from heat and infuse with vanilla extract for depth of flavor.
- Segment the molten mixture into three distinct color palettes: vibrant red, forest green, and classic white, using food coloring to transform the pure white base.
- Craft artistic layers by carefully spreading the crimson fudge as the foundation, followed by a pristine white layer, and crowned with an emerald green tier.
- Unleash creativity by delicately swirling the colors with a knife, generating a mesmerizing marbled landscape that captures holiday spirit.
- Elevate the visual appeal by scattering festive sprinkles across the surface for a touch of whimsical celebration.
- Chill the creation in the refrigerator for minimum 2 hours until completely set and firm, allowing flavors to meld and texture to solidify.
- Once chilled, lift the fudge using parchment paper edges, slice into bite-sized pieces, and serve this delectable holiday treat.
Notes
- Create a Non-Stick Surface by generously greasing parchment paper edges to ensure smooth fudge removal without tearing.
- Control Chocolate Melting by using low, consistent heat and stirring continuously to prevent burning or seizing of delicate white chocolate.
- Enhance Color Vibrancy with gel food coloring instead of liquid, which maintains better texture and provides more intense holiday hues.
- Try Flavor Variations by adding peppermint extract or crushed candy canes for a classic Christmas twist that elevates the traditional fudge recipe.
- Prep Time: 20 minutes
- Cook Time: 2 hours
- Category: Desserts, Snacks
- Method: Baking
- Cuisine: American
Nutrition
- Serving Size: 16
- Calories: 211
- Sugar: 24 g
- Sodium: 32 mg
- Fat: 11 g
- Saturated Fat: 7 g
- Unsaturated Fat: 4 g
- Trans Fat: 0 g
- Carbohydrates: 27 g
- Fiber: 0 g
- Protein: 2 g
- Cholesterol: 10 mg
Nathaniel Brooks
Founder & Recipe Developer
Expertise
Farm-to-table cuisine, Seasonal recipe development, Culinary storytelling
Education
Ivy Tech Community College – Indianapolis, IN
Culinary Arts / Hospitality Administration & Events
Focused on hands-on training in classical and modern culinary techniques.
Nathaniel’s story starts in the foothills of the Appalachian Mountains, where farm stands, backyard gardens, and old family recipes shaped his love for real food. After graduating from Ivy Tech Community College in Indianapolis, he spent years working in farm-to-table kitchens, learning how to turn local, seasonal ingredients into something memorable.
Today, Nathaniel pours that same spirit into every single recipe on Aspiring Culinarian – recipes that feel real, comforting, and connected to the land. When he’s not in the kitchen, you’ll find him foraging wild herbs, chasing sunsets with his camera, or writing about the flavors that shaped his roots.