
The Creamiest Fried Cheese Balls Recipe for Snack Lovers
Crispy, golden spheres of melted cheese tempt taste buds with this irresistible fried cheese balls recipe that promises pure indulgence.
Cheese lovers understand the magical allure of these bite-sized delights that crackle with each delectable bite.
Every ingredient comes together effortlessly to create a stunning appetizer that delights crowds.
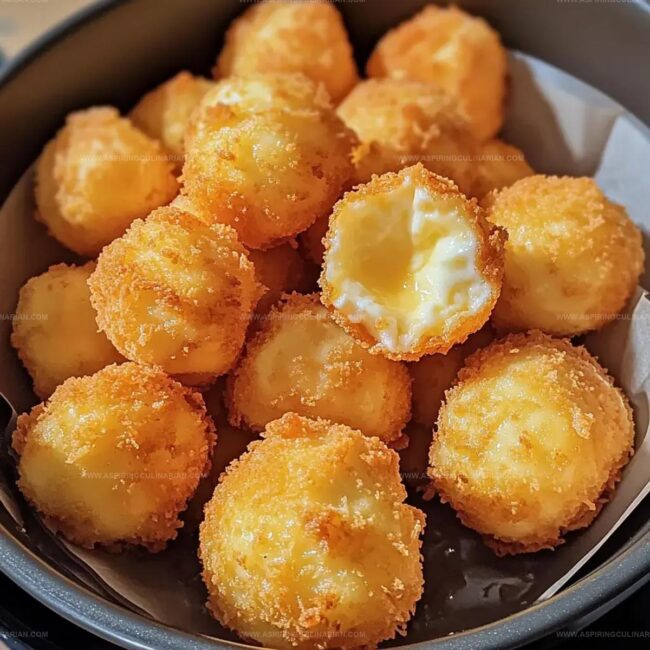
The outer layer delivers a satisfying crunch while revealing a molten, gooey center that melts on your tongue.
Simple pantry staples transform into a crowd-pleasing snack that sparks joy at gatherings.
These golden treasures work perfectly as party nibbles or a spontaneous treat when hunger strikes.
Prepare to experience a culinary moment that elevates comfort food to an art form.
What Makes Crispy Party Snacks Stand Out

Ingredients for Crispy Party Snack Magic
Main Ingredients:Coating Ingredients:Seasoning Ingredients:Additional Ingredients:How to Make Crispy Party Snacks with Ease
Step 1: Create Cheese Blend
Grab your favorite sharp cheddar and creamy mozzarella.
Gently mix these two cheeses together until they’re perfectly combined and smooth.
The blend will create a delightful flavor profile that’ll make everyone’s taste buds dance.
Step 2: Cool Cheese Mixture
Pop the cheese blend into the refrigerator.
Let it chill and firm up for about 15 minutes.
This helps the cheese hold its shape when you’re forming the balls.
Step 3: Build Flavor-Packed Flour Coating
In a wide bowl, combine all-purpose flour with an exciting mix of seasonings.
Think paprika, garlic powder, black pepper, and a pinch of salt.
This will give your cheese poppers an extra kick of flavor.
Step 4: Prepare Egg Wash
Crack fresh eggs into a separate bowl.
Whisk them until they’re smooth and fully blended.
This will help the breadcrumb coating stick perfectly to each cheese ball.
Step 5: Set Up Crispy Coating Station
Pour breadcrumbs into another bowl.
Choose panko for an extra crispy exterior that’ll make these poppers irresistible.
Step 6: Shape Cheese Delights
Using your hands, roll the chilled cheese mixture into small, bite-sized balls.
Make them about the size of a golf ball for the perfect one-bite snack.
Step 7: First Coating Adventure
Roll each cheese ball in the seasoned flour mixture.
Make sure they’re completely covered, shaking off any excess.
Step 8: Egg Bath
Dip each flour-coated cheese ball into the whisked eggs.
Let the excess drip off for a light, even coating.
Step 9: Breadcrumb Transformation
Roll the egg-coated balls in breadcrumbs.
Press gently to ensure a thick, even coating that’ll turn golden and crispy.
Step 10: Prepare Frying Station
Heat vegetable oil in a deep pan or fryer.
Aim for a consistent temperature of 350°F.
Use a cooking thermometer to check accuracy.
Step 11: Golden Frying Magic
Carefully lower the cheese balls into the hot oil.
Fry in small batches to maintain oil temperature.
Cook for 2-3 minutes until they turn a beautiful golden brown.
Step 12: Drain Excess Oil
Transfer the fried poppers onto a paper towel-lined plate.
This helps remove any extra oil and keeps them crispy.
Step 13: Serve and Enjoy
Arrange the hot, crispy cheese poppers on a serving platter.
Pair with your favorite dipping sauce – ranch, marinara, or spicy aioli work wonderfully.
Serve immediately while they’re hot and crispy!
Crispy Party Snack Tips for Any Gathering

New Flavors and Styles for Party Snacks
Best Ways to Serve Crispy Party Snacks
Storage for Crispy Party Snacks That Works
FAQs
Ensure your cheese mixture is cold and firm before coating. Use a gentle rolling technique when forming balls and make sure each ball is evenly coated with flour, eggs, and breadcrumbs for a secure outer layer.
Yes, you can prepare the cheese balls up to the coating stage and refrigerate them for 2-3 hours before frying. This helps them hold their shape and ensures a crispy exterior when fried.
Use vegetable oil, canola oil, or peanut oil with a high smoke point. These oils can handle high temperatures without burning and provide a neutral flavor that won’t overpower the cheese balls.
Use a kitchen thermometer to confirm 350F.
Print
Fried Cheese Balls Recipe
- Total Time: 28 minutes
- Yield: 4 1x
Description
Crispy golden Fried Cheese Balls emerge as a mouthwatering appetizer that perfectly blends creamy cheese and crunchy exterior. Guests will savor these irresistible bites, which deliver a delightful combination of textures and flavors you cannot resist.
Ingredients
Main Ingredients:
- 1 cup shredded cheddar cheese
- 1 cup shredded mozzarella cheese
- 2 large eggs
- 1/2 cup all-purpose flour
- 1/2 cup breadcrumbs (preferably panko)
Seasonings:
- 1/4 teaspoon garlic powder
- 1/4 teaspoon onion powder
- 1/4 teaspoon paprika
- Salt and pepper to taste
Cooking Ingredients:
- Vegetable or canola oil for frying
- Optional: marinara or ranch for dipping
Instructions
- Blend sharp cheddar and creamy mozzarella in a mixing bowl until thoroughly combined.
- Refrigerate cheese mixture for 15 minutes to firm up and enhance texture.
- Create seasoned flour coating by mixing dry ingredients with your preferred herbs and spices.
- Whisk eggs in a separate wide, shallow container until smooth and well-blended.
- Spread breadcrumbs evenly in a third dish, preparing for final coating.
- Using clean hands, gently shape chilled cheese mixture into uniform 1-inch spherical portions.
- Carefully roll each cheese ball through seasoned flour, ensuring complete and even coverage.
- Submerge floured cheese balls into whisked eggs, allowing excess to drip off.
- Roll egg-coated balls generously in breadcrumbs, pressing gently to adhere crispy layer.
- Heat vegetable oil in a deep skillet or fryer to precisely 350°F.
- Carefully lower breaded cheese balls into hot oil, frying in small batches for 2-3 minutes until golden brown and crispy.
- Transfer fried snacks onto paper towel-lined plate to absorb excess oil and maintain crispness.
- Serve immediately alongside preferred dipping sauce while still piping hot and crunchy.
Notes
- Cheese Selection Experiment with different cheese blends for unique flavor profiles, like adding parmesan or gouda for extra depth.
- Temperature Control Keep oil consistently at 350F to ensure golden, crispy exterior without burning the cheese balls.
- Gluten-Free Adaptation Swap regular flour and breadcrumbs with almond flour and gluten-free panko for celiac-friendly version.
- Make-Ahead Tip Prepare cheese balls ahead and freeze uncooked, then fry directly from frozen for convenient party prep.
- Prep Time: 25 minutes
- Cook Time: 3 minutes
- Category: Snacks, Appetizer
- Method: Frying
- Cuisine: Italian
Nutrition
- Serving Size: 4
- Calories: 250
- Sugar: 1 g
- Sodium: 300 mg
- Fat: 15 g
- Saturated Fat: 7 g
- Unsaturated Fat: 6 g
- Trans Fat: 0 g
- Carbohydrates: 20 g
- Fiber: 1 g
- Protein: 10 g
- Cholesterol: 100 mg
Nathaniel Brooks
Founder & Recipe Developer
Expertise
Farm-to-table cuisine, Seasonal recipe development, Culinary storytelling
Education
Ivy Tech Community College – Indianapolis, IN
Culinary Arts / Hospitality Administration & Events
Focused on hands-on training in classical and modern culinary techniques.
Nathaniel’s story starts in the foothills of the Appalachian Mountains, where farm stands, backyard gardens, and old family recipes shaped his love for real food. After graduating from Ivy Tech Community College in Indianapolis, he spent years working in farm-to-table kitchens, learning how to turn local, seasonal ingredients into something memorable.
Today, Nathaniel pours that same spirit into every single recipe on Aspiring Culinarian – recipes that feel real, comforting, and connected to the land. When he’s not in the kitchen, you’ll find him foraging wild herbs, chasing sunsets with his camera, or writing about the flavors that shaped his roots.