
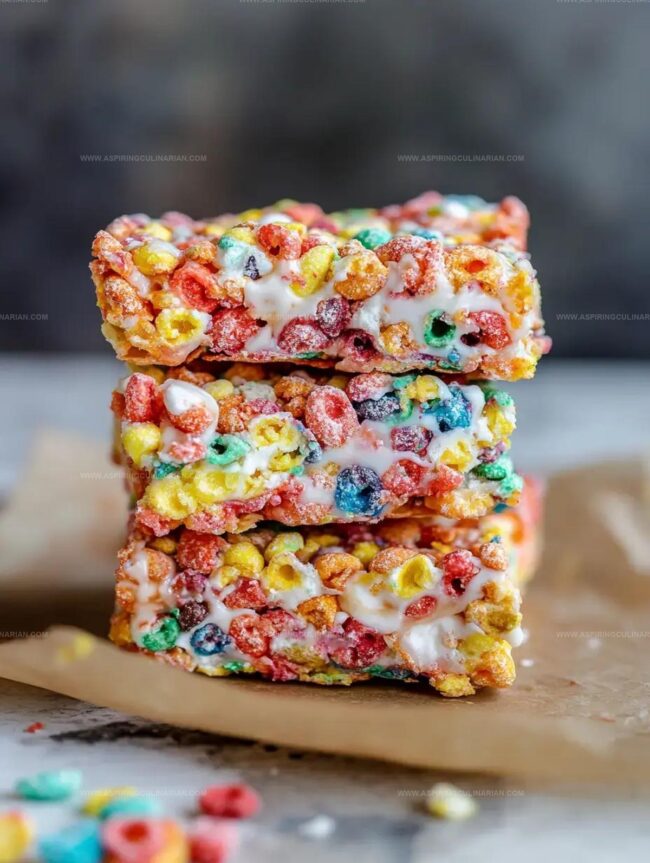
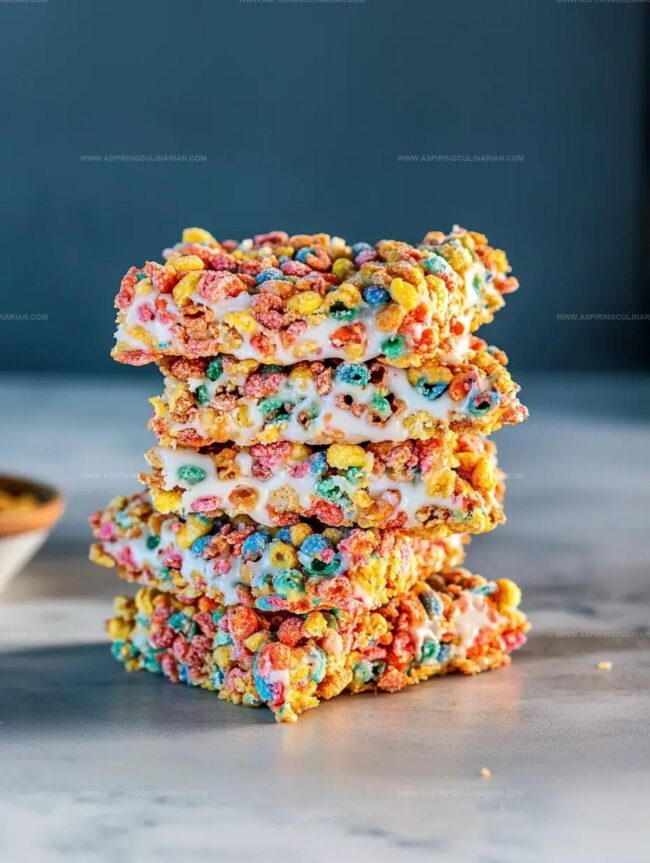
Colorful Fruity Pebbles Treats Recipe: Sweet Childhood Magic
Baking enthusiasts adore these delightful fruity pebbles treats that bring nostalgic childhood memories to life.
Colorful and crunchy, this sweet dessert combines marshmallow magic with vibrant cereal textures.
Each bite delivers a playful burst of sugary goodness that melts perfectly in your mouth.
The simple recipe requires just a few ingredients and minimal preparation time.
Sticky marshmallows bind the crispy cereal into delectable squares that spark joy at any gathering.
Quick to assemble and even faster to devour, these treats transform an ordinary snack into a spectacular celebration of flavor.
You’ll want to whip up a batch and watch smiles spread across everyone’s faces.
Serving Ideas for No-Bake Cereal Bars
Storage Advice for No-Bake Cereal Bars
FAQs
Yes, you can substitute the original cereal with similar crispy cereals like Rice Krispies, Corn Flakes, or Chex. Just ensure the cereal has a similar texture and crunch.
These no-bake cereal bars will stay fresh for 3-4 days when stored in an airtight container at room temperature. Keep them away from direct heat or sunlight.
Absolutely! These bars are super easy to make and kids love their sweet, crunchy texture. They’re a great after-school snack or dessert that children can help prepare.
No-Bake Cereal Bars Snack Highlights
No-Bake Cereal Bar Ingredient Guide
Base Ingredients:Binding and Coating Ingredients:Optional Topping Ingredient:How to Make No-Bake Cereal Bars
Step 1: Prepare Baking Dish
Grab a glass pan and give it a light coating of cooking spray.
This will help prevent the bars from sticking and make them easier to remove later.
Step 2: Create Marshmallow Base
Place butter in a saucepan and melt it gently over low heat.
Pour in most of the marshmallows and stir continuously until they transform into a smooth, gooey mixture.
Keep the heat low to prevent burning.
Step 3: Combine Cereal and Marshmallow
Take the saucepan off the heat.
Fold in the crispy cereal and remaining marshmallows.
Stir until every piece of cereal gets coated with the sticky marshmallow mixture, ensuring an even distribution.
Step 4: Shape the Bars
Transfer the cereal mixture into the prepared pan.
Use a piece of parchment paper to press down firmly and create an even, compact layer.
This helps the bars hold together and create a neat shape.
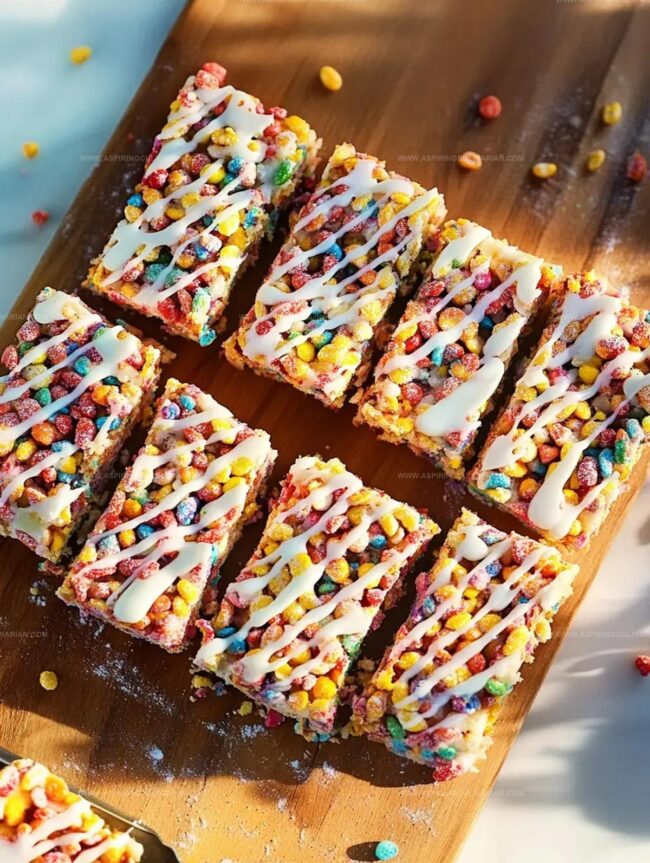
Step 5: Add Chocolate Drizzle
If desired, melt white chocolate in the microwave in short bursts, stirring between each interval.
Once smooth, drizzle the chocolate over the bars in a zigzag pattern for a decorative touch.
Step 6: Cool and Set
Let the bars sit at room temperature to set.
If you’ve added chocolate, pop them in the refrigerator for about 10 minutes to help the chocolate firm up quickly.
Once cooled, slice into squares and enjoy your delicious treat.
Pro Tips for No-Bake Cereal Bars
Cereal Bar Variations to Explore
Print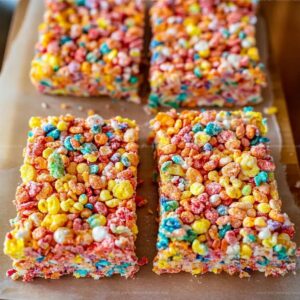
Fruity Pebbles Treats Recipe
- Total Time: 15 minutes
- Yield: 12 1x
Description
Colorful Fruity Pebbles treats bring nostalgic childhood memories with a crunchy, marshmallow-packed delight. Sweet squares packed with rainbow cereal promise quick happiness for snack enthusiasts craving playful dessert magic.
Ingredients
Main Ingredients:
- 7 cups Fruity Pebbles cereal
- 5 cups mini marshmallows
- 2 cups mini marshmallows (for topping)
Binding Ingredients:
- 1/4 cup (57 grams) salted butter
Coating Ingredients:
- 1 cup Ghirardelli white vanilla wafers
Instructions
- Lightly coat a glass baking dish with non-stick cooking spray to prevent sticking and ensure easy removal of the bars.
- In a large saucepan, gently melt butter over low heat, creating a smooth base for the marshmallow mixture.
- Add the majority of marshmallows to the melted butter, stirring continuously until they transform into a silky, uniform liquid.
- Immediately remove the saucepan from heat and gently fold in the crisp cereal, ensuring every piece gets evenly coated with the marshmallow mixture.
- Incorporate the remaining marshmallows for added texture and pockets of gooey sweetness.
- Transfer the mixture to the prepared glass pan, using a piece of parchment paper to firmly press and compact the bars into an even layer.
- If desired, microwave white chocolate in 15-second intervals, stirring between each, until completely melted and smooth.
- Drizzle the melted white chocolate artfully across the surface of the bars.
- Allow the bars to cool at room temperature for about 20-30 minutes, or refrigerate for 10 minutes to expedite setting if using chocolate topping.
- Once set, slice into individual bars and serve.
Notes
- Customize your cereal choice to match personal taste preferences or dietary needs like gluten-free or low-sugar options.
- Use a silicone spatula when mixing marshmallows and cereal to prevent sticking and ensure even coating.
- Try different chocolate drizzles like dark chocolate or butterscotch for unique flavor variations.
- Press mixture gently into pan to maintain a light, airy texture without compressing the cereal too densely.
- Prep Time: 15 minutes
- Cook Time: 0 minutes
- Category: Snacks, Desserts
- Method: None
- Cuisine: American
Nutrition
- Serving Size: 12
- Calories: 202
- Sugar: 16 g
- Sodium: 93 mg
- Fat: 7 g
- Saturated Fat: 4 g
- Unsaturated Fat: 2 g
- Trans Fat: 0 g
- Carbohydrates: 31 g
- Fiber: 0 g
- Protein: 1 g
- Cholesterol: 15 mg
Nathaniel Brooks
Founder & Recipe Developer
Expertise
Farm-to-table cuisine, Seasonal recipe development, Culinary storytelling
Education
Ivy Tech Community College – Indianapolis, IN
Culinary Arts / Hospitality Administration & Events
Focused on hands-on training in classical and modern culinary techniques.
Nathaniel’s story starts in the foothills of the Appalachian Mountains, where farm stands, backyard gardens, and old family recipes shaped his love for real food. After graduating from Ivy Tech Community College in Indianapolis, he spent years working in farm-to-table kitchens, learning how to turn local, seasonal ingredients into something memorable.
Today, Nathaniel pours that same spirit into every single recipe on Aspiring Culinarian – recipes that feel real, comforting, and connected to the land. When he’s not in the kitchen, you’ll find him foraging wild herbs, chasing sunsets with his camera, or writing about the flavors that shaped his roots.