The Ultimate Fudgy Chocolate Chip Brownie Squares Recipe
Chocolate chip brownie squares bring pure decadence right to your plate with minimal effort and maximum satisfaction.
Sweet secrets hide inside these rich, dense treats that promise intense flavor in every bite.
Bakery-style indulgence starts with simple ingredients you already have in your kitchen.
Deep cocoa notes mingle with melted chocolate chips, creating a luxurious texture that melts effortlessly.
Professional bakers know the magic happens when ingredients blend seamlessly and temperatures are precisely controlled.
Each square delivers a moment of pure bliss that breaks through ordinary dessert expectations.
Let’s dive into this irresistible recipe that will make you the star of any gathering.
Fudgy Chocolate Chip Brownie Squares: The Sweetest Squares
Everything You Need for Chocolate Chip Brownie Squares
Chocolate Base Ingredients:Dry Ingredients:Binding and Flavor Ingredients:Directions for Super Fudgy Brownie Squares at Home
Step 1: Warm Up the Oven
Get your baking space ready by heating the oven to 175C (350F).
This creates the perfect environment for your delicious brownies.
Step 2: Prepare the Baking Vessel
Grab an 8×8-inch pan and show it some love.
Grease the entire surface and line it with parchment paper, letting the edges hang over for super easy brownie removal later.
Step 3: Create the Smooth Base
In a spacious mixing bowl, combine:Whisk these ingredients until they transform into a silky, creamy mixture that looks absolutely irresistible.
Step 4: Introduce Moisture
Drop in the eggs and vanilla extract.
Whisk everything together until the mixture looks smooth and well-blended.
Step 5: Bring in the Dry Companions
Sift these powdery friends directly into your wet mixture:Step 6: Gentle Mixing Magic
Fold the ingredients together with a light touch.
Stop mixing the moment everything looks combined – no need for aggressive stirring!
Step 7: Chocolate Chip Party
Sprinkle chocolate chips into the batter and give a gentle stir to distribute them evenly throughout.
Step 8: Pan Placement
Pour the entire batter into your prepared pan.
Use a spatula to spread it out evenly, creating a smooth surface.
Step 9: Baking Transformation
Slide the pan into the preheated oven.
Bake for 25-30 minutes.
You’ll know they’re perfect when a toothpick comes out with just a few moist crumbs.
Step 10: Cooling Countdown
Let the brownies rest in the pan for 10 minutes.
Then transfer to a wire rack to cool completely.
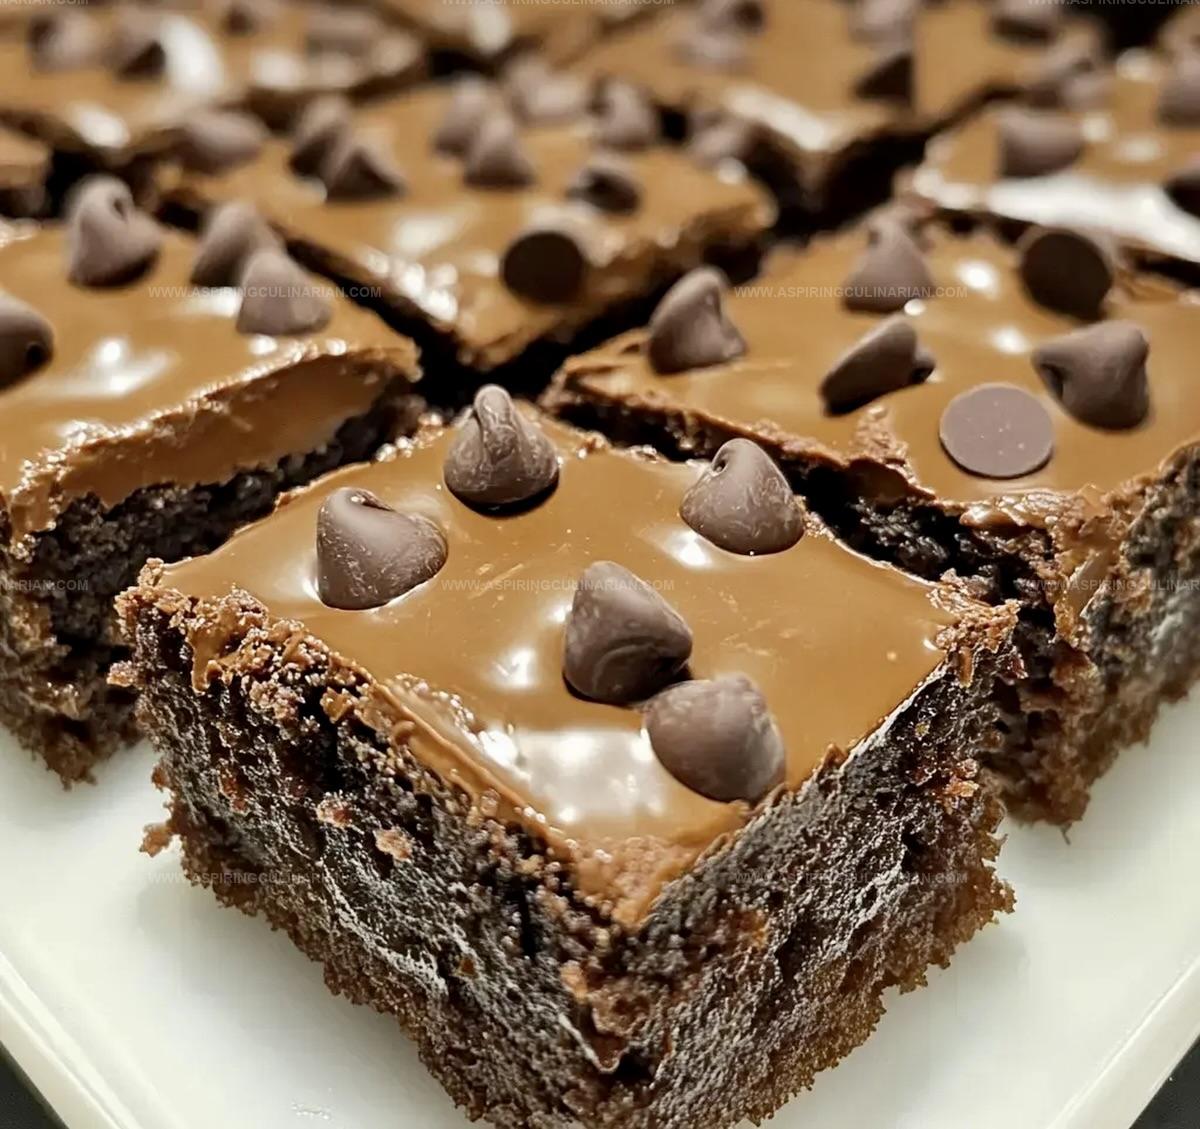
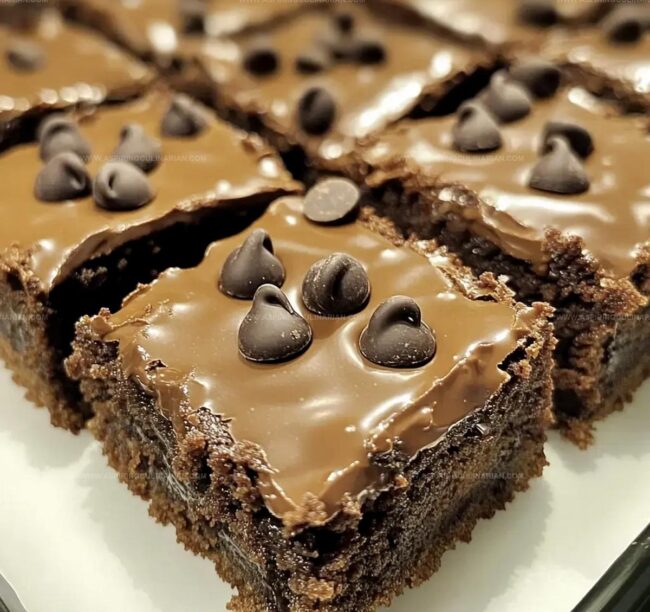
Step 11: Chocolate Drizzle
Melt milk chocolate chips and create a luxurious topping layer over the cooled brownies.
Step 12: Final Flourish
Sprinkle extra chocolate chips on top for a gorgeous, tempting appearance.
Step 13: Patience Pays Off
Allow the chocolate topping to set completely before cutting.
Step 14: Indulge and Enjoy
Slice into square pieces and savor every single bite of these incredible brownies!
Tips for Rich, Chewy Chocolate Brownies Every Batch
New Takes on Chocolate Chip Brownie Squares
How to Present Brownie Squares for Dessert
Storing Brownie Squares for That Freshly-Baked Taste
FAQs
Yes, you can substitute milk, dark, or white chocolate chips based on your preference. Mix and match for a unique flavor profile.
Look for a toothpick with a few moist crumbs when inserted in the center. This ensures a fudgy, not dry, texture.
Parchment paper helps easy removal and prevents sticking. If you don’t have it, generously grease the pan with butter or cooking spray.
Replace all-purpose flour with a gluten-free flour blend. Ensure all other ingredients are gluten-free to maintain the recipe’s integrity.
Print
Fudgy Chocolate Chip Brownie Squares Recipe
- Total Time: 50 minutes
- Yield: 16 1x
Description
Chocolate lovers rejoice with these irresistible Chocolate Chip Brownie Squares that blend rich cocoa depth and sweet chip surprises. Perfectly balanced between fudgy intensity and classic brownie texture, you’ll savor each indulgent bite of this delectable dessert treasure.
Ingredients
Main Ingredients:
- 1/2 cup (118 ml) unsalted butter, melted
- 2 large eggs
- 1/2 cup (50 g) unsweetened cocoa powder
- 3/4 cup (94 g) all-purpose flour
- 1 cup (200 g) granulated sugar
- 1/3 cup (67 g) brown sugar
Chocolate Ingredients:
- 1/2 cup (85 g) chocolate chips (for the batter)
- 1/2 cup (85 g) milk chocolate chips (for topping)
Additional Ingredients:
- 1 teaspoon vanilla extract
- 1/4 teaspoon salt
- 1/4 teaspoon baking powder
Instructions
- Warm the oven to 175C (350F), creating an ideal baking environment for rich, fudgy brownies.
- Prepare an 8×8-inch baking pan by generously greasing the surface and lining with parchment paper, ensuring easy brownie removal.
- In a spacious mixing bowl, thoroughly combine melted butter with granulated and brown sugars until the mixture appears silky and uniform.
- Introduce eggs and vanilla extract, whisking vigorously until the ingredients integrate completely and develop a smooth consistency.
- Sift cocoa powder, flour, salt, and baking powder directly into the wet mixture, creating a velvety chocolate base.
- Fold the dry ingredients gently into the wet mixture, maintaining a light touch to prevent overmixing and preserve the brownies’ delicate texture.
- Distribute chocolate chips evenly throughout the batter, ensuring each bite will contain delightful chocolate pockets.
- Transfer the batter into the prepared pan, spreading it uniformly to guarantee consistent baking.
- Bake for 25-30 minutes, watching for a toothpick that emerges with minimal moist crumbs, indicating perfect fudgy consistency.
- Allow brownies to rest in the pan for 10 minutes, then transition to a wire rack for complete cooling.
- Melt milk chocolate chips and create an indulgent topping layer across the cooled brownies’ surface.
- Enhance visual appeal by sprinkling additional chocolate chips over the melted chocolate layer.
- Permit the chocolate topping to solidify completely before slicing into delectable squares.
- Present these luxurious chocolate treats and savor the rich, decadent flavors.
Notes
- Achieve extra fudgy texture by slightly underbaking the brownies, ensuring a toothpick has moist crumbs when tested.
- Customize the recipe for gluten-free diets by substituting all-purpose flour with almond or gluten-free flour blend.
- Enhance chocolate intensity by using dark cocoa powder or adding a splash of espresso for deeper, richer flavor.
- Store brownies in an airtight container at room temperature for up to 4 days, or refrigerate for extended freshness.
- Prep Time: 20 minutes
- Cook Time: 30 minutes
- Category: Desserts, Snacks
- Method: Baking
- Cuisine: American
Nutrition
- Serving Size: 16
- Calories: 180 kcal
- Sugar: 17 g
- Sodium: 50 mg
- Fat: 9 g
- Saturated Fat: 5 g
- Unsaturated Fat: 3 g
- Trans Fat: 0.1 g
- Carbohydrates: 25 g
- Fiber: 2 g
- Protein: 2 g
- Cholesterol: 30 mg
Nathaniel Brooks
Founder & Recipe Developer
Expertise
Farm-to-table cuisine, Seasonal recipe development, Culinary storytelling
Education
Ivy Tech Community College – Indianapolis, IN
Culinary Arts / Hospitality Administration & Events
Focused on hands-on training in classical and modern culinary techniques.
Nathaniel’s story starts in the foothills of the Appalachian Mountains, where farm stands, backyard gardens, and old family recipes shaped his love for real food. After graduating from Ivy Tech Community College in Indianapolis, he spent years working in farm-to-table kitchens, learning how to turn local, seasonal ingredients into something memorable.
Today, Nathaniel pours that same spirit into every single recipe on Aspiring Culinarian – recipes that feel real, comforting, and connected to the land. When he’s not in the kitchen, you’ll find him foraging wild herbs, chasing sunsets with his camera, or writing about the flavors that shaped his roots.