
Spooky & Irresistible Halloween Pizza Skulls Recipe
Crafting spooky Halloween pizza skulls brings a wickedly delicious twist to your party spread.
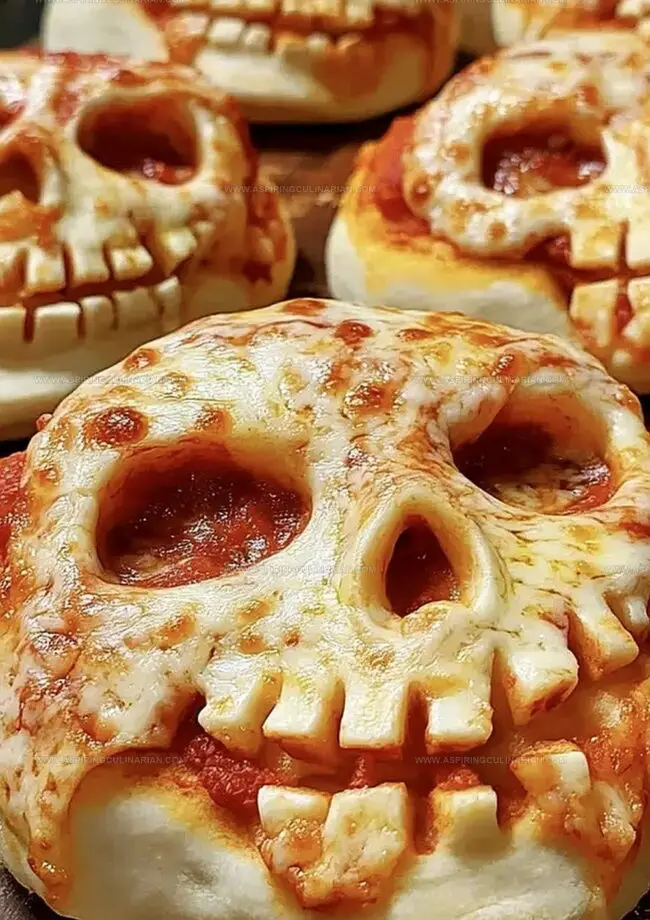
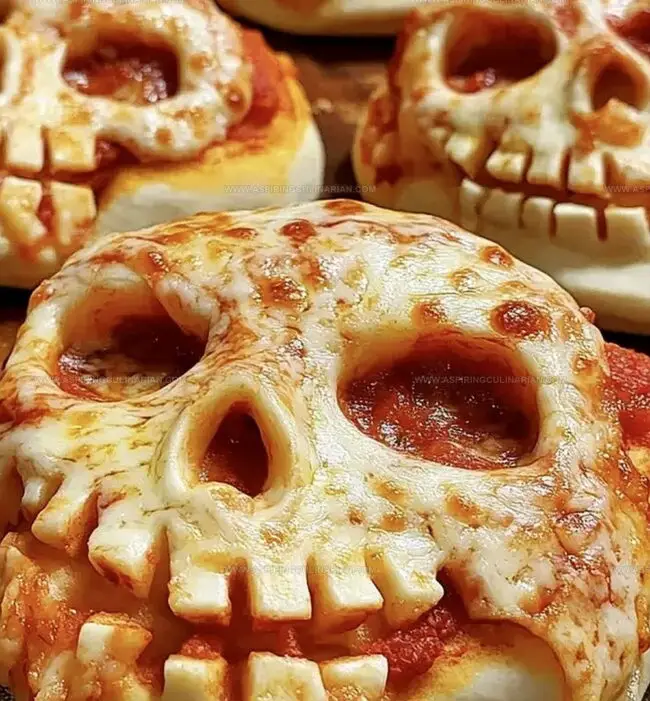
Eerie and edible, these creepy creations will make guests do a double-take.
Cheese melts into ghoulish patterns across crispy dough shaped like haunting craniums.
Ghosts and goblins have nothing on these wickedly good pizza treats.
Kitchen counters transform into a monster-making station with simple ingredients and playful creativity.
Each skull becomes a canvas for culinary horror that delights both young and old.
You’ll want to slice into these scary-good pizzas and see what delectable surprises await.
Halloween Pizza Skulls Unique Features to Celebrate
Everything Needed for Halloween Pizza Skulls
Main Ingredients:Meat Ingredients:Sauce and Seasoning Ingredients:Baking Instructions for Festive Pizza Skulls
Step 1: Prepare the Oven
Crank up your oven to a toasty 375°F (190°C).
Grab a skull-shaped cake pan and give it a quick spritz of non-stick cooking spray to prevent any ghostly sticking.
Step 2: Shape the Dough
Stretch out your pizza dough into a wide rectangle.
Slice the dough into six equal strips that will drape perfectly over each skull-shaped mold, creating a complete creepy cover.
Step 3: Layer Delicious Fillings
Time to build your spooky flavor fortress!
Load up each skull mold with these ghostly ingredients:Step 4: Seal the Scary Treats
Carefully fold any extra dough over the filling, pressing down firmly to create a tight seal.
Make sure no tasty bits can escape!
Step 5: Bake to Perfection
Slide the pan into the preheated oven and bake for 18-20 minutes.
Watch for a golden, crispy crust that screams Halloween deliciousness.
Step 6: Serve and Devour
Let the skull pizza bites cool just enough to handle.
Plate them up with a side of marinara sauce for dipping, and get ready to scare up some serious flavor!
Useful Tips for Pizza Skulls Success
Fun Variations for Halloween Pizza Skull Fillings
Serving Ideas for Pizza Skulls on Halloween
Best Ways to Store Leftover Pizza Skulls
FAQs
You’ll need a skull-shaped cake pan, which is essential for creating the unique skull design. A rolling pin helps spread the pizza dough evenly, and basic kitchen tools like a baking sheet and measuring cups will be helpful.
Absolutely! Replace the pepperoni and Italian sausage with vegetarian alternatives like chopped bell peppers, mushrooms, spinach, or plant-based meat substitutes. The cheese and sauce remain the same.
Lightly spray the skull-shaped cake pan with non-stick cooking spray before placing the dough. This ensures easy removal and helps maintain the skull shape when baking.
Print
Halloween Pizza Skulls Recipe
- Total Time: 40 minutes
- Yield: 8 1x
Description
Spine-chilling Halloween Pizza Skulls bring macabre culinary creativity to your spooky party spread. Ghoulish ingredients merge into a frightfully delicious appetizer that will delight horror-loving guests and make your Halloween celebration memorably delectable.
Ingredients
Main Ingredients:
- 1 (13.8 ounces / 391 grams) can refrigerated pizza dough
- 1 1/2 cups shredded mozzarella cheese
- 24 slices pepperoni, chopped
Protein Addition:
- 1/4 cup cooked and crumbled Italian sausage
Sauce and Seasoning:
- 6 tablespoons pizza sauce
Instructions
- Prepare the oven by heating to 375°F (190°C) and lightly coat the skull-shaped cake pan with non-stick cooking spray.
- Roll out the pizza dough into a thin 15×10-inch rectangle, then carefully divide into 6 equal strips, draping each strip completely over the skull-shaped molds to ensure full coverage.
- Create layered fillings inside each mold by first spreading a base of shredded mozzarella, then adding a layer of pizza sauce, followed by scattered chopped pepperoni and crumbled Italian sausage.
- Top the fillings with an additional layer of mozzarella cheese, ensuring complete coverage of the ingredients.
- Carefully fold any overhanging dough edges inward, pressing firmly to create a tight seal and prevent filling from leaking during baking.
- Place the prepared skull molds in the preheated oven and bake for 18-20 minutes, monitoring until the crust turns a rich golden brown and appears crisp and fully cooked.
- Remove from the oven and let the pizza skulls rest for a few minutes to cool slightly, which helps them maintain structural integrity when removing from the molds.
- Gently release the skulls from the cake pan and serve warm, accompanied by marinara sauce for an additional dipping option.
Notes
- Customize the filling by swapping meats with vegetarian alternatives like roasted vegetables or plant-based protein for dietary restrictions.
- Use gluten-free pizza dough to make the recipe suitable for those with wheat sensitivities.
- Prep molds ahead of time and refrigerate assembled skulls for a make-ahead Halloween party appetizer that saves last-minute cooking stress.
- Try different cheese combinations like adding sharp cheddar or blue cheese for extra flavor complexity and unique taste profiles.
- Prep Time: 20 minutes
- Cook Time: 20 minutes
- Category: Dinner, Appetizer, Snacks
- Method: Baking
- Cuisine: American
Nutrition
- Serving Size: 8
- Calories: 260
- Sugar: 2 g
- Sodium: 520 mg
- Fat: 12 g
- Saturated Fat: 5 g
- Unsaturated Fat: 6 g
- Trans Fat: 0.1 g
- Carbohydrates: 25 g
- Fiber: 1 g
- Protein: 14 g
- Cholesterol: 35 mg
Nathaniel Brooks
Founder & Recipe Developer
Expertise
Farm-to-table cuisine, Seasonal recipe development, Culinary storytelling
Education
Ivy Tech Community College – Indianapolis, IN
Culinary Arts / Hospitality Administration & Events
Focused on hands-on training in classical and modern culinary techniques.
Nathaniel’s story starts in the foothills of the Appalachian Mountains, where farm stands, backyard gardens, and old family recipes shaped his love for real food. After graduating from Ivy Tech Community College in Indianapolis, he spent years working in farm-to-table kitchens, learning how to turn local, seasonal ingredients into something memorable.
Today, Nathaniel pours that same spirit into every single recipe on Aspiring Culinarian – recipes that feel real, comforting, and connected to the land. When he’s not in the kitchen, you’ll find him foraging wild herbs, chasing sunsets with his camera, or writing about the flavors that shaped his roots.