Ooey-Gooey Ham Swiss Sliders Recipe: Party-Ready in a Flash
Sliding into comfort food territory, these irresistible ham Swiss sliders pack a flavorful punch that will steal the show at any gathering.
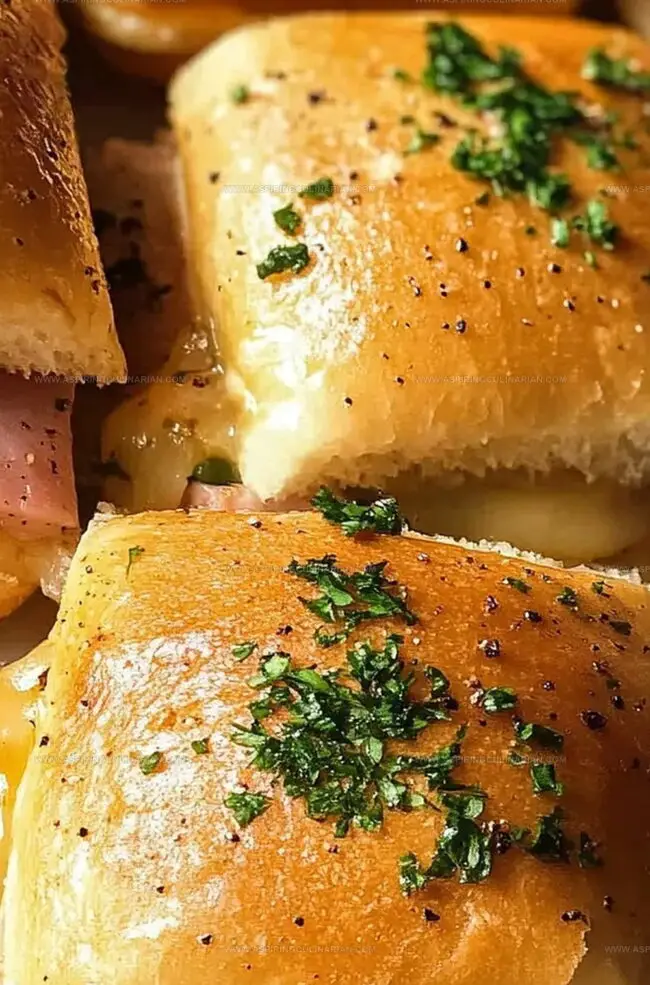
Melted Swiss cheese and savory ham nestled between soft, buttery rolls create a mouthwatering combination.
The simple yet elegant recipe transforms basic ingredients into a crowd-pleasing appetizer or quick meal.
Each slider delivers a perfect balance of salty ham and creamy cheese that melts beautifully.
The magic happens when these sliders emerge from the oven, golden and bubbling with irresistible aroma.
You won’t be able to resist the warm, gooey center and crispy, buttered tops.
Prepare to be the hero of your next potluck or game day spread with these delectable little sandwiches.
Ham and Swiss Sliders: Crowd Pleasers
Ingredient Lineup for Ham and Swiss Sliders
Main Ingredients:Sauce and Spread:Seasoning and Extras:Slider Assembly and Baking Instructions
Step 1: Warm Up the Oven
Bring your oven to a toasty 375 degrees Fahrenheit, getting ready for some slider magic.
Step 2: Skillfully Slice Rolls
Grab a large serrated knife and slice the entire tray of rolls horizontally, keeping them connected as one beautiful sheet.
Step 3: Create a Delicious Foundation
Nestle the bottom layer of rolls into a lightly greased 9×13 baking dish, preparing for flavor layering.
Step 4: Spread Garlic Mayo Goodness
Mix garlic and mayonnaise in a small bowl, then generously spread this zesty mixture across the roll bottoms.
Step 5: Build Flavor Layers
Arrange ham slices evenly over the mayo-coated rolls, then top with:Step 6: Drizzle Honey Butter Topping
Whisk together honey and butter in a small bowl, then lovingly brush the mixture over the roll tops.
Step 7: First Baking Stage
Cover the sliders with aluminum foil and bake for 15-20 minutes, letting the flavors meld and warmth build.
Step 8: Final Golden Transformation
Remove the foil and return to the oven for 5-10 minutes until the tops turn a gorgeous golden brown and cheese melts perfectly.
Step 9: Serve and Enjoy
Slice the connected sliders and serve immediately while warm and irresistible.
Slider Tips for Melty, Gooey Goodness
Slider Variations for Every Taste
Serving Ham and Swiss Sliders Warm
Storage for Slider Leftovers
FAQs
Yes, you can use various ham types like honey ham, black forest ham, or deli-style ham depending on your preference and flavor profile.
You can substitute Swiss cheese with provolone, mild cheddar, or Monterey Jack cheese for similar melting properties and taste.
Prepare the sliders completely, cover tightly with plastic wrap, and refrigerate for up to 24 hours before baking. Just add a few extra minutes to the baking time when cooking from cold.
Absolutely! These ham and Swiss sliders are perfect for gatherings, game days, and casual events because they’re easy to make, serve, and everyone loves them.
Print
Ham Swiss Sliders Recipe
- Total Time: 45 minutes
- Yield: 12 1x
Description
Savory ham swiss sliders bring mouthwatering comfort to casual gatherings with minimal prep time. Quick and irresistible party bites guarantee smiles and second helpings from hungry guests.
Ingredients
Main Ingredients:
- 1 package Kings Hawaiian Original Sweet Rolls
- 16 pieces deli ham
- 6 large slices swiss cheese
Sauce and Spread:
- 1/4 cup (59 ml) mayonnaise
- 1 garlic clove, minced
- 2 tablespoons (28 grams) butter, softened
- 1/2 teaspoon honey
- 1/2 teaspoon worcestershire sauce
- 1/4 teaspoon yellow mustard
- 1 tablespoon parsley, chopped fine
Seasonings:
- 1/8 teaspoon garlic powder
- 1/8 teaspoon onion powder
- 1/8 teaspoon paprika
Instructions
- Preheat oven to 375°F, ensuring optimal temperature for golden, crispy sliders.
- Using a large serrated knife, slice entire roll tray horizontally without separating individual rolls.
- Arrange bottom roll layer in a lightly greased 9×13 baking pan, creating a uniform base.
- Whisk garlic mayo in a small bowl, then spread smoothly across entire roll surface.
- Distribute ham slices evenly across mayo-covered rolls, creating a consistent meat layer.
- Place Swiss cheese slices directly on top of ham, covering entire surface.
- Carefully position top roll layer over cheese, creating a complete slider assembly.
- Mix honey butter ingredients in a separate bowl until well combined.
- Generously brush honey butter mixture across roll tops, ensuring even coverage.
- Cover pan tightly with aluminum foil to trap moisture and heat.
- Bake covered for 15-20 minutes, allowing flavors to meld and cheese to partially melt.
- Remove foil and return to oven for additional 5-10 minutes until tops turn golden brown and cheese fully melts.
- Remove from oven, let rest briefly, then slice into individual sliders.
- Serve immediately while warm and cheese remains gooey.
Notes
- Customize Mayo Experiment with different herbs or spices in the garlic mayo for a personalized flavor boost.
- Swap Proteins Replace ham with turkey, chicken, or plant-based alternatives to suit dietary preferences or restrictions.
- Make Ahead Prepare sliders up to a day in advance, refrigerate, and bake just before serving for convenient entertaining.
- Gluten-Free Option Use gluten-free rolls and verify all ingredients are gluten-free for those with wheat sensitivities.
- Prep Time: 15 minutes
- Cook Time: 30 minutes
- Category: Lunch, Appetizer, Snacks
- Method: Baking
- Cuisine: American
Nutrition
- Serving Size: 12
- Calories: 250
- Sugar: 2 g
- Sodium: 650 mg
- Fat: 12 g
- Saturated Fat: 6 g
- Unsaturated Fat: 4 g
- Trans Fat: 0 g
- Carbohydrates: 28 g
- Fiber: 1 g
- Protein: 9 g
- Cholesterol: 30 mg





Lena Martinez
Contributing Writer & Culinary Educator
Expertise
Southwestern and Latin American cuisines, Vegetarian and plant-based recipe development, Culinary education and community outreach
Education
Santa Fe Community College, Santa Fe, NM
Certificate in Culinary Arts
Emphasized Southwestern cuisine and sustainable cooking practices
Lena grew up surrounded by the colors, spices, and traditions of the Southwest – flavors that sparked her love for bold, honest cooking. After earning her Culinary Arts certificate at Santa Fe Community College, she made it her mission to teach home cooks how to create flavorful, plant-powered meals without the fuss.
Her recipes are packed with vibrant ingredients, simple steps, and the kind of heart that turns a regular meal into something you’ll want to share. Outside the kitchen, Lena spends her time wandering farmers’ markets, trading family recipes, and helping young chefs find their voice through food.