Homemade Hot Pockets Recipe: Cozy Comfort Food Magic
Crafting delectable homemade hot pockets can turn an ordinary meal into a flavor-packed adventure.
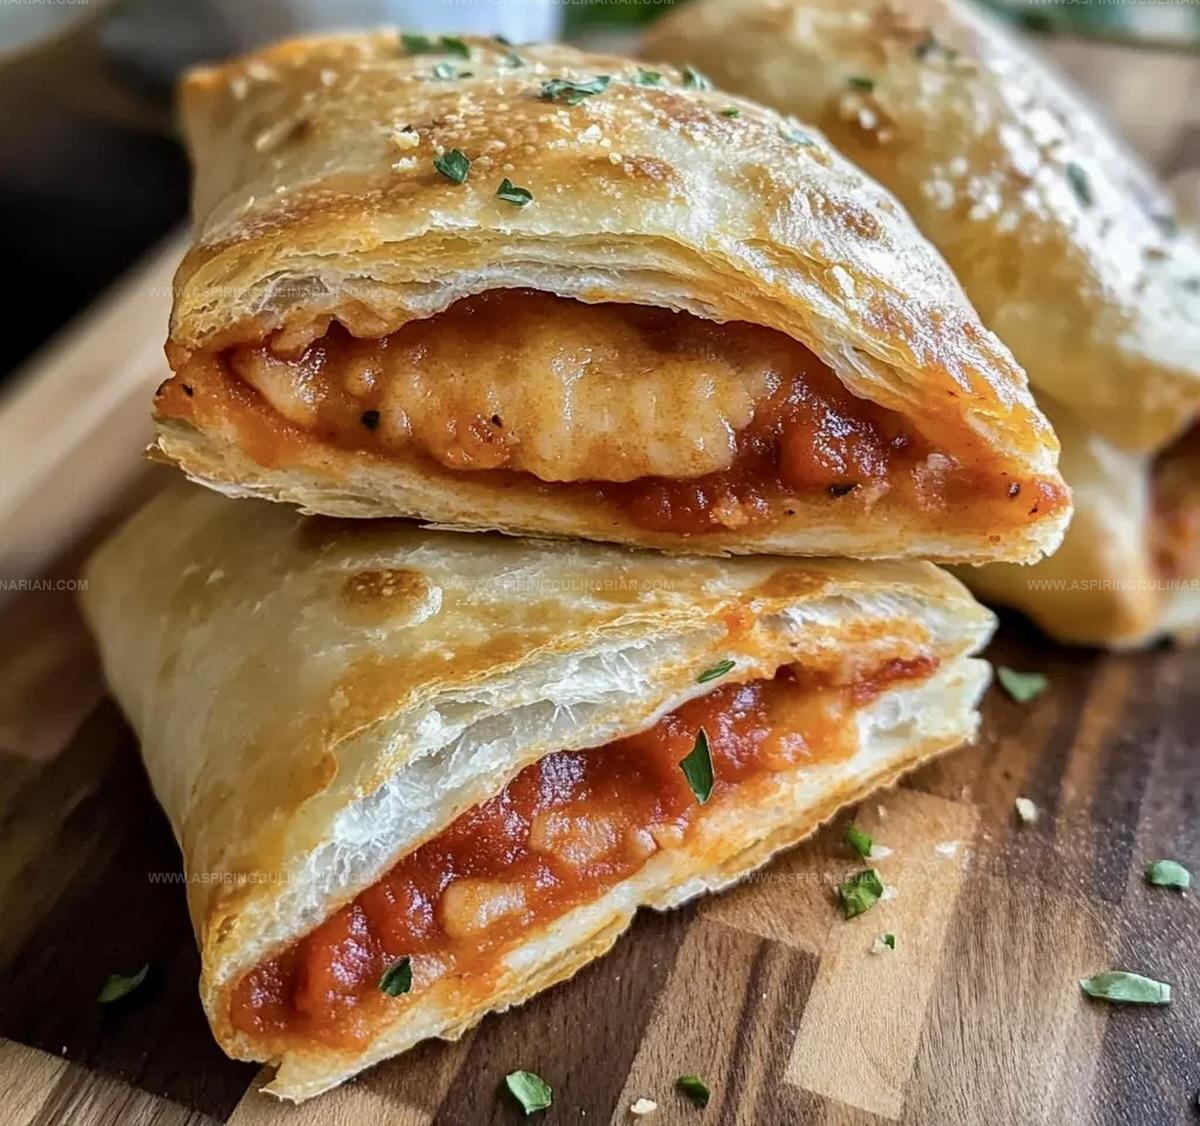
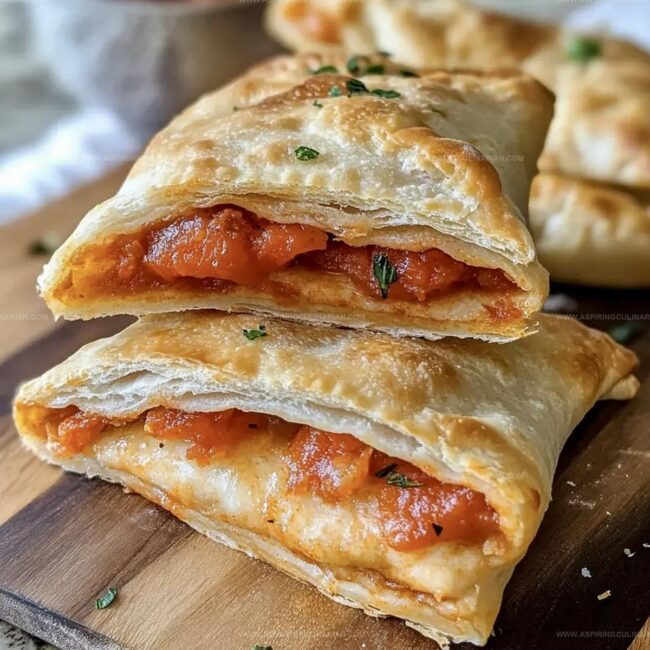
Crispy golden pastry wraps around savory fillings, creating a handheld delight that beats store-bought versions.
Cheese, meats, and vegetables combine in endless combinations for personalized comfort food.
Warm, gooey centers nestled within flaky crusts make these pockets irresistible to everyone at the table.
Simple ingredients and basic kitchen skills mean you can whip up these treats quickly.
Each bite promises a burst of satisfaction that commercial versions simply cannot match.
Let’s unlock the secrets to making these irresistible parcels that will have everyone asking for seconds.
Storing Homemade Hot Pockets
FAQs
Active dry yeast or instant yeast are perfect. Both will help create a soft, fluffy dough that rises beautifully.
Yes, you can prepare the dough up to 24 hours in advance. Store it in the refrigerator in a covered container after the first rise.
Seal the edges tightly by pressing with a fork or pinching the dough closed. Make sure there are no gaps where filling can escape during baking.
Absolutely! After assembling, you can freeze uncooked hot pockets. Place them on a baking sheet, freeze until solid, then transfer to a freezer bag for storage up to 3 months.
Homemade Hot Pockets That Beat Store-Bought Snacks
Ingredient List for Homemade Hot Pocket Creations
Dough Ingredients:Filling Ingredients:Preparation Ingredients:Homemade Hot Pocket Instructions for Savory Success
Step 1: Activate Yeast Magic
Wake up the yeast by mixing warm water with sugar in a cozy bowl.
Watch the mixture transform and become bubbly after 5 minutes of peaceful resting.
Step 2: Create Dough Foundation
Drizzle olive oil into the yeast mixture and sprinkle in flour and salt.
Stir until a soft, clingy dough emerges, ready for its culinary adventure.
Step 3: Massage Dough to Perfection
Transfer the dough onto a flour-dusted surface.
Knead with loving hands, working in extra flour if the dough feels too sticky.
Continue until the dough becomes smooth and elastic.
Step 4: Let Dough Rise and Dream
Nestle the dough into a greased bowl, cover with a soft towel, and let it relax and expand for about 30 minutes.
Watch it double in size with magical transformation.
Step 5: Fire Up the Oven
Crank the oven to a toasty 450°F.
Line a baking sheet with parchment paper, creating a welcoming stage for your pizza pockets.
Step 6: Shape Dough Rounds
Divide the dough into equal portions.
Roll each piece into a perfect circle, approximately the size of your palm.
Step 7: Layer Flavor Treasures
Spread a generous spoonful of zesty pizza sauce across each dough circle.
Top with delicious ingredients:Step 8: Create Sealed Flavor Packets
Fold each dough circle in half, embracing the fillings.
Pinch edges firmly to create a tight seal, trapping all the delicious goodness inside.
Step 9: Bake to Golden Perfection
Arrange the stuffed pockets on the prepared baking sheet.
Slide into the preheated oven and bake for 10-15 minutes until they turn a gorgeous golden brown.
Step 10: Savor and Enjoy
Allow the pizza pockets to cool slightly.
Serve warm for an immediate flavor explosion or save for a convenient meal later.
Handy Tips for Perfect Homemade Hot Pockets
Homemade Hot Pocket Flavor Combos to Explore
Serving Homemade Hot Pockets Ideally
Print
Homemade Hot Pockets Recipe
- Total Time: 1 hour
- Yield: 4 1x
Description
Delicious homemade hot pockets blend comfort and creativity in a handheld meal perfect for busy families. Crispy golden pastry wraps around savory fillings, offering a satisfying twist on classic convenience food you’ll crave again and again.
Ingredients
Dough Ingredients:
- 2 1/4 cups all-purpose flour
- 1 cup warm water
- 1 tablespoon (15 ml) active dry yeast
- 1 tablespoon (15 ml) granulated sugar
- 1 tablespoon (15 ml) olive oil
- 1 teaspoon (5 ml) salt
Filling Ingredients:
- 1 cup shredded mozzarella cheese
- 1 cup shredded cheddar cheese
- 1/2 cup quartered pepperoni (or diced ham)
- 3/4 cup pizza sauce
Optional Finishing Ingredients:
- Extra flour for dusting
Instructions
- Activate the yeast by whisking warm water, sugar, and yeast together in a mixing bowl. Allow the mixture to bloom for 5 minutes until foamy and fragrant.
- Incorporate olive oil, flour, and salt into the yeast mixture, stirring until a cohesive, slightly tacky dough emerges.
- Transfer the dough to a lightly floured surface and knead vigorously for 5-7 minutes, gradually adding extra flour if the dough remains too sticky.
- Place the kneaded dough in a lightly greased bowl, cover with a clean kitchen towel, and let it rise in a warm location for approximately 30 minutes until it doubles in volume.
- Heat the oven to 450°F and prepare a baking sheet with parchment paper for even cooking and easy cleanup.
- Divide the risen dough into equal portions, then roll each section into a circular shape approximately hand-sized.
- Spread pizza sauce across each dough circle, leaving a small border around the edges for sealing. Distribute pepperoni, mozzarella, and cheddar cheese evenly.
- Carefully fold the dough over the fillings, creating a half-moon shape. Firmly crimp and press the edges to create a tight seal, preventing filling from leaking during baking.
- Arrange the assembled pockets on the prepared baking sheet, ensuring they are not touching. Bake for 12-15 minutes until the exterior turns golden brown and crispy.
- Remove from the oven and allow the hot pockets to rest for 3-5 minutes. Serve immediately or store for convenient meal preparation.
Notes
- Customize fillings by swapping pepperoni with ham, chicken, or vegetarian alternatives like roasted vegetables for diverse flavor profiles.
- Ensure yeast activation by using water at precise 110°F temperature, which helps dough rise perfectly without killing active yeast.
- Brush pocket edges with egg wash before baking to create golden, shiny exterior and help seal filling inside securely.
- Make freezer-friendly versions by cooling completely, wrapping individually in plastic wrap, and storing in freezer bags for convenient grab-and-go meals.
- Prep Time: 45 minutes
- Cook Time: 15 minutes
- Category: Lunch, Snacks
- Method: Baking
- Cuisine: American
Nutrition
- Serving Size: 4
- Calories: 370 kcal
- Sugar: 3 g
- Sodium: 550 mg
- Fat: 16 g
- Saturated Fat: 7 g
- Unsaturated Fat: 8 g
- Trans Fat: 0.2 g
- Carbohydrates: 38 g
- Fiber: 2 g
- Protein: 18 g
- Cholesterol: 45 mg
Nathaniel Brooks
Founder & Recipe Developer
Expertise
Farm-to-table cuisine, Seasonal recipe development, Culinary storytelling
Education
Ivy Tech Community College – Indianapolis, IN
Culinary Arts / Hospitality Administration & Events
Focused on hands-on training in classical and modern culinary techniques.
Nathaniel’s story starts in the foothills of the Appalachian Mountains, where farm stands, backyard gardens, and old family recipes shaped his love for real food. After graduating from Ivy Tech Community College in Indianapolis, he spent years working in farm-to-table kitchens, learning how to turn local, seasonal ingredients into something memorable.
Today, Nathaniel pours that same spirit into every single recipe on Aspiring Culinarian – recipes that feel real, comforting, and connected to the land. When he’s not in the kitchen, you’ll find him foraging wild herbs, chasing sunsets with his camera, or writing about the flavors that shaped his roots.