Dreamy Japanese Cheese Tarts Recipe: Melt-in-Your-Mouth Magic
Cheese tarts have become a delightful craze in Japanese culinary circles, sparking excitement among dessert enthusiasts everywhere.
Sweet and savory aromas waft through bakeries, capturing attention instantly.
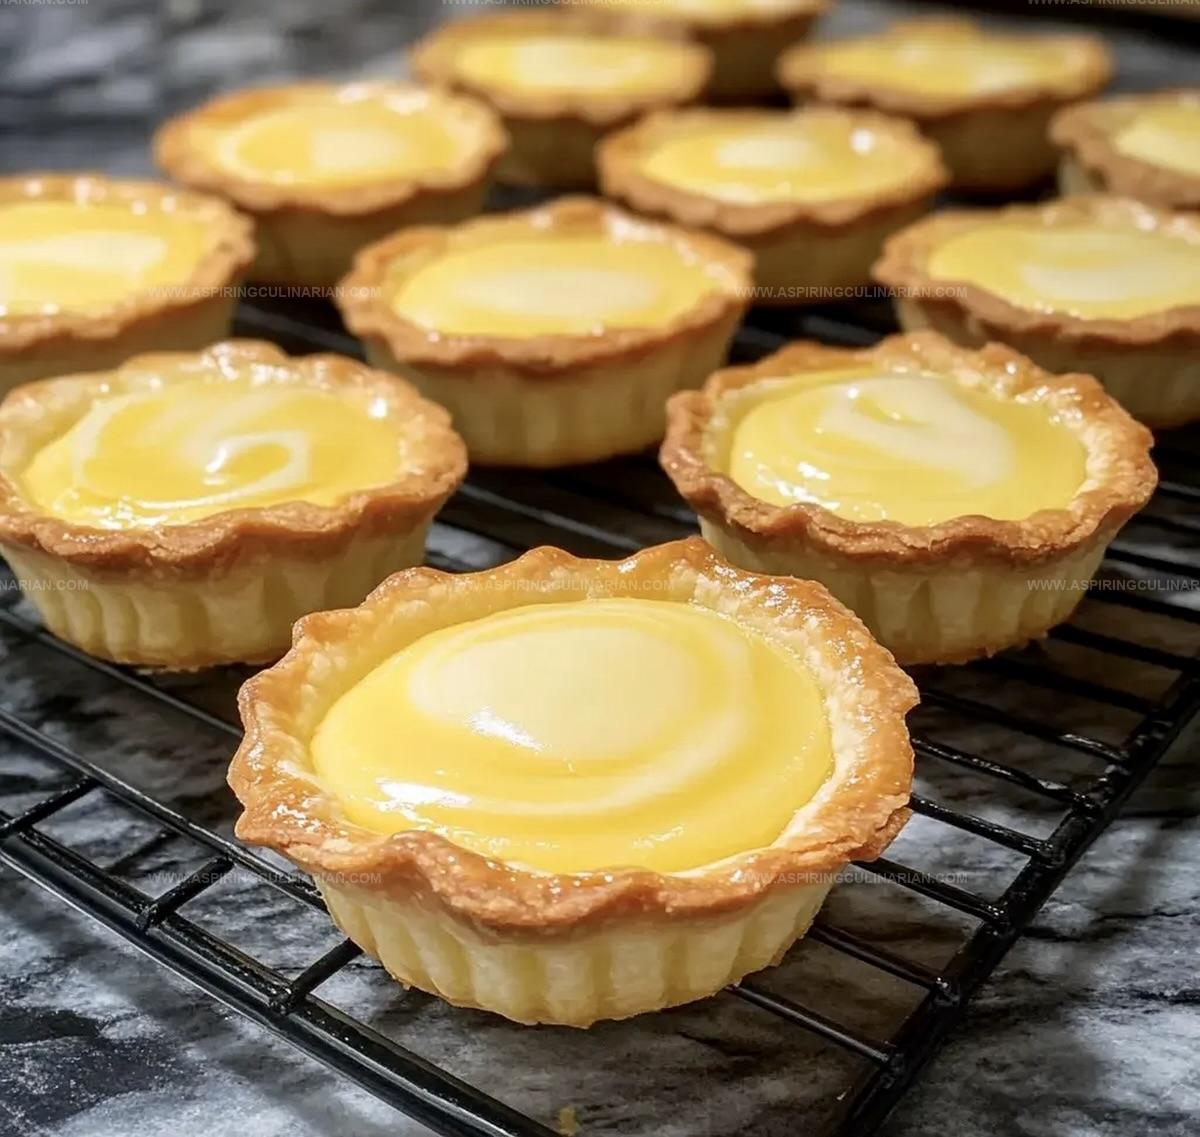
Crisp pastry shells cradle a silky, molten center that melts beautifully on your tongue.
Creamy textures blend perfectly with delicate flavor notes that dance across taste buds.
Subtle hints of richness emerge from each carefully crafted bite.
Home bakers can recreate this magical experience with simple ingredients and minimal technique.
You’ll want to master these incredible tarts and impress everyone at your next gathering.
Irresistible Japanese Cheese Tarts: Light, Creamy, Golden
Must-Have Ingredients for Japanese Cheese Tart Filling
Base Ingredients:Dairy Components:Finishing Ingredients:Japanese Cheese Tart Baking Instructions, Step by Step
Step 1: Create Buttery Pastry Dough
Blend flour, powdered sugar, and chilled butter in a mixing bowl until the mixture looks like coarse breadcrumbs.
Gently fold in egg yolk and knead until a smooth, cohesive dough forms.
The key is to handle the dough minimally to keep it tender.
Step 2: Shape Delicate Tart Shells
Carefully press the dough into small tart molds, ensuring an even thickness.
Trim any excess edges for a clean look.
Use a fork to lightly prick the bottom of each shell, which helps prevent bubbling during baking.
Step 3: Pre-Bake Pastry Shells
Heat the oven to 410°F (210°C).
Place the prepared shells in the oven and bake until they turn a beautiful golden brown color.
Once done, remove and let them cool completely inside the molds.
Step 4: Whip Up Creamy Cheese Filling
Allow cream cheese to soften at room temperature.
Using an electric mixer, whip the cream cheese with powdered sugar until the mixture becomes silky smooth and free of lumps.
Step 5: Create Luxurious Filling Texture
Gradually incorporate heavy whipping cream into the cream cheese mixture:Mix thoroughly after each addition to ensure a velvety consistency.
Sprinkle in cornstarch and blend until fully integrated.
Step 6: Assemble Magnificent Tarts
Transfer the cheese filling into a piping bag.
Carefully pipe the filling into the cooled tart shells, creating elegant peaks.
Place the assembled tarts in the freezer for 4 hours to set firmly.
Step 7: Final Baking Magic
Preheat the oven to 410°F (210°C).
Prepare an egg wash by mixing egg yolk with a splash of milk or water.
Gently brush the frozen tarts with the egg wash, giving them a beautiful golden sheen.
Bake for approximately 15 minutes.
Step 8: Enjoy Delectable Tarts
Serve these heavenly cheese tarts warm, chilled, or straight from the freezer.
Each temperature offers a unique and delightful texture that will tantalize your taste buds.
Cheese Tart Tricks for a Delicate, Silky Texture
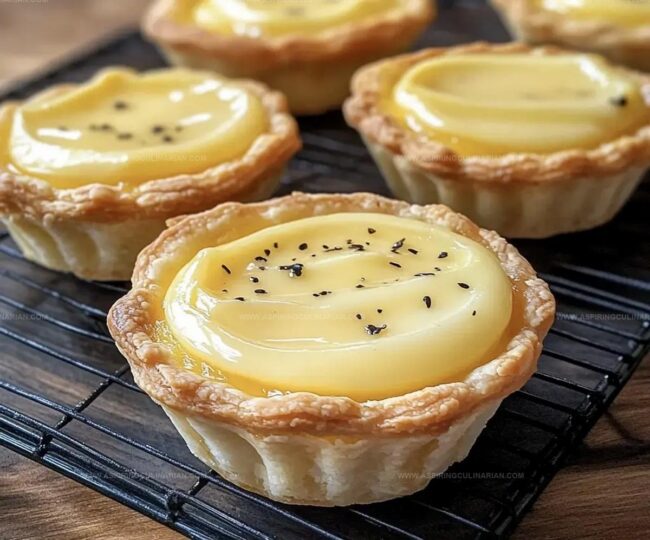
Topping and Filling Variations for Cheese Tart Fans
Serving Japanese Cheese Tarts for Dessert or Tea Time
Flavor Fusion Plate: Pair these delicate cheese tarts with a light Japanese green tea to enhance the creamy richness and balance the sweetness.
Weekend Brunch Companion: Serve alongside fresh berries or a small scoop of vanilla bean ice cream for a delightful morning or afternoon treat.
Elegant Presentation Trick: Dust the top with a delicate sprinkle of powdered sugar or garnish with edible flowers to create a stunning visual appeal that elevates the dessert’s sophistication.
Temperature Adventure: Experiment with serving temperatures – warm for a gooey center, chilled for a firmer texture, or slightly frozen for a unique ice cream-like experience that surprises the palate.
Keeping Japanese Cheese Tarts Fresh After Baking
FAQs
The combination of flour, powdered sugar, and butter creates a delicate, crumbly texture that holds its shape beautifully. The egg yolk helps bind the ingredients and provides a rich, tender finish to the shell.
Absolutely! You can prepare the tart shells and filling in advance. The assembled tarts can be frozen for up to a week before baking, making them perfect for advance preparation and unexpected guests.
Freezing helps the tarts maintain their shape and creates a beautiful golden-brown exterior. It also ensures the filling stays creamy and doesn’t overflow during baking, giving you that perfect, professional-looking result.
Print
Irresistible Japanese Cheese Tarts Recipe
- Total Time: 1 hour
- Yield: 8 1x
Description
Delightful Japanese Cheese Tarts bring a creamy, melt-in-your-mouth experience straight from Tokyo’s culinary scene. Sweet and tangy flavors dance across your palate, promising a delectable journey through Japanese pastry craftsmanship you won’t soon forget.
Ingredients
Tart Shell Ingredients:
- 1 1/2 cups (192 grams) all-purpose flour
- 8 1/2 tablespoons (120 grams) unsalted butter, cubed
- 1/2 cup (60 grams) powdered sugar
- 1 egg yolk
Filling Ingredients:
- 1 cup (226 grams) cream cheese
- 2/3 cup (160 milliliters) heavy whipping cream
- 1/2 cup (60 grams) powdered sugar
- 1 teaspoon cornstarch
Egg Wash:
- 1 egg yolk
- 1/2 tablespoon (7.5 milliliters) milk or water
Instructions
- Transform flour, powdered sugar, and butter into a crumbly texture using gentle fingertip mixing, ensuring no large butter chunks remain. Incorporate egg yolk and knead until a uniform, smooth dough emerges.
- Delicately press the prepared dough into precise 2.6-inch tart molds, meticulously trimming excess edges. Use a fork to create strategic perforations across the dough’s bottom surface.
- Heat oven to 410F. Position tart shells in the oven and bake for 15 minutes until achieving a uniform golden-brown coloration. Allow shells to completely cool before carefully extracting from molds.
- Extract cream cheese and permit it to reach room temperature naturally. Blend cream cheese with powdered sugar, whisking until achieving a silky, lump-free consistency.
- Introduce heavy whipping cream systematically in three separate additions, thoroughly integrating after each pour. Fold cornstarch gently into the mixture, ensuring complete and even distribution.
- Transfer cheese filling into a piping bag and carefully fill the cooled tart shells. Place assembled tarts in the freezer for 4 hours, allowing them to solidify completely.
- Preheat oven once more to 410F. Craft an egg wash by combining egg yolk with milk, then delicately brush over frozen tart surfaces. Bake for 15 minutes until exterior appears gloriously golden.
- Present tarts with versatility – enjoy warm for a molten experience, chilled for refreshing texture, or frozen for a unique sensory adventure.
Notes
- Chilling the dough before rolling helps prevent shrinkage and creates a more stable tart shell with crisp edges.
- Use room temperature ingredients to ensure smooth, lump-free filling and easier mixing.
- For a gluten-free version, substitute all-purpose flour with almond flour or a gluten-free blend to accommodate dietary restrictions.
- Consider adding a hint of vanilla extract or lemon zest to the cheese filling for an extra layer of flavor complexity.
- Prep Time: 30 minutes
- Cook Time: 30 minutes
- Category: Desserts, Snacks
- Method: Baking
- Cuisine: Japanese
Nutrition
- Serving Size: 8
- Calories: 174 kcal
- Sugar: 6 g
- Sodium: 56 mg
- Fat: 14 g
- Saturated Fat: 8 g
- Unsaturated Fat: 5 g
- Trans Fat: 0.2 g
- Carbohydrates: 10 g
- Fiber: 0.3 g
- Protein: 3 g
- Cholesterol: 67 mg
Nathaniel Brooks
Founder & Recipe Developer
Expertise
Farm-to-table cuisine, Seasonal recipe development, Culinary storytelling
Education
Ivy Tech Community College – Indianapolis, IN
Culinary Arts / Hospitality Administration & Events
Focused on hands-on training in classical and modern culinary techniques.
Nathaniel’s story starts in the foothills of the Appalachian Mountains, where farm stands, backyard gardens, and old family recipes shaped his love for real food. After graduating from Ivy Tech Community College in Indianapolis, he spent years working in farm-to-table kitchens, learning how to turn local, seasonal ingredients into something memorable.
Today, Nathaniel pours that same spirit into every single recipe on Aspiring Culinarian – recipes that feel real, comforting, and connected to the land. When he’s not in the kitchen, you’ll find him foraging wild herbs, chasing sunsets with his camera, or writing about the flavors that shaped his roots.