Dreamy Italian Cream Stuffed Cannoncini Recipe for Sweet Bliss
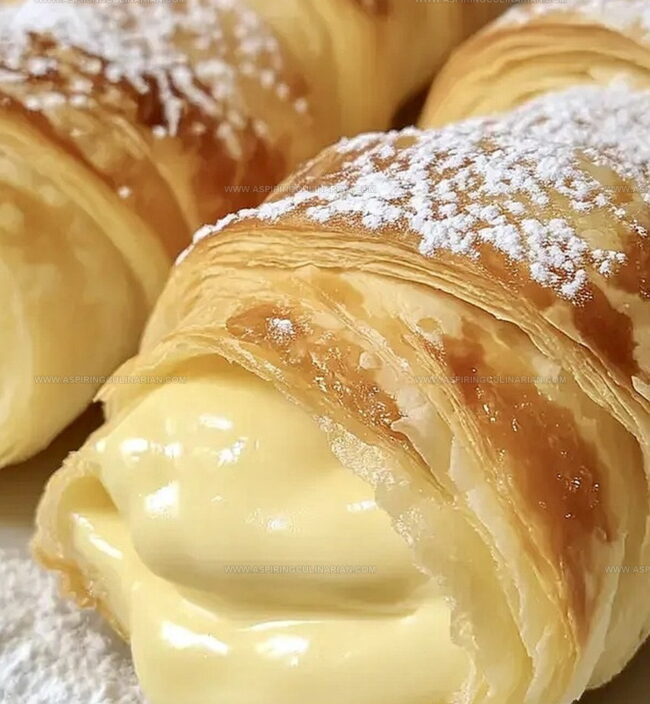
Delicate pastry shells cradle a luscious Italian cream filling that whispers pure indulgence.
Crisp golden exterior promises a delightful sensory journey through classic bakery magic.
Layers of buttery puff pastry curl around silky smooth cream, creating an irresistible contrast.
Traditional Italian techniques blend with modern culinary artistry in this elegant dessert.
Soft peaks of whipped cream and rich mascarpone dance within delicate pastry boundaries.
Each bite promises a moment of sweet, creamy bliss that transports you straight to a charming venetian bakery.
You’ll want to savor every delectable morsel of this heavenly treat.
Italian Cream Stuffed Cannoncini for Sweet Celebrations
Ingredients for Italian Cream Stuffed Cannoncini Success
Main Ingredients:
Pastry Base:Cream Filling:Binding and Finishing Ingredients:Baking and Filling Cannoncini: Stepwise Instructions
Step 1: Warm The Milk
Gently heat milk in a saucepan until it reaches a warm, comfortable temperature without boiling.
Step 2: Create Smooth Egg Base
In a mixing bowl, whisk together:Blend until the mixture becomes light and airy with a smooth texture.
Step 3: Merge Milk And Egg Mixture
Slowly stream warm milk into the egg mixture, stirring continuously to prevent lumps and create a silky consistency.
Step 4: Transform Into Creamy Custard
Transfer the combined mixture back to the saucepan and cook over medium heat.
Stir constantly until the custard thickens and coats the back of a spoon.
Step 5: Chill Custard Completely
Remove from heat, pour into a clean bowl, and cover.
Refrigerate for one hour to allow the custard to set and cool thoroughly.
Step 6: Prepare Oven
Preheat oven to 400°F (200°C), ensuring even temperature for perfect pastry baking.
Step 7: Shape Pastry Strips
Roll out puff pastry on a sugar-sprinkled surface into a rectangular shape.
Cut into 12 equal strips with precision.
Step 8: Wrap Pastry Horns
Carefully wrap each pastry strip around horn-shaped molds, slightly overlapping edges.
Position seam-side down on a parchment-lined baking sheet.
Step 9: Bake Golden Pastries
Brush pastry horns with egg wash, creating a beautiful golden sheen.
Bake for 15-20 minutes until perfectly crisp and golden brown.
Step 10: Cool Pastry Shells
Allow pastries to cool slightly before gently removing them from molds, preserving their delicate shape.
Step 11: Fill With Creamy Goodness
Use a piping bag to generously fill cooled pastry horns with the chilled custard cream.
Step 12: Final Elegant Touch
Dust the filled cannoncini with a light sprinkle of powdered sugar, creating a stunning presentation.
Creamy Cannoncini Tips for Italian Dessert Buffets
Cannoncini Filling and Topping Options to Explore
Arranging Italian Cream Cannoncini for Dessert Trays
Chilling Cannoncini for Perfect Texture and Storage
FAQs
Cannoncini are traditional Italian pastry horns originating from Northern Italy, specifically popular in regions like Piedmont and Lombardy.
Yes, you can prepare the custard cream 1-2 days in advance and store it covered in the refrigerator until ready to use.
You’ll need horn-shaped metal molds to create the classic cone shape, which can be purchased online or at specialty baking stores.
Lightly grease the metal horn molds with cooking spray or butter before wrapping the pastry strips to ensure easy removal after baking.
Print
Italian Cream Stuffed Cannoncini Recipe
- Total Time: 45 minutes
- Yield: 12 1x
Description
Delicate italian cream stuffed cannoncini whisper sweet promises of pastry perfection from Naples. Crisp golden shells cradle silky vanilla cream, inviting dessert enthusiasts to savor each heavenly bite with pure culinary passion.
Ingredients
Main Ingredients:
- 1 sheet puff pastry (defrosted, about 8 ounces / 225 grams)
- 8 ounces (235 milliliters) milk
- 3 egg yolks
- 1/2 cup (100 grams) sugar
Thickening and Flavoring Ingredients:
- 3 tablespoons (30 grams) all-purpose flour
- 1 teaspoon vanilla extract
Finishing Ingredients:
- 1/4 cup (50 grams) sugar (for rolling)
- 1 egg (for egg wash)
- Powdered sugar (for garnish)
Instructions
- Warm milk in a saucepan until it reaches a gentle simmer, avoiding boiling.
- Create a smooth custard base by whisking egg yolks with sugar, vanilla extract, and flour until the mixture turns pale and forms soft peaks.
- Slowly incorporate warm milk into the egg mixture, stirring continuously to prevent curdling and ensure a silky texture.
- Transfer the combined liquid back to the saucepan and cook over medium heat at 160°F, constantly stirring to prevent scorching and achieve a thick, pudding-like consistency.
- Remove custard from heat, pour into a clean bowl, and cover with plastic wrap directly touching the surface to prevent skin formation. Refrigerate for 60 minutes until thoroughly chilled.
- Preheat the oven to 400°F, ensuring the rack is positioned in the center for even baking.
- Dust work surface with granulated sugar and roll puff pastry into a rectangular shape approximately 9×12 inches. Slice into 12 equal strips using a sharp knife.
- Carefully wrap each pastry strip around a conical mold, ensuring a slight overlap and positioning seam-side down on a parchment-lined baking sheet.
- Brush pastry surfaces with egg wash for a golden, glossy finish. Bake for 15-20 minutes until they turn crisp and amber-colored.
- Allow pastry horns to cool slightly, then gently remove from metal molds to prevent breaking.
- Fill a piping bag with chilled custard cream and carefully pipe the filling into each delicate pastry horn.
- Elegantly dust the filled cannoncini with powdered sugar just before serving for a classic Italian dessert presentation.
Notes
- Check milk temperature carefully to prevent scorching or curdling the custard.
- Whisk egg mixture thoroughly to eliminate lumps and create smooth, silky texture.
- Use fine-quality vanilla extract for rich, authentic flavor enhancement.
- Stir custard constantly while cooking to prevent burning and ensure even thickening.
- Refrigerate custard for precise consistency and easier piping.
- Roll pastry on sugar-coated surface for extra caramelized exterior crunch.
- Keep pastry strips uniform for consistent baking and professional appearance.
- Seal pastry strips gently to prevent unraveling during baking.
- Use metal horn molds for crisp, even pastry shape.
- Allow pastries to cool completely before filling to maintain structural integrity.
- Pipe custard gently to avoid tearing delicate pastry shells.
- Select powdered sugar with fine granulation for elegant final presentation.
- Prep Time: 20 minutes
- Cook Time: 25 minutes
- Category: Desserts, Snacks
- Method: Baking
- Cuisine: Italian
Nutrition
- Serving Size: 12
- Calories: 230 kcal
- Sugar: 13 g
- Sodium: 75 mg
- Fat: 11 g
- Saturated Fat: 4 g
- Unsaturated Fat: 6 g
- Trans Fat: 0.1 g
- Carbohydrates: 27 g
- Fiber: 1 g
- Protein: 4 g
- Cholesterol: 75 mg




Nathaniel Brooks
Founder & Recipe Developer
Expertise
Farm-to-table cuisine, Seasonal recipe development, Culinary storytelling
Education
Ivy Tech Community College – Indianapolis, IN
Culinary Arts / Hospitality Administration & Events
Focused on hands-on training in classical and modern culinary techniques.
Nathaniel’s story starts in the foothills of the Appalachian Mountains, where farm stands, backyard gardens, and old family recipes shaped his love for real food. After graduating from Ivy Tech Community College in Indianapolis, he spent years working in farm-to-table kitchens, learning how to turn local, seasonal ingredients into something memorable.
Today, Nathaniel pours that same spirit into every single recipe on Aspiring Culinarian – recipes that feel real, comforting, and connected to the land. When he’s not in the kitchen, you’ll find him foraging wild herbs, chasing sunsets with his camera, or writing about the flavors that shaped his roots.