
The Best Jello Creamsicle Pie Recipe for Sweet Summer Bliss
Summers demand cool, refreshing desserts that sparkle with nostalgia and creamy jello creamsicle pie recipe magic.
Orange dreams swirl through each delightful slice, bringing back memories of childhood treats.
This classic dessert combines tangy citrus with smooth, silky textures that dance on your palate.
Creamy and light, the pie captures the essence of those beloved frozen popsicle moments.
Simple ingredients transform into a spectacular dessert that requires minimal effort.
Sweet orange notes blend perfectly with a smooth, cloud-like filling that melts in your mouth.
You’ll find this pie becomes an instant crowd-pleaser at any gathering.
Prepare to dive into a slice of pure, refreshing bliss.
Creamsicle Pie You’ll Want Again and Again
What’s in a Classic Creamsicle Pie
Base Ingredients:Citrus Ingredients:Flavoring and Binding Ingredients:How to Assemble a Dreamy Creamsicle Pie
Step 1: Prepare Pie Base
Grab a deep pie dish and generously coat the entire surface with non-stick cooking spray to ensure easy serving later.
Step 2: Create Crumbly Cookie Crust
Toss shortbread cookies into a food processor and pulse until they transform into fine sandy crumbs.
Transfer crumbs to a mixing bowl and blend thoroughly with melted butter.
Press the mixture firmly across the bottom and up the sides of the prepared pie dish.
Slide the crust into the freezer while preparing remaining ingredients.
Step 3: Develop Fresh Orange Essence
Clean the food processor and add:Blend until silky smooth, creating a vibrant orange puree.
Set aside.
Step 4: Develop Creamy Filling Base
Using a stand mixer or hand mixer, combine:Whip until completely smooth and well integrated.
Step 5: Enhance Filling Texture
Gently fold into the mixture:Ensure ingredients are fully incorporated and create a luxurious texture.
Step 6: Infuse Citrus Flavor
Slowly beat the prepared orange puree into the filling until perfectly blended, creating a harmonious orange cream sensation.
Step 7: Assemble Pie Layers
Retrieve the chilled crust from the freezer.
Carefully pour the filling into the crust, using a spatula to create an even, tempting surface.
Step 8: Chill and Set
Refrigerate the pie for at least 2 hours for a soft, creamy texture.
For a more frozen experience, place in the freezer for approximately 1 hour.
Step 9: Craft Dreamy Topping
In a mixing bowl, whip together:Beat until achieving a smooth, fluffy consistency.
Step 10: Finish and Serve
Spread or pipe the cream cheese topping across the chilled pie.
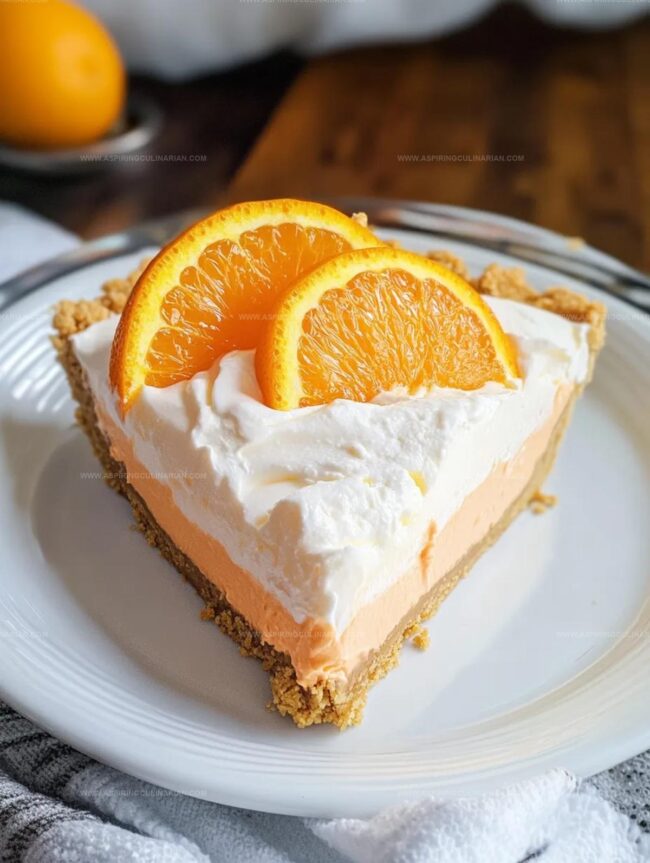
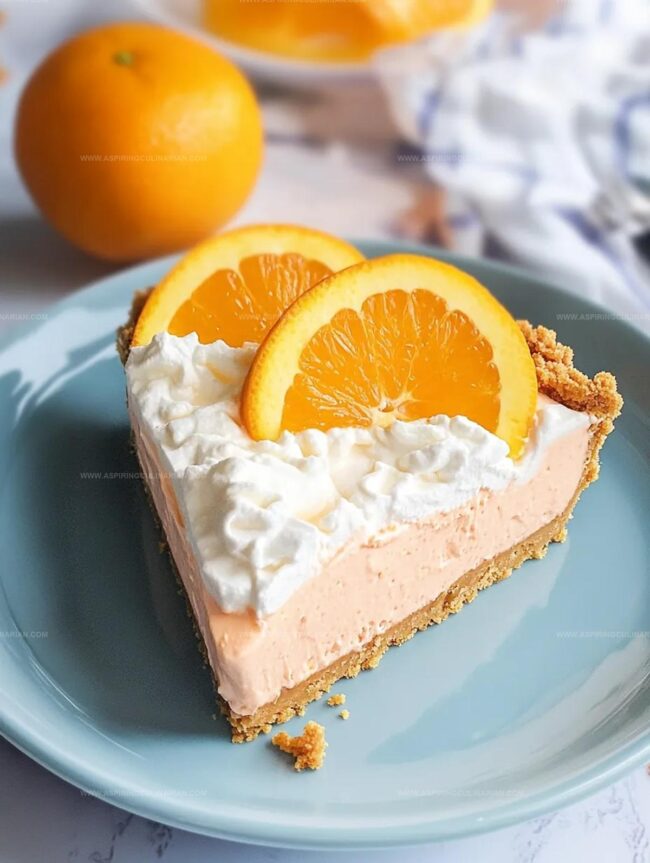
Garnish with fresh orange slices for a beautiful presentation.
Serve cold and enjoy the burst of creamsicle flavors.
Creamsicle Pie Tips for Creamy Results

Fun Ideas for Creamsicle Pie Variations
Best Ways to Serve Creamsicle Pie Slices
Keeping Your Creamsicle Pie Fresh Longer
FAQs
The orange zest, orange juice, and orange Jello mix combine to create the classic creamsicle taste, mimicking the beloved orange and vanilla ice cream treat.
Fresh oranges work best. Using fresh slices and zest provides more intense, natural orange flavor compared to pre-packaged juice.
Absolutely! This pie requires no baking and uses simple techniques like mixing and chilling, making it perfect for novice bakers or those who want an easy dessert.
The pie can be prepared a day ahead and stored in the refrigerator, which actually helps the flavors meld together and enhances the overall taste.
Print
Jello Creamsicle Pie Recipe
- Total Time: 20 minutes
- Yield: 8 1x
Description
Cool summer memories merge perfectly with homemade Jello Creamsicle Pie, blending nostalgic orange zest and creamy vanilla essence. Refreshing layers promise delightful sweetness that cools and satisfies your dessert cravings in one delectable slice.
Ingredients
Crust Ingredients:
- 3 cups shortbread cookies
- 1/4 cup (4 tablespoons) butter, melted
Main Filling Ingredients:
- 8 ounces (226 grams) cream cheese, softened and cubed
- 1 box of orange jello (3 ounces/85 grams)
- 1 can sweetened condensed milk (14 ounces/397 grams)
- 8 ounces (226 grams) cool whip
Flavor and Garnish Ingredients:
- 1 orange, peeled and sliced
- 2 tablespoons orange zest
- 1/4 cup (60 milliliters) orange juice
- 1 teaspoon vanilla extract
- 4 ounces (113 grams) cream cheese, softened
- 4 ounces (113 grams) cool whip
- Orange slices for garnish
Instructions
- Prepare the pie dish by lightly coating the interior with non-stick cooking spray, ensuring complete coverage.
- Transform shortbread cookies into fine crumbs using a food processor, then combine with melted butter until the mixture resembles wet sand.
- Press the cookie crumb mixture firmly into the bottom and sides of the prepared pie dish, creating an even layer. Freeze the crust while preparing the filling.
- Create a vibrant orange puree by blending peeled orange segments, zest, vanilla extract, and orange juice in the food processor until completely smooth.
- In a mixing bowl, whip cream cheese with orange Jello mix until the texture becomes light and uniform.
- Gently incorporate sweetened condensed milk and Cool Whip into the cream cheese mixture, folding carefully to maintain a smooth consistency.
- Integrate the prepared orange puree into the filling, mixing thoroughly to distribute the citrus flavor evenly.
- Extract the chilled crust from the freezer and carefully pour the orange filling, using a spatula to smooth the surface perfectly.
- Chill the pie in the refrigerator for 2 hours for a soft texture, or freeze for 1 hour for a more solid consistency.
- Whip the remaining cream cheese and Cool Whip together until achieving a light, airy texture.
- Artfully spread or pipe the cream cheese topping over the chilled pie, adding fresh orange slices as a final garnish. Serve immediately, either chilled or slightly frozen.
Notes
- Swap shortbread cookies for gluten-free graham crackers to accommodate gluten-sensitive diets, ensuring everyone can enjoy this delightful dessert.
- Create a lighter version by using reduced-fat cream cheese and sugar-free Cool Whip, cutting down on calories without sacrificing flavor.
- Elevate the presentation by using a piping bag with a star tip for the topping, transforming the pie into a professional-looking dessert that impresses guests.
- Try different citrus zests like mandarin or tangerine to add unique flavor variations and keep the recipe exciting for repeated enjoyment.
- Prep Time: 20 minutes
- Cook Time: 0 minutes
- Category: Desserts, Snacks
- Method: Chilling
- Cuisine: American
Nutrition
- Serving Size: 8
- Calories: 348
- Sugar: 26 g
- Sodium: 200 mg
- Fat: 20 g
- Saturated Fat: 11 g
- Unsaturated Fat: 9 g
- Trans Fat: 0 g
- Carbohydrates: 38 g
- Fiber: 1 g
- Protein: 4 g
- Cholesterol: 47 mg
Lena Martinez
Contributing Writer & Culinary Educator
Expertise
Southwestern and Latin American cuisines, Vegetarian and plant-based recipe development, Culinary education and community outreach
Education
Santa Fe Community College, Santa Fe, NM
Certificate in Culinary Arts
Emphasized Southwestern cuisine and sustainable cooking practices
Lena grew up surrounded by the colors, spices, and traditions of the Southwest – flavors that sparked her love for bold, honest cooking. After earning her Culinary Arts certificate at Santa Fe Community College, she made it her mission to teach home cooks how to create flavorful, plant-powered meals without the fuss.
Her recipes are packed with vibrant ingredients, simple steps, and the kind of heart that turns a regular meal into something you’ll want to share. Outside the kitchen, Lena spends her time wandering farmers’ markets, trading family recipes, and helping young chefs find their voice through food.