
Mesmerizing Marbled Sugar Cookies Recipe: Sweet Swirls of Joy
Sweet and delicate marbled sugar cookies dance with swirls of vibrant color, creating edible art that delights the senses.
Baking these treats brings joy to any kitchen, transforming simple ingredients into magical moments.
Soft, buttery dough becomes a canvas for creative expression through elegant marbling techniques.
Each cookie tells a unique story with its mesmerizing patterns and delicate texture.
Sophisticated yet approachable, these cookies blend professional pastry skills with home-baking charm.
Rich vanilla undertones complement the stunning visual appeal of each perfectly crafted treat.
You’ll fall in love with how easily these stunning cookies come together, promising smiles and culinary satisfaction.
Perfect Party Cookie Art: Why It’s a Showpiece
What’s in Perfect Party Cookie Art
Base Ingredients:Dry Ingredients:Flavor Enhancers:Icing Ingredients:Creating Cookie Art Step-by-Step
Step 1: Cream Butter and Cream Cheese
Use a stand mixer or hand mixer to blend butter and cream cheese until they become silky smooth and fully integrated.
Step 2: Incorporate Sugar
Gradually add sugar to the butter mixture, beating continuously until the mixture becomes light and fluffy with a pale color.
Step 3: Add Liquid Ingredients
Introduce egg and flavor extracts into the mixture, stirring gently to maintain the airy texture.
Step 4: Prepare Dry Ingredients
In a separate bowl, whisk together:Step 5: Merge Wet and Dry Components
Slowly fold dry ingredients into wet mixture, mixing just until everything combines without overmixing.
Step 6: Refrigerate Dough
Wrap cookie dough in plastic wrap and chill in refrigerator for 2 hours to enhance flavor and prevent spreading.
Step 7: Shape Cookie Cutouts
Roll dough to 1/3 inch thickness on lightly floured surface, using festive cookie cutters to create desired shapes.
Step 8: Pre-Bake Chill
Place shaped cookies on parchment-lined baking sheet, then refrigerate for 15 minutes to maintain crisp edges.
Step 9: Bake Cookies
Preheat oven to 350°F, bake cookies for 10-12 minutes until edges turn golden brown.
Step 10: Prepare Royal Icing Base
Combine in mixing bowl:Step 11: Develop Icing Texture
Add water and vanilla extract, beating until stiff peaks form.
Step 12: Adjust Icing Consistency
Gradually add water to achieve smooth flooding consistency for decorating.
Step 13: Create Color Palette
Divide icing into separate bowls, adding gel food coloring for vibrant designs.
Step 14: Decorate Masterpiece
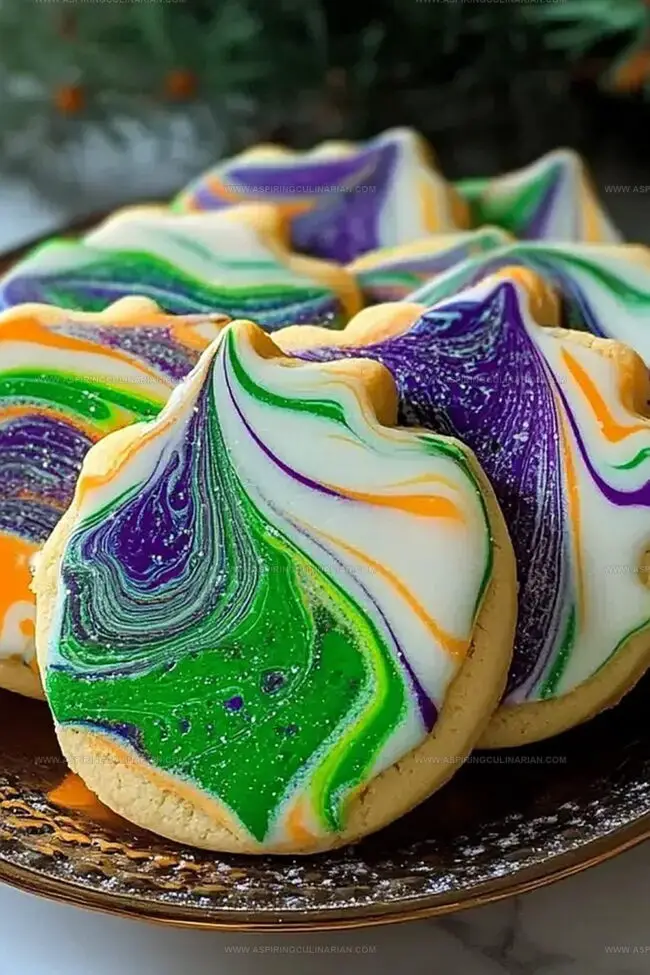
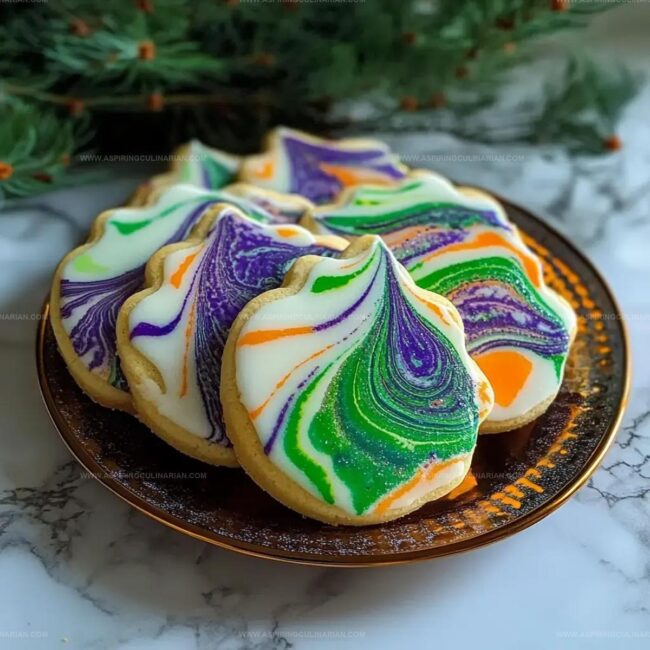
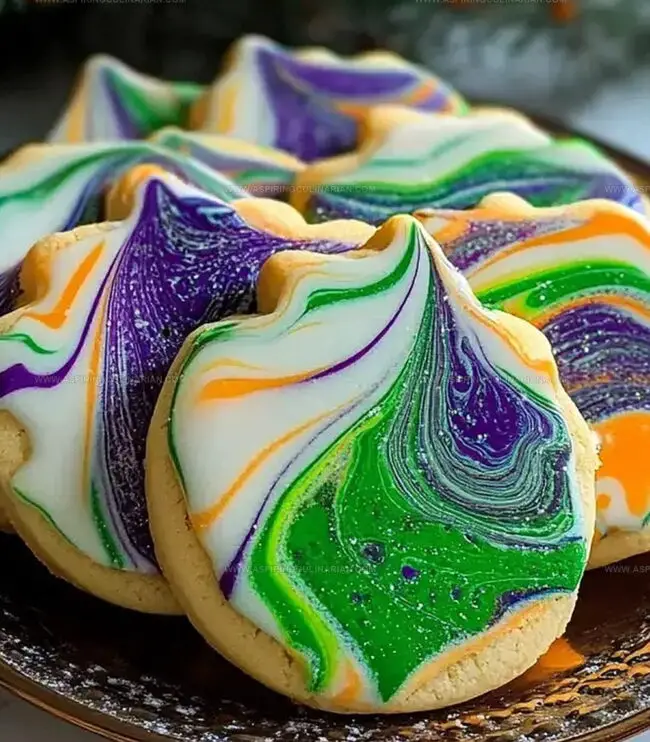
Use techniques like marbling, dipping, and intricate piping to transform cookies into edible art.
Step 15: Allow Decorations to Set
Let decorated cookies dry completely at room temperature for approximately 1 hour.
Cookie Art – Tips for Fun Baking
Cookie Art – Fun Ways to Switch It Up
Cookie Art Serving Tips for Parties
Cookie Art: Storage That Keeps Them Fresh
FAQs
Cream cheese creates extra softness and tangy flavor, while using both butter and cream cheese ensures rich texture and depth of taste.
Chilling the dough for 2 hours and chilling cut-out shapes for 15 minutes before baking helps maintain precise shape and prevents excessive spreading.
Meringue powder stabilizes royal icing, helps it dry faster, and creates a smooth, professional-looking finish on decorated cookies.
Use different colored icings, pipe alternating lines or dots, then immediately drag a toothpick through colors to create swirled, marbled design.
Print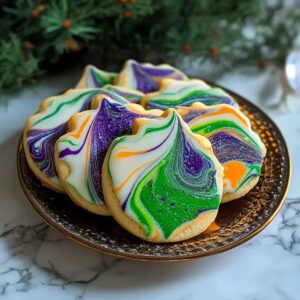
Marbled Sugar Cookies Recipe
- Total Time: 3 hours 27 minutes
- Yield: 24 1x
Description
Sweet marble swirls dance through these sugar cookies, creating delightful patterns that surprise and charm dessert enthusiasts. Crisp edges and delicate centers promise a delectable treat you’ll savor with pure baking joy.
Ingredients
Main Ingredients:
- 3/4 cup (177 ml) unsalted butter, room temperature
- 1/2 cup (113 g) full fat cream cheese, room temperature
- 1 large egg, room temperature
- 3 cups (375 g) all-purpose flour
- 1 1/2 cups (300 g) granulated sugar
Flavoring Ingredients:
- 2 teaspoons vanilla bean paste or extract
- 1 teaspoon almond extract (optional)
- 1/2 teaspoon fine salt
- 1 tablespoon cornstarch
- 1/2 teaspoon baking powder
Icing Ingredients:
- 3 cups (360 g) powdered sugar
- 3 tablespoons meringue powder
- 1/4 cup (60 ml) room temperature water
- 2 teaspoons vanilla or almond extract
- Extra water for consistency
- Gel food coloring
Instructions
- Cream the softened butter and cream cheese in a large mixing bowl until uniformly smooth and fluffy.
- Gradually incorporate sugar, continuously beating until the mixture becomes light and airy.
- Introduce egg and vanilla/almond extracts, blending thoroughly to create a cohesive mixture.
- In a separate bowl, sift together flour, salt, and baking powder to eliminate potential lumps.
- Gently fold dry ingredients into wet mixture, stirring minimally to prevent tough cookies.
- Wrap dough in plastic and refrigerate for 2 hours to enhance flavor and improve texture.
- On a lightly floured surface, roll dough to 1/3 inch thickness and cut desired shapes using cookie cutters.
- Transfer cut shapes to parchment-lined baking sheets and chill for 15 minutes to maintain crisp edges.
- Preheat oven to 350°F and bake cookies for 10-12 minutes until edges are delicately golden.
- Prepare royal icing by combining powdered sugar and meringue powder in a clean mixing bowl.
- Gradually add water and extract, whipping until stiff, glossy peaks form.
- Adjust icing consistency by adding water incrementally for smooth flooding technique.
- Separate icing into portions and tint with gel food coloring for decorative design.
- Apply decorative techniques like marbling or dipping to create intricate cookie designs.
- Allow decorated cookies to dry completely for approximately 1 hour before serving.
Notes
- Take butter and cream cheese out 30-60 minutes before baking to reach room temperature for smoother mixing.
- Gently spoon flour into measuring cup and level with knife to avoid dense, tough cookies.
- Work with small portions of dough when rolling to maintain consistent thickness and prevent overworking.
- Use squeeze bottles for precise decorating and easier color control when creating intricate designs.
- Prep Time: 3 hours 15 minutes
- Cook Time: 12 minutes
- Category: Desserts, Snacks
- Method: Baking
- Cuisine: American
Nutrition
- Serving Size: 24
- Calories: 200
- Sugar: 14 g
- Sodium: 80 mg
- Fat: 8 g
- Saturated Fat: 5 g
- Unsaturated Fat: 3 g
- Trans Fat: 0 g
- Carbohydrates: 28 g
- Fiber: 0 g
- Protein: 2 g
- Cholesterol: 30 mg
Nathaniel Brooks
Founder & Recipe Developer
Expertise
Farm-to-table cuisine, Seasonal recipe development, Culinary storytelling
Education
Ivy Tech Community College – Indianapolis, IN
Culinary Arts / Hospitality Administration & Events
Focused on hands-on training in classical and modern culinary techniques.
Nathaniel’s story starts in the foothills of the Appalachian Mountains, where farm stands, backyard gardens, and old family recipes shaped his love for real food. After graduating from Ivy Tech Community College in Indianapolis, he spent years working in farm-to-table kitchens, learning how to turn local, seasonal ingredients into something memorable.
Today, Nathaniel pours that same spirit into every single recipe on Aspiring Culinarian – recipes that feel real, comforting, and connected to the land. When he’s not in the kitchen, you’ll find him foraging wild herbs, chasing sunsets with his camera, or writing about the flavors that shaped his roots.