
Adorable Melted Snowman Bark Recipe: Fun Winter Treat
Chilly winter memories melt into this delightful snowman bark that sparks instant joy and childhood wonder.
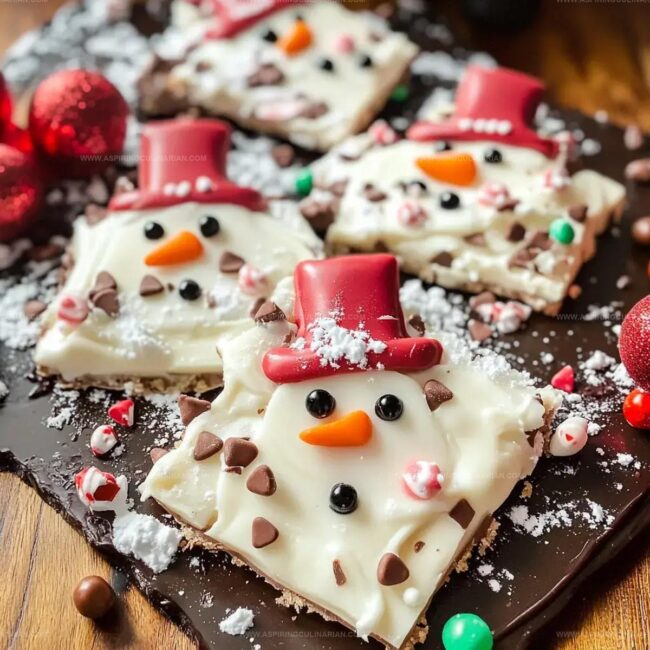
Sweet chocolate layers create a playful canvas for whimsical decorations.
Snow-inspired treats never looked so charming or delicious.
Every bite promises a nostalgic journey through winter’s magical landscape.
Crafting this dessert connects you with pure seasonal happiness.
White chocolate and creative toppings dance together in perfect harmony.
Grab your ingredients and let the winter magic begin!
Why Fun Christmas Candy Bark Brings Cheer
Christmas Candy Bark – What Goes Inside
Base Ingredients:Cookie and Candy Decorations:Decorative Finishing Ingredients:Steps for Making Christmas Candy Bark at Home
Step 1: Melt Chocolate Smoothly
Grab your white chocolate and carefully melt it in microwave using 30-second intervals, stirring between each heating cycle until completely smooth and creamy.
Step 2: Prepare Baking Surface
Line a baking sheet with parchment paper, ensuring entire surface is covered with smooth, flat paper.
Step 3: Create Chocolate Bases
Drop white chocolate dollops onto parchment paper, creating 12 evenly spaced circular foundations for snowman shapes.
Step 4: Position Oreo Cookies
Gently place one Oreo cookie in center of each white chocolate dollop, creating snowman body.
Step 5: Cover Cookies Completely
Pour remaining melted white chocolate over Oreo cookies, ensuring total coverage and smooth appearance.
Step 6: Fill Surrounding Areas
Use extra chocolate to fill spaces between cookies, creating seamless connection points.
Step 7: Create Snowman Buttons
Add three colorful M&Ms underneath each Oreo cookie to represent buttons.
Step 8: Add Gumdrop Details
Place halved gumdrops on sides of cookies to form snowman arms.
Step 9: Connect Gumdrops
Use Twizzler pieces to connect gumdrop arms, creating playful snowman design.
Step 10: Design Snowman Face
Pipe black icing to create cute eyes and smile on white chocolate surface.
Step 11: Add Carrot Nose
Use orange icing to draw triangular nose in center of snowman face.
Step 12: Allow Chocolate to Set
Refrigerate bark for one hour or let sit at room temperature for several hours until completely hardened.
Step 13: Cut into Festive Pieces
Using warm knife, slice bark into individual snowman-shaped pieces for serving.
Tips for Festive Christmas Bark Success
Christmas Candy Bark: Variations to Try
Serving Fun Christmas Candy Bark
Christmas Candy Bark Storage Tips
FAQs
Yes, you can substitute almond bark with milk, dark, or white chocolate melting wafers for similar results.
No, this recipe is beginner-friendly and requires basic melting and decorating skills that anyone can do.
Ensure chocolate is fully melted, spread evenly, and let it set completely at room temperature or in the refrigerator before cutting.
Feel free to substitute M&Ms, gumdrops, or Twizzlers with similar colorful candies you have available.
Print
Melted Snowman Bark Recipe
- Total Time: 1 hour 30 minutes
- Yield: 12 1x
Description
Melted snowman bark delights winter dessert enthusiasts with its playful chocolate canvas and adorable marshmallow details. Whimsical swirls of white and milk chocolate create a festive treat you’ll want to share and savor during cozy holiday moments.
Ingredients
Main Ingredients:
- 1 pound almond bark or white melting chocolate
- 12 golden Oreo cookies
- 36 red and green mini M&Ms
Toppings:
- 6 red and green gumdrops, halved
- 1 Twizzler pull and peel
Decorations:
- Black cookie icing
- Orange cookie icing
Instructions
- Melt white chocolate almond bark in microwave using 30-second intervals, stirring between each interval until smooth and completely liquefied.
- Prepare a baking sheet by lining it with parchment paper, ensuring complete coverage and smooth surface.
- Create 12 evenly spaced white chocolate dollops across the prepared parchment paper, maintaining consistent size and spacing.
- Carefully position one Oreo cookie at the center of each white chocolate dollop, pressing gently to secure.
- Generously drizzle remaining melted chocolate over each Oreo, completely covering the cookies and creating a uniform coating.
- Fill all remaining spaces between cookies with excess melted chocolate, creating a smooth and connected surface.
- Strategically place 3 red and green M&Ms underneath each Oreo cookie to resemble festive buttons.
- Position gumdrop halves along the sides of each snowman cookie, alternating colors for visual interest.
- Connect the gumdrops using small Twizzler pieces, creating arms and enhancing the snowman design.
- Use black decorating icing to pipe eyes and mouth on each snowman, ensuring consistent placement.
- Apply orange decorating icing as a small triangular nose for each snowman character.
- Allow candy bark to set completely by refrigerating for 1 hour or letting it rest at room temperature for several hours until firm.
- Using a knife warmed under hot water, carefully slice the bark into individual serving pieces.
Notes
- Melt chocolate carefully to prevent burning, stirring between intervals for smooth consistency.
- Use silicone baking mat as alternative to parchment paper for easy release and cleanup.
- Soften almond bark briefly in microwave to achieve perfect drizzling texture without overheating.
- Chill bark quickly in freezer for 15 minutes if you’re short on time and want faster setting.
- Prep Time: 30 minutes
- Cook Time: 1 hour
- Category: Desserts, Snacks
- Method: Baking
- Cuisine: American
Nutrition
- Serving Size: 12
- Calories: 210
- Sugar: 18 g
- Sodium: 55 mg
- Fat: 12 g
- Saturated Fat: 7 g
- Unsaturated Fat: 4 g
- Trans Fat: 0.1 g
- Carbohydrates: 25 g
- Fiber: 1 g
- Protein: 2 g
- Cholesterol: 5 mg
Nathaniel Brooks
Founder & Recipe Developer
Expertise
Farm-to-table cuisine, Seasonal recipe development, Culinary storytelling
Education
Ivy Tech Community College – Indianapolis, IN
Culinary Arts / Hospitality Administration & Events
Focused on hands-on training in classical and modern culinary techniques.
Nathaniel’s story starts in the foothills of the Appalachian Mountains, where farm stands, backyard gardens, and old family recipes shaped his love for real food. After graduating from Ivy Tech Community College in Indianapolis, he spent years working in farm-to-table kitchens, learning how to turn local, seasonal ingredients into something memorable.
Today, Nathaniel pours that same spirit into every single recipe on Aspiring Culinarian – recipes that feel real, comforting, and connected to the land. When he’s not in the kitchen, you’ll find him foraging wild herbs, chasing sunsets with his camera, or writing about the flavors that shaped his roots.