
Try Our Adorable Mini Lunchbox Pizzas Recipe Today
Weeknight dinners demand quick, crowd-pleasing solutions that satisfy hungry appetites and mini lunchbox pizzas deliver pure culinary magic.
These bite-sized delights pack serious flavor into every compact package.
Kids adore these portable pizza parcels, and parents appreciate their simplicity.
Crafted with minimal ingredients and maximum enjoyment, these mini pizzas turn ordinary meals into exciting experiences.
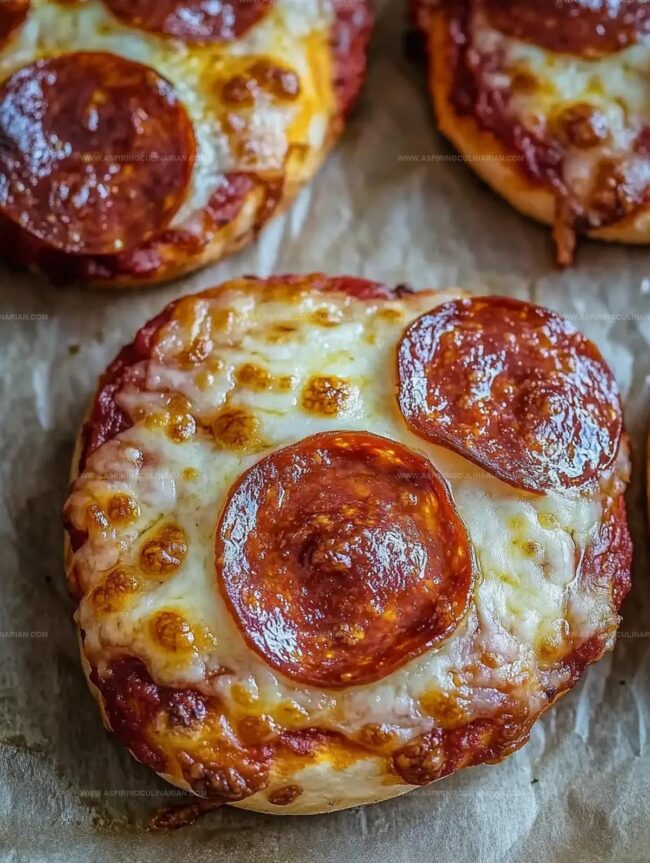
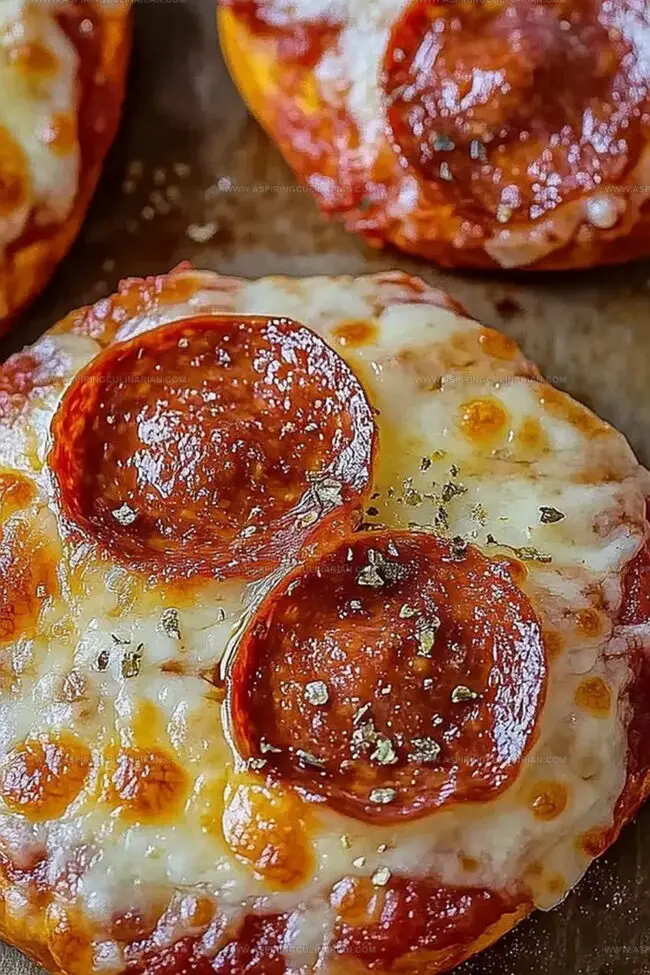
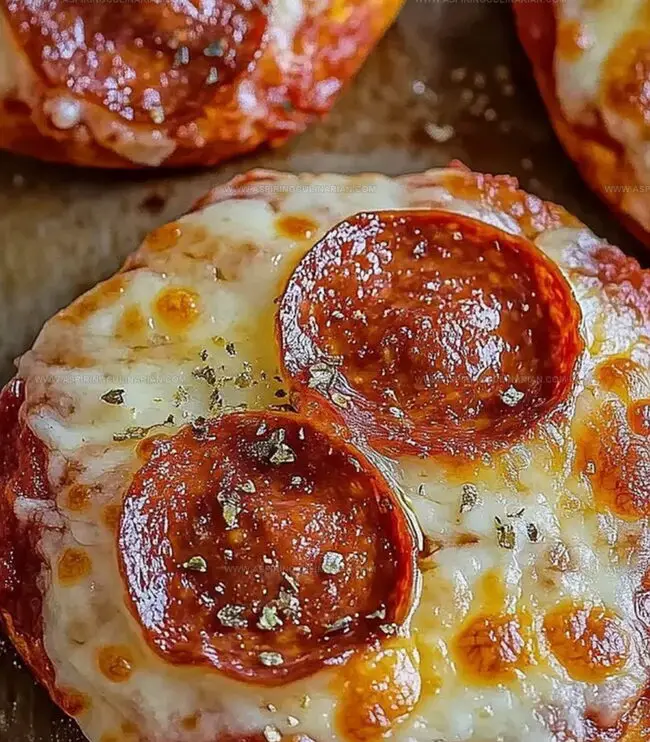
Packed with melted cheese, savory sauce, and your favorite toppings, they’re perfect for lunchboxes or casual gatherings.
Prepare to elevate your mealtime with these irresistible little crowd-pleasers that promise smiles with every delicious bite.
Mini Lunchbox Pizzas: Snack-Time Hits

Mini Lunchbox Pizza Ingredients
Base Ingredients:Topping Ingredients:Additional Ingredients:Quick Steps for Mini Lunchbox Pizzas
Step 1: Fire Up the Oven
Warm your oven to 400°F (200°C) for standard ovens or 350°F (180°C) for fan-forced.
Grab a baking sheet and line it with parchment paper for easy cleanup.
Step 2: Create Magical Dough
Grab a large mixing bowl and combine:Stir with a spoon until the mixture looks like chunky flakes.
Then dive in with your hands and knead the dough until it becomes soft and smooth.
This might take around 12 minutes of gentle mixing and folding.
Step 3: Roll and Shape
Dust a clean countertop with flour.
Roll out your dough to about half an inch thick.
Use a large mug or cookie cutter to create perfect round bases.
Gather any leftover dough scraps and re-roll to maximize your pizza yield.
Step 4: Dress Your Pizzas
Place the dough rounds on your prepared baking sheet.
Spread a thin layer of tomato paste across each round.
Top with:Step 5: Bake to Perfection
Slide the baking sheet into the preheated oven.
Bake for 12-14 minutes until the edges turn golden and the cheese melts into a delicious blanket.
Let the pizzas cool on the tray for a few minutes before serving.
Tips for Pizzas That Travel Well
Fun Mini Pizza Variations
Packing and Serving Mini Lunchbox Pizzas
Storage for Lunchbox Pizzas
FAQs
You’ll need just two simple ingredients: self-raising flour and yoghurt. These two items create a quick and easy pizza base that’s soft and delicious.
Absolutely! You can swap pepperoni for other toppings like ham, cooked chicken, vegetables, or even keep it vegetarian with just cheese and tomato paste.
No special equipment required. You’ll just need a large bowl, a rolling pin, a baking tray, and something to cut round shapes like a large mug or cookie cutter.
Print
Mini Lunchbox Pizzas Recipe
- Total Time: 34 minutes
- Yield: 4 1x
Description
Packed with flavor, mini lunchbox pizzas bring Italian-inspired delights to quick midday meals. These bite-sized treasures combine crispy bases, zesty sauce, and melted cheese, ensuring you’ll savor every delectable morsel.
Ingredients
Main Ingredients:
- 2 cups (300 grams) self-raising flour
- 1 cup (250 grams) full-fat plain Greek yoghurt
- 1 cup (125 grams) freshly shredded mozzarella
- 1/2 cup (80 grams) pepperoni
Sauce:
- 1/3 cup (90 grams) tomato paste (concentrated puree)
Instructions
- Preheat the oven to 200C (400F) and prepare a baking tray with parchment paper for optimal cooking surface.
- In a spacious mixing bowl, blend self-raising flour and yoghurt using a spoon until large flakes form. Knead the mixture with hands until a smooth, cohesive dough develops, approximately 12 minutes.
- Dust a clean work surface with flour and roll out the dough to roughly 1 cm thickness. Use a large mug or cookie cutter to create uniform rounds, re-rolling scraps to maximize dough usage.
- Transfer dough rounds onto the prepared baking tray. Spread a thin layer of tomato paste across each round, ensuring even coverage.
- Generously sprinkle shredded mozzarella over the tomato paste, creating a consistent cheese base.
- Arrange pepperoni slices strategically on top of the cheese, distributing them evenly across each mini pizza.
- Place the tray in the preheated oven and bake for 12-14 minutes until the dough turns golden and the cheese melts completely.
- Remove from oven and let the mini pizzas rest on the tray for a few minutes to cool slightly before serving.
Notes
- Work quickly when kneading the dough to prevent the yogurt from making it too sticky, keeping your hands lightly floured to manage moisture.
- Choose low-fat or Greek yogurt for a protein-packed, lighter version of the mini pizzas that still maintains a tender texture.
- Use gluten-free self-raising flour and dairy-free cheese alternatives to create an inclusive recipe for various dietary needs without compromising taste.
- Try vegetarian toppings like roasted vegetables, sliced mushrooms, or plant-based pepperoni to diversify the mini pizza options for different preferences.
- Prep Time: 20 minutes
- Cook Time: 14 minutes
- Category: Lunch, Snacks
- Method: Baking
- Cuisine: Italian
Nutrition
- Serving Size: 4
- Calories: 400
- Sugar: 4g
- Sodium: 800mg
- Fat: 18g
- Saturated Fat: 10g
- Unsaturated Fat: 8g
- Trans Fat: 0g
- Carbohydrates: 40g
- Fiber: 2g
- Protein: 20g
- Cholesterol: 50mg
Lena Martinez
Contributing Writer & Culinary Educator
Expertise
Southwestern and Latin American cuisines, Vegetarian and plant-based recipe development, Culinary education and community outreach
Education
Santa Fe Community College, Santa Fe, NM
Certificate in Culinary Arts
Emphasized Southwestern cuisine and sustainable cooking practices
Lena grew up surrounded by the colors, spices, and traditions of the Southwest – flavors that sparked her love for bold, honest cooking. After earning her Culinary Arts certificate at Santa Fe Community College, she made it her mission to teach home cooks how to create flavorful, plant-powered meals without the fuss.
Her recipes are packed with vibrant ingredients, simple steps, and the kind of heart that turns a regular meal into something you’ll want to share. Outside the kitchen, Lena spends her time wandering farmers’ markets, trading family recipes, and helping young chefs find their voice through food.