
Creamy Mochi Ice Cream Delight Recipe: Sweet Bliss in Every Bite
Creamy mochi ice cream brings an unexpected twist to traditional dessert experiences.
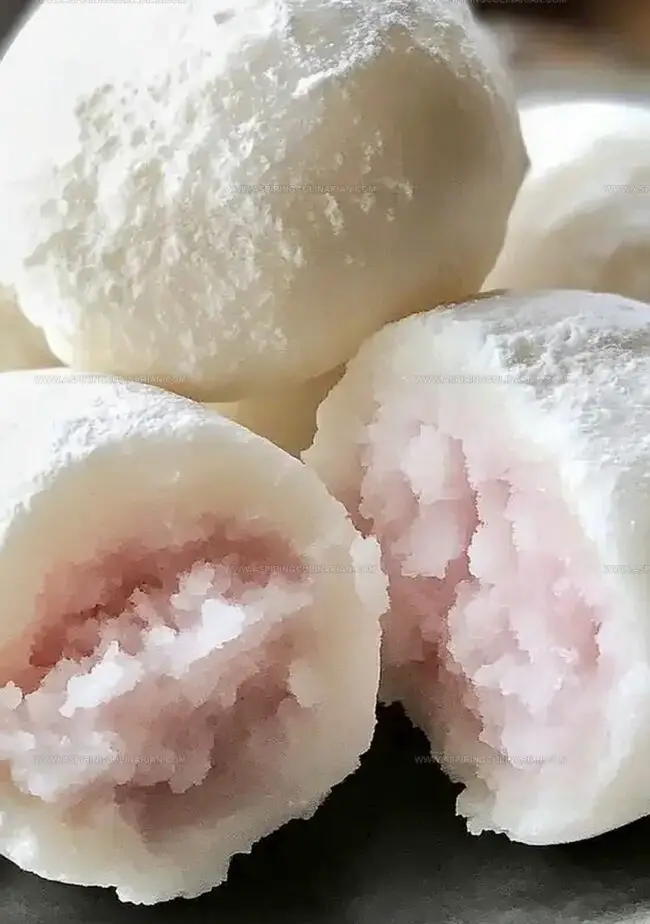
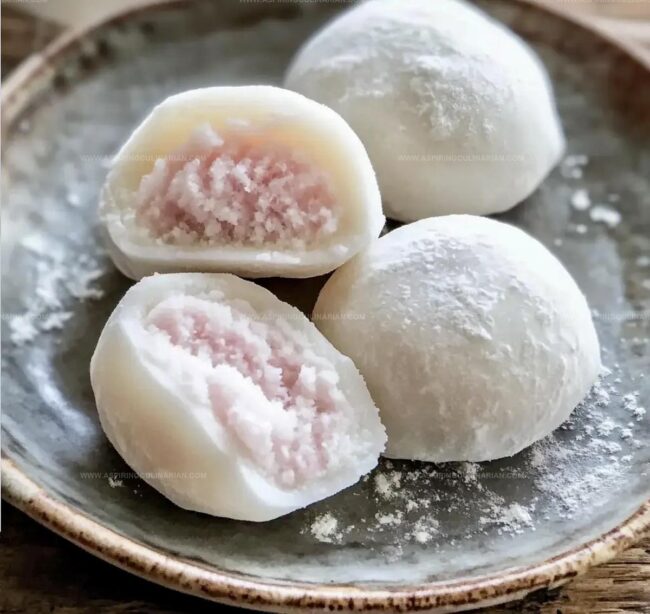
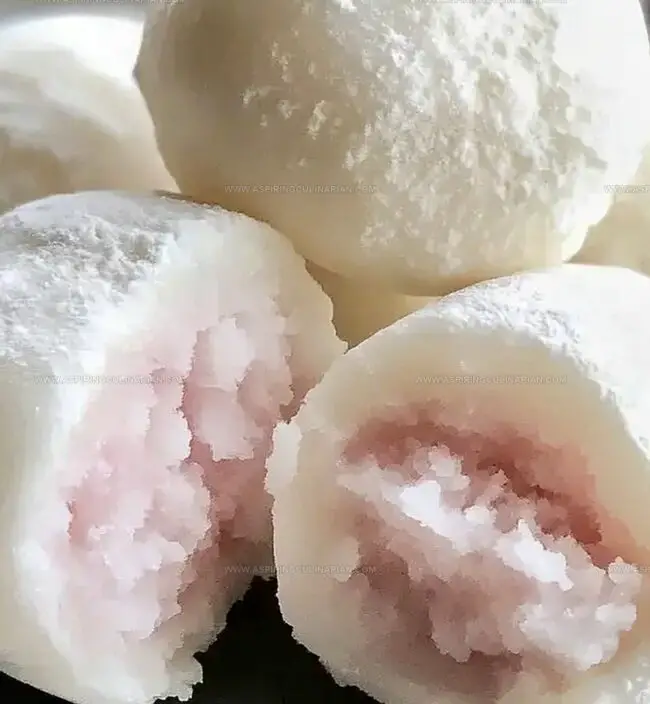
Soft, chewy rice dough wraps around cool, smooth ice cream centers.
Japanese culinary traditions inspire this delightful treat that melts perfectly in your mouth.
Playful textures dance between silky ice cream and tender mochi layers.
Sweet excitement builds with each colorful bite of these charming frozen delicacies.
Small batches make hosting simple and memorable for anyone wanting to impress.
You might just become the dessert hero among your closest companions.
Mochi Ice Cream Delight for Summertime Sweet Tooth
Mochi Ice Cream Ingredient List for Soft Texture
Main Ingredients:Sweeteners:Binding and Preparation Ingredients:Mochi Ice Cream Instructions for Chewy, Creamy Results
Step 1: Prep Frozen Spheres
Use a small scoop to create compact ice cream balls on a parchment-lined tray.
Place in the freezer for one hour to ensure they’re rock-solid and maintain their shape during wrapping.
Step 2: Mix Magical Mochi Base
Gather ingredients:Combine all ingredients in a microwave-safe bowl, stirring until the mixture becomes completely smooth.
Cover the bowl and microwave for one minute.
Stir thoroughly, then return to microwave for an additional one to two minutes.
The dough should transform into a glossy, translucent mixture that looks shiny and feels completely cooked.
Step 3: Flatten Dough Wonderland
Sprinkle cornstarch generously on a parchment sheet.
Transfer the warm mochi mixture onto the surface and dust with more cornstarch.
Carefully roll the dough to a quarter-inch thickness using a rolling pin.
Transfer to the refrigerator and chill for half an hour to firm up.
Step 4: Wrap Creamy Centers
Cut the chilled dough into three-inch circular shapes.
Retrieve the frozen ice cream balls and place one in the center of each dough circle.
Gently pinch and fold the edges, completely encasing the ice cream.
Wrap each bundle securely in plastic wrap to maintain its shape.
Step 5: Final Freeze
Return the wrapped mochi ice cream to the freezer for at least one hour.
This ensures they’re perfectly set and maintain their delightful structure.
Step 6: Indulge and Enjoy
Serve directly from the freezer.
Allow the mochi exterior to soften slightly for a moment before biting into these delightful treats.
The contrast between the chewy mochi and cold ice cream creates an incredible taste experience.
Tips for Rolling and Filling Mochi Ice Cream Balls
Mochi Ice Cream Flavor Variations for Your Next Batch
Creative Ideas for Serving Mochi Ice Cream Treats
Storing Mochi Ice Cream for Perfect Consistency
FAQs
Glutinous rice flour, also known as sweet rice flour, is a special type of flour that creates a chewy, stretchy texture essential for making authentic mochi. It’s different from regular rice flour and helps create the signature soft, pliable mochi coating.
No, regular rice flour or all-purpose flour won’t work. Glutinous rice flour is crucial for achieving the unique, stretchy texture of mochi. Using a substitute will result in a completely different consistency and texture.
Dust your hands and work surface generously with cornstarch. This will help prevent the sticky mochi dough from clinging to your hands.
Print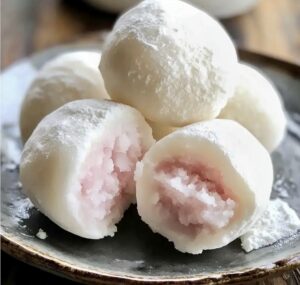
Mochi Ice Cream Delight Recipe
- Total Time: 48 minutes
- Yield: 4 1x
Description
Delightful Japanese Mochi Ice Cream brings cool comfort with its silky rice dough embracing creamy frozen centers. Sweet treats blend traditional technique and modern indulgence, inviting you to savor each delicate, chilled bite.
Ingredients
Mains:
- 1 cup glutinous rice flour (sweet rice flour)
- 1 cup water
Sweeteners:
- 1/4 cup sugar
- 2 tablespoons powdered sugar
Finishing:
- Cornstarch (for dusting)
- Ice cream (any flavor)
Instructions
- Prepare chilled foundations by portioning compact ice cream spheres onto a parchment-lined tray. Maintain at freezer temperature for 60 minutes to solidify.
- Craft mochi mixture by blending glutinous rice flour, sugars, and water in a microwave-safe vessel. Create a uniform consistency, then encase bowl and heat for one minute. Stir thoroughly and continue microwaving 1-2 minutes until achieving a glossy, translucent texture.
- Transform dough by generously coating parchment with cornstarch. Spread heated mochi across surface, dusting additional cornstarch. Roll into a delicate 1/4-inch layer. Refrigerate approximately 30 minutes for optimal malleability.
- Construct individual parcels by cutting chilled dough into precise 3-inch circular shapes. Center frozen ice cream ball within each disk, carefully pinching edges to create seamless encasement. Wrap each completed package in transparent film.
- Finalize preparation by returning wrapped mochi ice cream spheres to freezer. Allow minimum 60 minutes for complete stabilization and consistent temperature.
- Present dessert directly from freezer, permitting slight thawing to enhance textural complexity before consumption.
Notes
- Chill Ice Cream Balls Thoroughly freeze ice cream scoops to prevent melting during mochi wrapping, ensuring a perfect texture and clean presentation.
- Flour Power Use high-quality glutinous rice flour for authentic, stretchy mochi that wraps smoothly around ice cream without cracking.
- Temperature Control Work quickly when handling mochi dough, as it becomes less pliable and harder to manipulate when cooling down.
- Flavor Exploration Experiment with different ice cream flavors like matcha, strawberry, or chocolate to create unique and personalized mochi ice cream variations.
- Prep Time: 45 minutes
- Cook Time: 3 minutes
- Category: Desserts, Snacks
- Method: Microwaving
- Cuisine: Japanese
Nutrition
- Serving Size: 4
- Calories: 220 kcal
- Sugar: 18 g
- Sodium: 5 mg
- Fat: 2 g
- Saturated Fat: 1.2 g
- Unsaturated Fat: 0.6 g
- Trans Fat: 0 g
- Carbohydrates: 45 g
- Fiber: 1 g
- Protein: 3 g
- Cholesterol: 15 mg
Nathaniel Brooks
Founder & Recipe Developer
Expertise
Farm-to-table cuisine, Seasonal recipe development, Culinary storytelling
Education
Ivy Tech Community College – Indianapolis, IN
Culinary Arts / Hospitality Administration & Events
Focused on hands-on training in classical and modern culinary techniques.
Nathaniel’s story starts in the foothills of the Appalachian Mountains, where farm stands, backyard gardens, and old family recipes shaped his love for real food. After graduating from Ivy Tech Community College in Indianapolis, he spent years working in farm-to-table kitchens, learning how to turn local, seasonal ingredients into something memorable.
Today, Nathaniel pours that same spirit into every single recipe on Aspiring Culinarian – recipes that feel real, comforting, and connected to the land. When he’s not in the kitchen, you’ll find him foraging wild herbs, chasing sunsets with his camera, or writing about the flavors that shaped his roots.