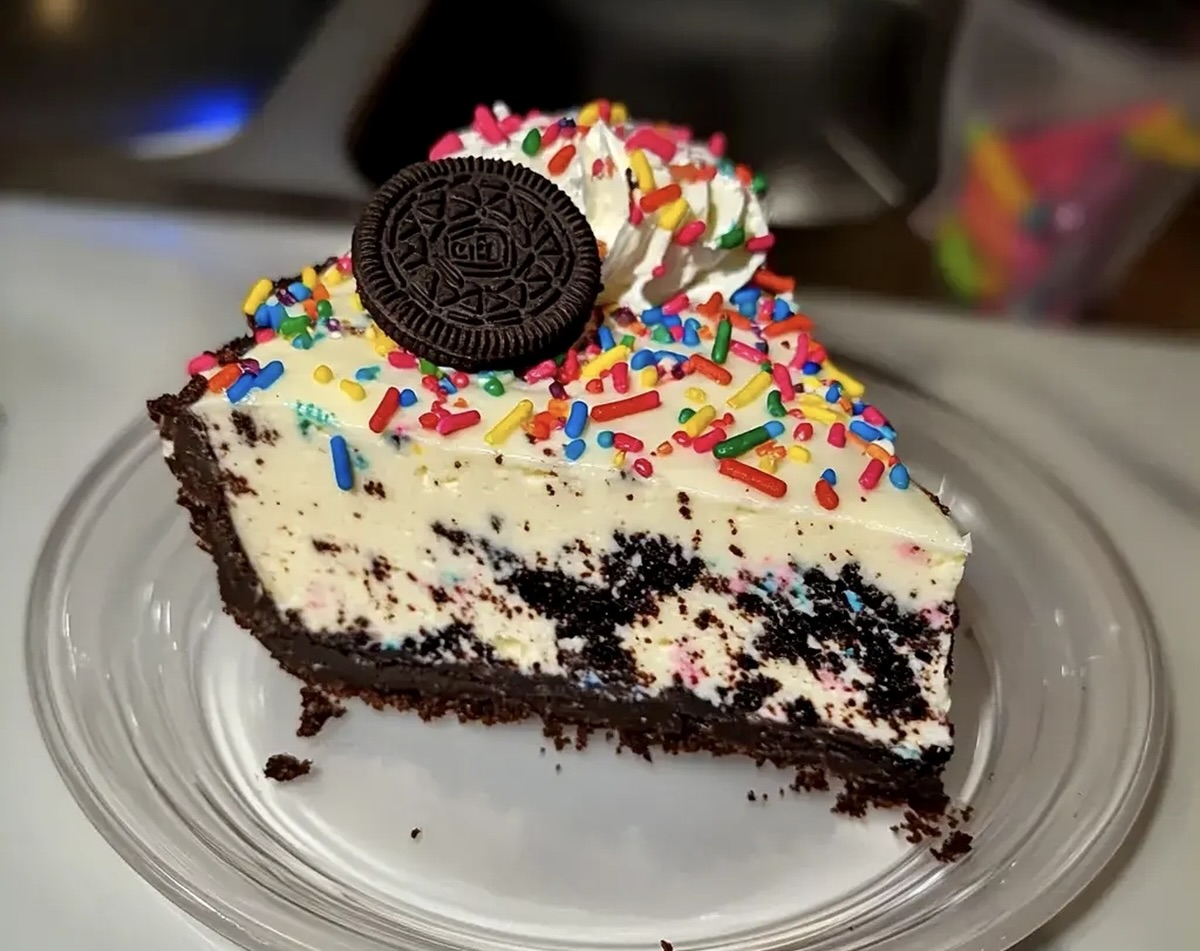
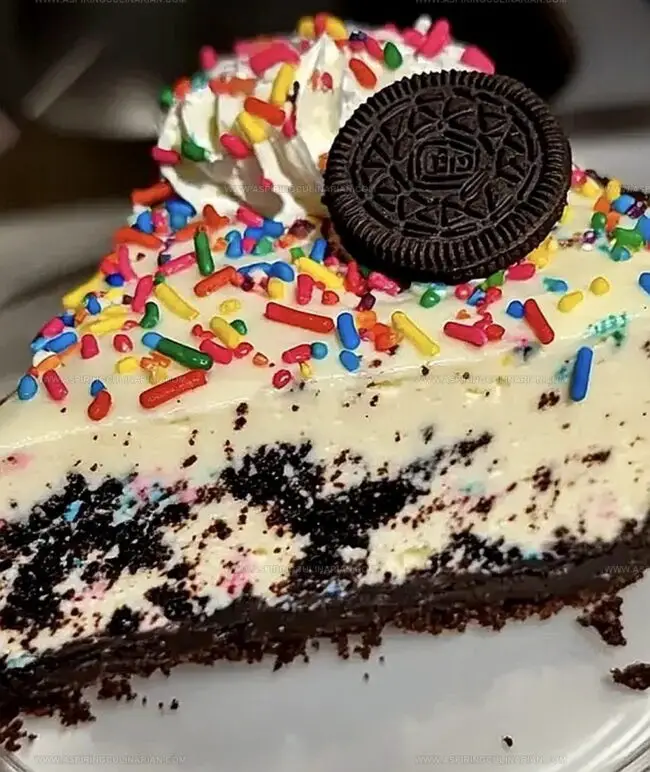
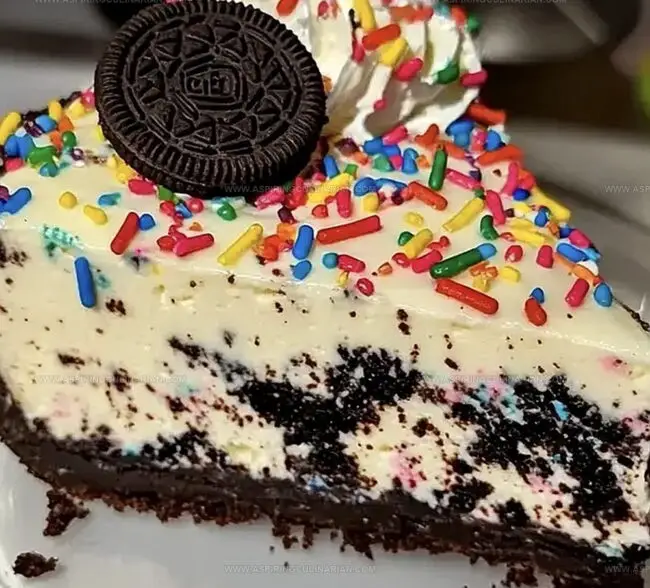
The Dreamiest No Bake Oreo Cheesecake Sprinkles Recipe Ever
Creamy no-bake Oreo cheesecake sprinkles have become my absolute weekend obsession lately.
Sweet crushes of chocolate cookies blend perfectly with smooth cream cheese.
Decadent layers promise pure indulgence without turning on a single oven.
Cool dessert magic happens when simple ingredients dance together in a chilled mixing bowl.
Each bite promises a delightful crunch and silky texture that melts instantly.
Rich flavors combine classic comfort with playful sprinkle excitement.
You might find yourself making this delectable treat again and again.
Dive into this quick and irresistible dessert that’ll spark smiles around any gathering.
No-Bake Oreo Cheesecake with Sprinkles Sweet Points to Love
What Goes Into a No-Bake Oreo Cheesecake
Base Ingredients:Binding and Sweetening Ingredients:Flavoring and Decorative Ingredients:Assembling No-Bake Oreo Cheesecake with Ease
Step 1: Crush Cookie Base
Grab a bunch of Oreo cookies and crush them into fine crumbs using a food processor or rolling pin.
The goal is to create a smooth, even texture that will form the perfect foundation for your cheesecake.
Step 2: Bind Cookie Crumbs
Mix the crushed Oreo crumbs with melted butter until the mixture looks like wet sand.
This helps the crust stick together and create a delicious, crunchy bottom layer.
Step 3: Press Crust Layer
Transfer the cookie mixture into a springform pan.
Use the back of a spoon or your fingers to press the crumbs firmly and evenly across the bottom.
Make sure the layer is compact and smooth.
Step 4: Chill Crust
Pop the pan into the refrigerator to let the crust set while you prepare the creamy filling.
This helps the base become firm and stable.
Step 5: Whip Cream Cheese
In a large mixing bowl, beat cream cheese until it becomes super smooth and free of lumps.
Add powdered sugar and continue mixing until the texture is silky and light.
Step 6: Incorporate Vanilla
Splash in some vanilla extract and mix thoroughly.
The vanilla adds a wonderful depth of flavor to the cheesecake.
Step 7: Whip Heavy Cream
In a separate bowl, whip cold heavy cream until it forms stiff, fluffy peaks.
This will give your cheesecake a light and airy texture.
Step 8: Combine Cream Mixtures
Gently fold the whipped cream into the cream cheese mixture.
Use a spatula and mix slowly to keep the mixture fluffy and prevent deflating the whipped cream.
Step 9: Add Cookie Crunch
Fold in chopped Oreo cookies and colorful rainbow sprinkles.
This adds texture and a playful look to your cheesecake.
Step 10: Fill Pan
Pour the creamy filling over the chilled crust.
Use a spatula to spread it evenly and create a smooth top.
Step 11: Chill and Set
Cover the cheesecake and refrigerate for at least 4 hours or overnight.
This allows the filling to set and develop rich flavors.
Step 12: Garnish and Serve
Before serving, add a final touch of whipped cream, whole Oreo cookies, and extra sprinkles on top.
Slice and enjoy your delightful no-bake treat!
Tips for Creamy, Dreamy Oreo Cheesecake Results
Oreo Cheesecake Variations for a Fun Twist
How to Serve Oreo Cheesecake with Sprinkles
Storing Cheesecake for Freshness and Flavor
FAQs
Yes, you can prepare the cheesecake up to 2-3 days in advance and keep it refrigerated until ready to serve.
A springform pan is recommended for easy removal, but you can use a regular cake pan lined with parchment paper as an alternative.
Full-fat cream cheese works best for a rich, creamy texture. Low-fat versions might make the cheesecake less smooth and stable.
Ensure all ingredients are at room temperature and avoid overmixing the batter to prevent air bubbles that can cause cracking.
Print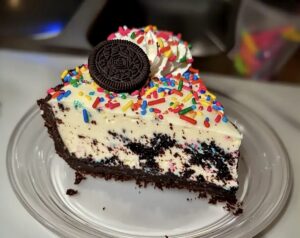
No Bake Oreo Cheesecake Sprinkles Recipe
- Total Time: 4 hours 30 minutes
- Yield: 8 1x
Description
Silky smooth Oreo cheesecake brings pure dessert magic right to your kitchen. Creamy layers of chocolate cookie crumbs and luscious cream cheese create an irresistible no-bake treat you’ll crave again and again.
Ingredients
Main Ingredients:
- 16 ounces (454 grams) cream cheese, softened
- 24 Oreo cookies, crushed into fine crumbs
- 12–15 Oreo cookies, chopped
- 2 cups (480 milliliters) heavy cream, cold
Sweeteners and Flavoring:
- 1 cup (120 grams) powdered sugar
- 1 teaspoon vanilla extract
- 1/4 cup (40 grams) rainbow sprinkles (plus extra for topping)
Binding and Crust Ingredients:
- 5 tablespoons (71 grams) unsalted butter, melted
- Whipped cream (for topping)
- Whole Oreo cookies (for garnish)
- Extra rainbow sprinkles (for garnish)
Instructions
- Crush Oreo cookies into fine crumbs and blend thoroughly with melted butter to create a cohesive base mixture.
- Transfer the cookie-butter blend into a 9-inch springform pan, pressing firmly and evenly across the bottom to construct a solid foundation.
- Chill the prepared crust in the refrigerator while assembling the filling components.
- Using an electric mixer, whip softened cream cheese until silky, gradually incorporating powdered sugar for a smooth consistency.
- Introduce vanilla extract and blend seamlessly into the cream cheese mixture.
- In a separate vessel, vigorously whip cold heavy cream until it develops sturdy, defined peaks.
- Delicately incorporate the whipped cream into the cream cheese base, folding gently to maintain volume and prevent deflation.
- Introduce chopped Oreo pieces and vibrant rainbow sprinkles, folding them evenly throughout the mixture.
- Carefully transfer the cheesecake filling over the chilled Oreo crust, using a spatula to create a uniform surface.
- Refrigerate the assembled cheesecake for a minimum of 4 hours, preferably overnight, to ensure complete setting and flavor melding.
- Prior to serving, embellish with dollops of whipped cream, whole Oreo cookies, and an additional sprinkle of colorful rainbow confetti.
- Slice into elegant portions and present for enjoyment.
Notes
- Crush Oreos finely for a smoother, more consistent crust that holds together perfectly.
- Use room temperature cream cheese to ensure a silky, lump-free filling with maximum smoothness.
- Chill your mixing bowl and whisk before whipping cream to achieve faster, more stable peaks.
- For a gluten-free version, swap traditional Oreos with gluten-free chocolate sandwich cookies and ensure all ingredients are certified gluten-free.
- Minimize overbeating cream cheese to prevent a grainy texture that can ruin the cheesecake’s creamy consistency.
- Try different Oreo flavors like mint, peanut butter, or birthday cake to create unique variations of this dessert.
- Let the cheesecake sit at room temperature for 10-15 minutes before serving to enhance its creamy texture and release flavors.
- Prep Time: 30 minutes
- Cook Time: 4 hours
- Category: Desserts
- Method: Refrigerating
- Cuisine: American
Nutrition
- Serving Size: 8
- Calories: 397 kcal
- Sugar: 34 g
- Sodium: 190 mg
- Fat: 29 g
- Saturated Fat: 18 g
- Unsaturated Fat: 10 g
- Trans Fat: 0.5 g
- Carbohydrates: 31 g
- Fiber: 1.5 g
- Protein: 5 g
- Cholesterol: 85 mg
Nathaniel Brooks
Founder & Recipe Developer
Expertise
Farm-to-table cuisine, Seasonal recipe development, Culinary storytelling
Education
Ivy Tech Community College – Indianapolis, IN
Culinary Arts / Hospitality Administration & Events
Focused on hands-on training in classical and modern culinary techniques.
Nathaniel’s story starts in the foothills of the Appalachian Mountains, where farm stands, backyard gardens, and old family recipes shaped his love for real food. After graduating from Ivy Tech Community College in Indianapolis, he spent years working in farm-to-table kitchens, learning how to turn local, seasonal ingredients into something memorable.
Today, Nathaniel pours that same spirit into every single recipe on Aspiring Culinarian – recipes that feel real, comforting, and connected to the land. When he’s not in the kitchen, you’ll find him foraging wild herbs, chasing sunsets with his camera, or writing about the flavors that shaped his roots.